When you want to keep upgrading or maintaining your 1996 Sea-Doo GTI, knowledge about the components goes a long way in ensuring that they give their best performance. However, the impeller is barely given any recognition; it is one main part which determines your jet ski’s performance. The impeller does all the action, and professionals use the following tips for jetting across the water seamlessly. Whether you are a seasoned jet ski enthusiast or a relatively new owner seeking to brush-up your knowledge, this guide will encompass all the information you will want to know about the impeller in the 1996 Sea-Doo GTI—its function and the features and the different elements of maintenance and possible upgrades which can be considered. Let’s go a little deeper into understanding matters as it pertains to the working of your Sea-Doo!
Understanding the Impeller

What is an Impeller?
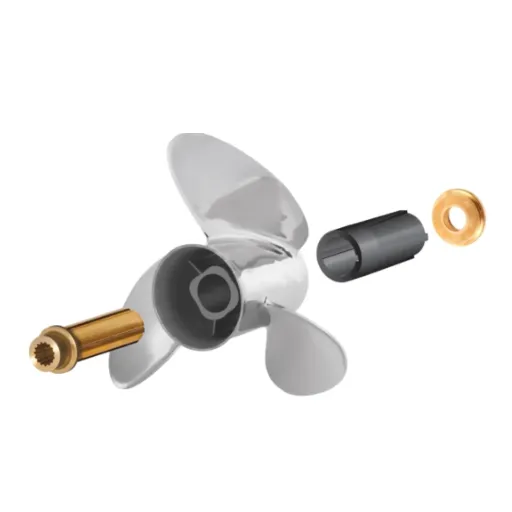
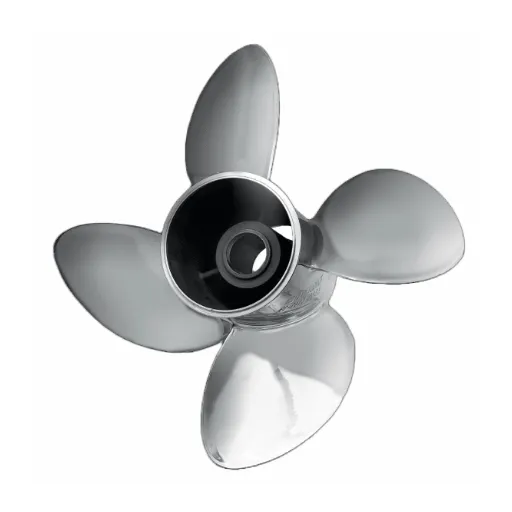
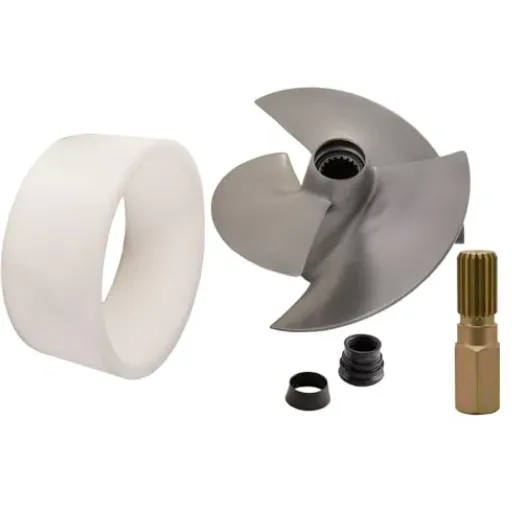
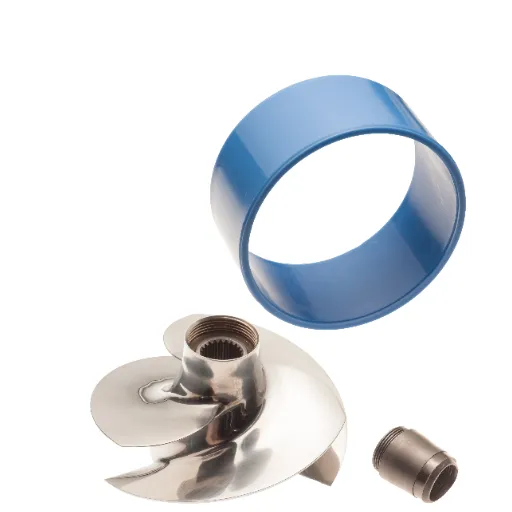
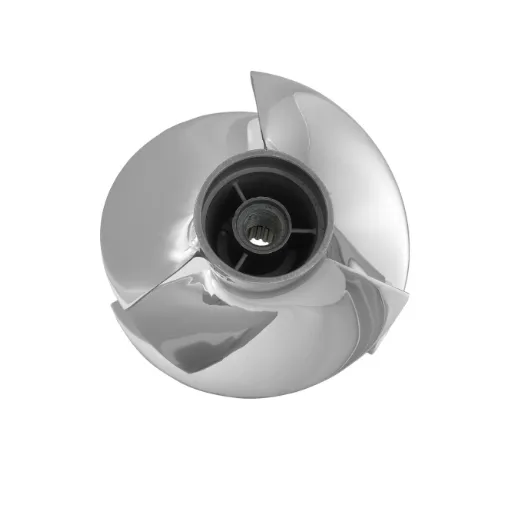
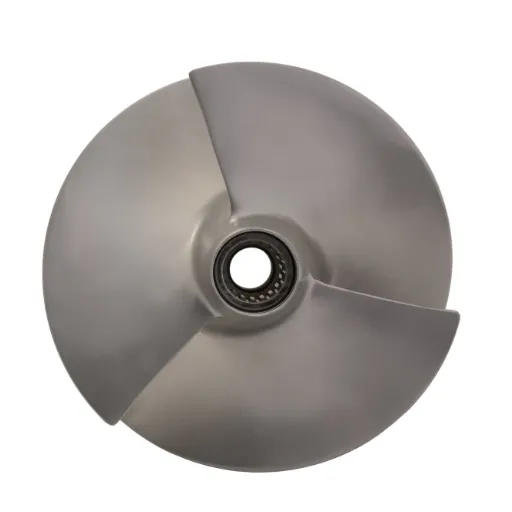
An impeller is an integral part of a jet propulsion system, specifically tailored to propel water through the pump of your Sea-Doo GTI. It looks to be a big-headed, revolving blade or screw, attracting the water into the pump and expelling it forcefully through the backside. The thrust of the water pressure across the impeller enables the watercraft to be efficiently propelled to its desired direction.
The impeller’s function not only affects the speed, acceleration, and general handling of the boat, but also guarantees efficient smooth rides, the least fuel usage, and adjustable performance under different water scenarios. Impellers for Sea-Doo, such as the ones used on the 1996 GTI, are made of either stainless steel or aluminum, tough materials appropriate for serious arduous use in the water.
Key Point:
Over time the impeller may wear from debris in the water or improper maintenance, which in turn means less lift and loss of performance. Frequent checks and constant cleaning from time to time would keep it in good condition. Furthermore, transiting to a performance-oriented impeller can step up your Sea-Doo, empowering to heighten not only its speed, but also handling for those who have a taste for more good riding.
Importance of the Impeller in Sea-Doo Watercraft
The impeller has got a crucial role to play on any Sea-Doo watercraft; it’s like they’re the one responsible for propelling these things through water. The impeller is one part of the jet propulsion system that draws water into the pump, accelerates it, and then shoots it out at high velocity. While powering the watercraft ahead, this same effect has been used to provide good control and maneuverability. Now, a watercraft can hardly be set to perform at its best without a good impeller inside her.
The impeller ensures maximum efficiency in translating the kinetic engine’s power into thrust. The engine makes energy, and that energy is harnessed by the impeller to produce thrust. Thus, a well-maintained impeller prevents or significantly reduces losses during power transfer, making the ski run faster and saving on fuel. Conversely, loss of power output, higher fuel consumption, and difficulty in handling may result from the use of a damaged or worn impeller, weakening the reliability of the watercraft in general.
It must not be overlooked that integrity of the Sea-Doo performance and safety depends upon regular inspection, and maintenance of the impeller. Mechanized maintenance service, such as debris removal, correct alignment technique, and upgrading to a high-performance impeller when necessary, will lead to remarkable benefits for a rider. Fortunate are riders seeking to undertake both extremes and ride at a leisurely pace or engage in high-speed maneuverability, to find out that maintaining an impeller is the way to go in upgrading the efficiency of their watercraft.
1996 Sea-Doo GTI and GTX Models
Specifications of the 1996 GTI and GTX
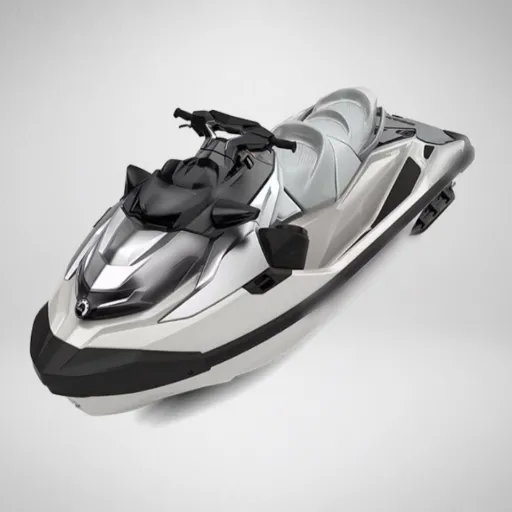
The 1996 Sea-Doo GTI and GTX models were planned to offer the performance characteristics and practical usability; and, with grownup seating arrangement, the ergonomic features were even more enhanced. GTI housed the 718cc Rotax dual-carburetor two-stroke engine well-suited to excursions over polished easy waterways with smooth utterness. The GTX used the more sporty 782cc Rotax triple-carburetor, two-stroke engine and big, long top-speed paired with much power for an amazing rush down the lake waters. Both models equipped with Bombardier Formula jet pump propulsion, for handling that responds and is nimble during operation.
The craft being built fiberglass including fiberglass reinforcement worked to endure rough but big-water cycling with less intimidating comfort for the rider. The design of the GTI targeted being trouble-free in its operation for beginners and families, while the GTX line aimed at delivering goodness with jumping around. The design of the sound-deadening D-Sea-Bel system was to mask some of the noise of the engine whilst still giving riders peace for more for eco-conscious riders.
For the GTI and GTX, each boat had very-useful applications to help the units in the water: it had sufficient storage to lock up your pocketbook and other necessities in their secure areas where they may ride without worry. All comfort-design principles focused on long workout time, ranging from ergonomic handlebars to right-positioned seating. Whether for efficiency or speed, in ’96, those were one-in-the-same—GTI posing for both greatly, with GTX, pushing at the britches.
Common Issues with Impellers on 1996 Models
The impellers on the 1996 Sea-Doo GTI and GTX models were a very vital part for the optimal performance, but they have their issues. One of the most common problems was cavitation that happens when the air or vapor bubbles are developed inside the pump, which reduces the thrust and efficiency. Usually, cavitation was because of a problem with the impeller because with the continuous usage nicks, dents, and scratches were created that disturbed the smooth flow of the water.
⚠️ Common Problems:
- Cavitation: Air or vapor bubbles reduce thrust and efficiency
- Debris Damage: Rocks, sticks, or foreign objects can cause torque loss
- Wear Ring Issues: Clearance growth between impeller and casing suppresses performance
One concern was the debris factor. As a result, the impellers in these watercrafts suffered greatly if rocks, sticks, or other foreign objects were present while operating in water with shallow depths and debris, leading to the loss of their torque. Failures for maintaining these parts and inspecting them regularly contributed to these events.
Meanwhile, the wear rings around the impeller contributed to other problems. This was because, when related to the wall of the casing, clearance could grow from initial systems to insignificant ones due to wear and/or tear, which further suppressed performance. Such issues could have been easily addressed; however, keeping the power plant up at its highest efficiency required proper maintenance, prompt repairs, and use of high-quality replacement parts in 1996 models milestone construction.
Comparison with Other Models: GTS, GSI, SPX
Removing and Replacing the Impeller
Tools Needed for Removal
The key to a smooth replacement process is to have the correct tools on-demand and the required assistance as necessary. It is with this in mind that it is important to have the right tools and equipment suitable for the task as discussed below:
🔧 Essential Tools Checklist:
- Impeller Removal Tool: Custom tool built specially for your marine model
- Spline Tool: For securely holding the impeller shaft during removal
- Socket Wrench Set: To loosen bolts and other fasteners
- Torque Wrench: Ensures the right tension is achieved when reassembling
- Rubber Mallet: For light tapping and releasing of stubborn parts
- Marine Grease: For smooth future functioning of marine parts
- Protective Gloves: Better grip and hand safety
- Drain Pan: To catch any fluid that may remain during disassembly
- Shop Towels: Keep components clean and working area tidy
The right tools expedite impeller change-out and serve to ensure no damage accrues through setup, which results in running peak design; good as per standards laid down by the manufacturer.
Step-by-Step Guide to Removing the Impeller
Step 1: Shut Off the Power Source
Before you start, double-check that the machine or pump you are attempting to restart is non-operational all the way to being disconnected from all electric or fuel source. This is critical for safety reasons to prevent any unforeseen start during the rejuvenation.
Step 2: Drain Out the System
Identify the spots for the collection plug or valve placed in your drive housing, solder as many plugs as will permit per each drain pathway. Keep a drain pan around to suck up whatever is left of the water, fluid, or coolant to stop all leaks and maintain a nice and clean workshop.
Step 3: Remove the Drive Housing
Loosen and unscrew the nuts or screws keeping the pump housing on with suitable wrenches or screwdrivers. Carefully lower the drive housing. This action will uncover the impeller. Find any debris and check for any signs of wear in the housing. Clean the housing appropriately.
Step 4: Check the Impeller
Before dismantling the impeller, spend a bit of time examining its position and condition. You should check for any form of visible damage, such as destroying warps or excess wear that will signal problems to resolve when you replace both parts.
Step 5: Unscrew the Impeller from the Shaft
The impeller is attached to threaded and locking nut and key-and-slot-arrangement variations, depending on the design of the pump. Manufacturers’ operating instructions should always guide one to unzip the impeller. Impeller or shaft should be handled with uniform pressure to ensure there is no damage to either.
Step 6: Remove Seals or Gaskets
If seals or gaskets are located in close proximity to the impeller, detach gently to avoid damage. When reassembly comes around, this part will be more than likely called for to be replaced with anew. Be careful about taking note of the location so it can be correctly installed during reassembly.
Step 7: Remove the Impeller
Now steadily remove or unscrew the impeller from the shaft, making sure at no time to force it or pry it in such a way that could damage the shaft or a component. Should the impeller get stuck, refer to a suitable puller in order to safely recover.
Step 8: Cleaning Parts
Cleaning shop towels and dissolving agents are ideal for the cleaning of shafts and impellers. This operation optimizes the life of the medication and maintains ease of fit of the parts.
They may remove an impeller by a slow, careful method given here without too much risk of destroying components. It is important to be conscious of general safety rules and product-specific instructions while working on the pump.
How to Properly Install a Replacement Impeller
For an impeller replacement therapy, I always make sure to thoroughly clean the pump housing and the surrounding area to be free from debris and other filth. I wipe down the interior surfaces with a clean cloth or shop towel to better ensure more surface area to apply resistance and to keep the brand new impeller from wearing away quickly. Also, it is double-checked that the replacement impeller suits the requirements of the unit to chuck out any compatibility problem.
Later, I smear a small amount of lubricant onto the impeller and into the pump housing. Obviously, this step provides smoother installation and minimizes the chances of any damage arising from inserting a dry impeller. Having been lubricated, the impeller is carefully maneuvered into place with its blades properly aligned. To be sure of perfect installation, I give the impeller a bit of rotation while pushing it into place to ensure seating all around.
Reinstating the seals, gaskets, and covers separated earlier, the pump was reassembled once the impeller was farmed in. The fasteners will be tightened in the exact torque and tightened shape without lopsidedness. Water is run through the system to test it before placing the pump back in duty, as we spot any leaks or noises. I can now and again replace my impellers properly and run the equipment at peak performance if follow these steps carefully.
Maintenance Tips for Impellers
Regular Inspection and Maintenance Procedures
Always making a runway inspection and maintenance of the impeller to be properties; this is software to be operated efficiently. Be the observation of the impeller for visual sings of wear, such as cracks, corrosion, or uneven edges. Debris can get stuck in the impeller vanes; this will result in decreased efficiencies and eventually cause collateral damage to nearby parts. Such blockage shall be removed from the vanes and thoroughly cleaned to retain superior functionality of the impeller. A monthly apart raise-in voluntary check will unearth minor glitches to be fixed before they give way to major issues.
💡 Best Practices for Maintenance:
- Conduct monthly visual inspections for cracks, corrosion, or uneven edges
- Remove debris from impeller vanes and clean thoroughly
- Monitor alignment and balance to prevent vibration damage
- Check seals for leakage or signs of wear
- Lubricate bearings according to manufacturer’s instructions
- Ensure impeller is securely mounted with proper torque
One of the maintenance steps concerns oversight of the alignment and balance of the impeller. An imbalanced impeller could result in vibration that wears out the shaft and bearings too recklessly and expects a short life from the equipment. An appropriate way of detecting and rectifying misalignment is the employment of special tools (e.g. dial indicators). Also, ensure the impeller is securely mounted, and all bolts/screws tightened to the torque appropriately recommended.
Seals, bearings, and pump housings are additional objects that can be checked. Seals should be examined for leakage or signs of wear, while bearings need to be lubricated according to manufacturer’s instructions. Used together with material advancements and real-time condition monitoring systems, it could give exact figures on impeller performance and equipment condition. This approach could in fact lessen the downtime and enable identification of any problems as early as possible, thereby assuring dependable performance to the system.
Signs of Wear and When to Replace
To maintain the best impeller performance and avoid costly system failures, the impellers and related components are kept in the perfect care. One major part of the process is to recognize very early the signs of wear. Some such telltale signs are cracks, chips, or corrosion of the impeller blades. Such physical defects can greatly affect performance, and, in turn, create vibration problems, excessive noise, and even system instability. Material fatigue from withstanding the loads over time might also manifest in warping and other deformations. All of these occurrences eventually affect the impeller’s efficacy even more. Consequently, careful and regular inspections are required to detect these anomalies and have them yet to progress further.
🚨 Warning Signs That Require Immediate Attention:
- Visible cracks, chips, or corrosion on impeller blades
- Excessive vibration during operation
- Unusual noise levels
- System instability or decreased performance
- Warping or deformation of the impeller
- Increased energy consumption
- Signs of cavitation (vapor bubbles collapsing)
- Frequent mechanical seal failures
Another troubled sign can be a general decrease in the performance of the system or increased consumption of energy. If the impeller is going down and so is its ability to move the fluids, cavitation can sometimes start. This is the condition triggered by vapor bubbles, which collide and collapse into the impeller and adjacent equipment. But let us recognize that frequent or continued mechanical seal failures usually focus on alignment, resulting in an impeller that is worn or has sustained some damage. System performance metrics combined with direct inspections allow operators to acknowledge and quantify operational inefficiencies, which signal that something needs to be replaced.
Replacing an impeller requires a multisystem approach that considers worn-out indicators, performance data, and operational needs. The state-of-the-art condition-monitoring systems now in use offer real-time insights so that operators can analyze live graphs of vibration, temperature rise, and pressure variation as far as recognizing premature symptoms well in advance. It is equally important to keep a record of the inspections alongside their repairs for trend analysis and for deciding an impeller change interval. Follow the service schedule as manufacturer recommended to preempt any unfortunate downtimes. Using new technologies and adopting an aggressive maintenance method will have most impellers functioning to their max lifespan while being very dependable on the operation of the equipment.
Extending the Lifespan of Your Impeller
The primary concern that will govern the longevity of impeller is the correct usage, maintenance checks, and environment care. Therefore, safely operating the impeller as per manufacturer’s safe operational limits and never allowing the impeller to fall under extreme conditions in terms of high speeds, temperatures, and pressures that can only accelerate wear is the first step. Always look for any initial signs of damage in the form of cracks or uneven wear, and fix them up before leading to the final option of replacing it if the impeller is severely impaired. In this regard, employing superior monitoring systems such as advanced vibration sensors and pressure sensors provides real-time evidence regarding impeller performance in order to detect inefficiencies in their early stages.
✅ Tips for Extending Impeller Life:
- Operate within manufacturer’s recommended limits
- Avoid extreme conditions (high speeds, temperatures, pressures)
- Use advanced monitoring systems (vibration sensors, pressure sensors)
- Select appropriate materials for operating conditions
- Consider custom coatings for corrosive environments
- Ensure balanced installation to prevent undue wear
- Maintain clean water or liquid flow
- Use simulation tools to predict potential failures
Moreover, material selection is also crucial in extending the life of an impeller. For operations exposed to corrosive or abrasive conditions, custom coating or durable materials, such as stainless steel and composite alloys, are required to avoid excessive wearing. In addition, balanced installations of the impeller ensure that spinnage does not cause undue wear.
In conditions where the impeller is operated without bringing in surrounding environmental properties to support its running; facilities should expect more damage. Simply put, clean water or liquid flow, which blocks debris accumulating and thereby causing mechanical damage, is the result. Using new industrial technology and bare innovation, they are now able to model such operational performances with the aid of sophisticated simulation tools and they can predict the impending failure well in advance. By following these practices, you can eradicate downtime during installation, improve overall efficiency, and extend equipment life.
Performance Reviews and Comparisons
Testing the Performance of Different Impellers
To weigh the performance of numerous impeller designs, many important parameters must be taken into consideration, such as flow rate, energy efficiency, cavitation resistance, and durability. Laboratory testing assisted with advanced computational fluid dynamics (CFD) simulations are a perfect combination for comparing different configurations. These methods provide numeral measurements in regard to the appreciation of the impacts of specific impeller geometries on fluid dynamics under different operating conditions.
📊 Key Performance Parameters:
- Flow Rate: Measures the volume of water moved per unit time
- Energy Efficiency: Ratio of useful work output to energy input
- Cavitation Resistance: Ability to operate without bubble formation
- Durability: Resistance to wear and tear over time
- Turbulence Management: How well the impeller handles irregular flow
A performance comparison might involve impeller testing at multiple stages, examining their efficiency at different speeds and—little wonder—how they manage the turbulence and wear over time. Increasing the flow might maximize the throughput while increasing the susceptibility to cavitation when it operates at high pressures. A low-flow design, however, might provide a close view of stability and lesser energy consumption in situations that call for a low, constant flow.
Modern tools and data visualization further enhance the analysis. Structural strength can be gauged in real-time from operating data so that optimal blade angles may be observed and irregularities monitored. A better rounded path of evaluating and identifying better solutions with data-driven support is thus realized for more-target-specific organizational benchmarks or project objectives.
Choosing the Right Impeller for Your Sea-Doo
The careful selection of impellers for your Sea-Doo jet boat is considered essential for the purposes of getting maximum performance out of the engine and the whole watercraft. While making its basic contribution to the acceleration, top speed, cornering, and braking characteristics of the craft, it is central to the propulsion system in terms of the impeller’s size and design. In doing impeller selection, it serves you best to dictate what goes on your riding style and the way you would like it to perform. If your only aim is to be the first one across the open water, you will want a totally different impeller than someone who loves to tow wakeboarders or the environmentally conscious wanting low fuel usage. Not to mention that a race-trained impeller will deliver a model tuned for an easy casual ride for a novice while a sea rider for a practitioner would assist thousands of others to produce that high boost or an ultra cruising speed bay racer.
🎯 Factors to Consider When Choosing an Impeller:
- Riding Style: Racing, casual cruising, towing, or trick riding
- Material: Stainless steel (durable, saltwater-friendly) vs. Aluminum (affordable, freshwater)
- Pitch: Low pitch (faster acceleration, lower top speed) vs. High pitch (higher top speed, slower acceleration)
- Engine Size: Must match your specific engine specifications
- Water Conditions: Freshwater, saltwater, shallow or deep water
- Load Capacity: Single rider vs. multiple passengers
Regarding impellers, the choice of material is another important consideration. Stainless steel provides a highly durable and corrosion-resistant choice; thus, they are well-suited for critical long-propelled use in harsh water conditions such as saltwater. A lower-cost impeller material, aluminum, crumbles faster and works well for casual water rides in freshwater only. Impeller pitch, then, plays a subsequent role giving results of acceleration versus highest speed. Varying the pitch imprints faster acceleration potential at slow down speed for a low pitch impeller, whereas varying to a high pitch suggests better top-speed but eventually at a slowdown power downside. Taking into context the mentioned factors, the personal choice for different water levels and usage scenarios forms the appropriateness for selection.
Through using online tools and databases like comparison guides, these, being mostly on the manufacturers’ websites, would let you adhere to search results which would take into considering engine size, type of gearing you want to acquire, and average load figures. Wherever the application requires fitting, the user must comply with guidelines described on the manufacturer’s side website; use of a totally wrong impeller could result in poor performance or worse damage under the boat. So, visioning the perfect harmony of personal whims on top of the latest insights in the industry makes it all easygoing to invest with your eyes closed in an impeller that functions as gross fun, par notches on the water.
Frequently Asked Questions (FAQ)
Q: What are common indications that my 1996 Sea-Doo GTI impeller should be replaced?
A: Common symptoms pointing toward a required impeller replacement for a 1996 Sea-Doo GTI would include reduced top speed, slower acceleration, heavy cavitation or vibration, and visible damage to the intake area. On a Sea-Doo watercraft, wear or nicks to the impeller fins and loss of prime are usually signals for impeller renewal and possibly wear ring maintenance. Regular inspection as part of routine maintenance can greatly help to avoid sudden failures.
Q: How do I go about selecting the proper replacement products for the impeller of my 1996 Sea-Doo GTI?
A: Go for an impeller product suitable for a 1996 Sea-Doo GTI year and engine setup. Look for stock or high-performance aftermarket impellers of similar pitch and diameter specs. Consider whether one desires stock performance or a 95/97-style pitch for slightly different acceleration characteristics; speak to the supplier or look up the product specification if they suit the intake and wear ring clearance.
Q: Can I install the 1996 Sea-Doo GTI impeller on my own? And what tools would I need?
A: Yes, indeed, many owners will be able to install a 1996 Sea-Doo GTI impeller with simple tools, such as an impeller puller/installer kit, sockets, wrenches, torque wrench, and a safe work stand for the hull. You will have to dismantle your engine cover, maybe drain the cooling system, and apply torque on certain specifications of the driveshaft nut. Ensure the intake and wear ring condition and position of the carbon seal are well checked upon reinstallation. If in doubt, have someone experienced to install it for you so as to prevent any possible damage.
Q: How do the intake and wear ring influence the performance of the 1996 Sea-Doo GTI impeller?
A: The intake and wear ring affect the performance of the impellers by providing proper water circulation and less cavitation. A worn wear ring or a damaged intake could bring air or turbulence, which will result in reduced thrust from a 1996 Sea-Doo GTI impeller. Replacing or polishing the wear ring and assuring that the intake grate is in good condition improves performance, onboard acceleration and top-speed performance, and extends the lifespan of the impeller and other components.
Q: What should I know about guarantees and warranties on replacement impellers for a 1996 Sea-Doo GTI?
A: Warranty coverage from different manufacturers will vary, as will policy allowances. Oftentimes, OEM impellers will come with limited warranties against defects, while aftermarket ones can carry different guarantees. Know what the warranty period terms are and check installation guidelines against misuse; noncompliance with the guidelines could result in denial of any claims made for defective product. Always keep receipts and have proof of proper installation should there be questions or claims made.
Q: Can upgrading the impeller improve my Sea-Doo’s performance?
A: Upgrading the impeller can provide better acceleration and possibly top-speed improvements with correct matching to engine tune and intake-condition requirements. An upgrade will give rise to higher top speed, but slower off-the-line acceleration, or lower top-top pitch will drag top-end acceleration back. For a 1996 Sea-Doo GTI, opposition must be leveled by combining the prime fuel octane-number requirement (95 vs 97 recommendations may apply) and any engine modifications with impeller choice.
Final Thoughts
Understanding your 1996 Sea-Doo GTI impeller is essential for maintaining optimal performance and enjoying countless hours on the water. By following proper maintenance procedures, recognizing signs of wear, and choosing the right replacement parts, you can ensure your watercraft continues to deliver the thrilling experience you expect. Whether you’re performing routine maintenance or considering an upgrade, this comprehensive guide provides the knowledge you need to make informed decisions about your Sea-Doo’s most critical component.