Replacing the propeller on your Yamaha outboard motor is a crucial maintenance task that can enhance your boat’s overall performance, fuel efficiency, and handling. Whether you’re a seasoned boater or a first-time DIY enthusiast, knowing when and how to replace your propeller can save you time, money, and potential frustration out on the water. This comprehensive guide is designed to walk you through every step of the process, from identifying key signs of wear to choosing the right replacement propeller for your specific needs.
What is a Yamaha Outboard Propeller and Why is it Important?

A Yamaha outboard propeller is a crucial component of your boat’s propulsion system. It is the part that transfers the engine’s power to the water, generating the thrust needed to move your boat forward or backward. The propeller’s design—its size, shape, and material—determines how efficiently your boat performs in various conditions, affecting speed, fuel efficiency, and overall handling. Having the right propeller ensures optimal performance, prolongs the life of your engine, and enhances your boating experience.
Understanding the Role of a Propeller in Your Yamaha Outboard
Selecting the ideal propeller for your Yamaha outboard is a critical step in optimizing your boat’s performance. Several factors come into play, including pitch, diameter, material, and the number of blades. For instance, pitch refers to how far the propeller moves forward in one complete revolution. Lower pitch numbers provide better acceleration and pulling power, while higher pitch numbers allow for greater top-end speed. Diameter, on the other hand, impacts the balance between thrust and efficiency, with larger diameters generating more thrust at lower speeds—ideal for heavier boats or high-load conditions.
The material of the propeller also profoundly influences durability and performance. Aluminum propellers are lightweight and cost-effective, making them suitable for general-use applications. However, stainless steel propellers are more durable, delivering superior performance at higher speeds and in demanding conditions, although they come at a higher price point.
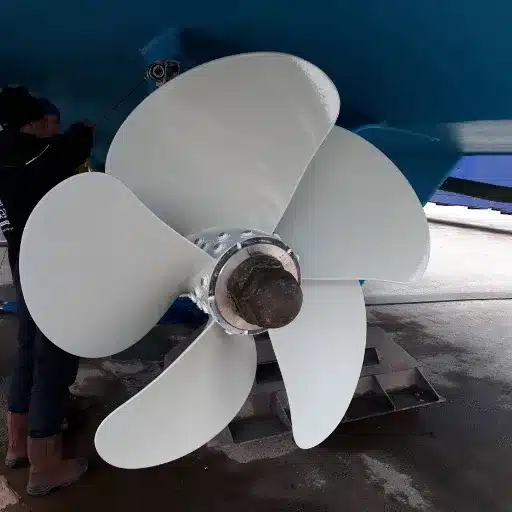
Additionally, the number of blades affects the propeller’s balance of speed and thrust. A three-blade propeller is commonly used for faster speeds, while four or five blades provide smoother operation and better low-speed maneuverability, especially in rough water or towing scenarios.
Ensuring your propeller matches the engine’s RPM (Revolutions Per Minute) range is another essential consideration. Yamaha recommends using a propeller that allows the engine to run at or near the upper end of its designated RPM range when operating at wide-open throttle. For example, an optimal range for many Yamaha outboards is around 5,000-6,000 RPM. Staying within this range can prevent engine strain, improve fuel efficiency, and extend the engine’s service life.
By carefully examining these variables and selecting a propeller tailored to your specific boating needs, you can maximize your Yamaha outboard’s capabilities while enjoying a smoother, more efficient ride. Always consult your Yamaha manual and seek professional advice if necessary to ensure the best fit.
How a Propeller Affects the Efficiency of Your Yamaha Outboard Motor
The propeller plays a critical role in determining the performance and fuel efficiency of your Yamaha outboard motor. Its size, shape, material, and pitch influence how effectively the engine transfers power to propel the boat through water.
1. Diameter and Pitch: The propeller’s diameter, or the size of the circle it forms while spinning, impacts how much water is displaced. A larger diameter can generate more thrust, which is ideal for heavier boats, while smaller diameters often provide better efficiency for lighter vessels. Pitch, on the other hand, refers to the theoretical distance the propeller moves in one rotation. A higher pitch offers greater speed but requires more engine power, making it less fuel-efficient for certain setups.
2. Blade Count and Shape: Propellers typically come with three, four, or even five blades. Fewer blades provide higher top speeds but may reduce low-speed control. Conversely, more blades result in smoother operations, better acceleration, and improved handling in rough water. The blade design, including rake and cupping, affects how water is channeled, further optimizing performance based on specific water conditions.
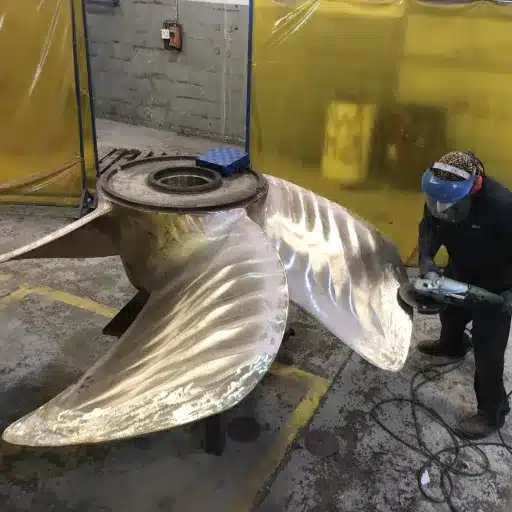
3. Material Considerations: Propellers are commonly made of stainless steel or aluminum. Aluminum propellers are cost-effective and lightweight, making them suitable for moderate usage. Stainless steel, although more expensive, offers durability and better performance due to its rigidity and precision machining. This material is a preferred choice for boaters seeking consistent efficiency and power.
4. Fuel Efficiency Impacts: According to industry insights, matching the right propeller to your Yamaha outboard can yield up to a 10-15% improvement in fuel economy. For example, a well-selected three-blade propeller with a moderate pitch might reduce fuel consumption for boats navigating calm waters, while a four-blade stainless steel propeller can enhance control and efficiency over extended trips in challenging conditions.
5. Load and RPM Range: Propeller choice can also affect the engine’s revolutions per minute (RPM) range under load. Ensuring the engine operates within the recommended RPM range, typically specified in your Yamaha manual, prevents unnecessary strain and maximizes engine efficiency. A properly aligned propeller will complement the boat’s load and usage to achieve optimal performance without overburdening the motor.
Choosing the right propeller is a dynamic process that requires careful consideration of these factors, alongside an understanding of your boat’s specific requirements and performance goals. Regular inspections and adjustments to the propeller, when necessary, will help you sustain peak efficiency and make the most of your Yamaha outboard motor.
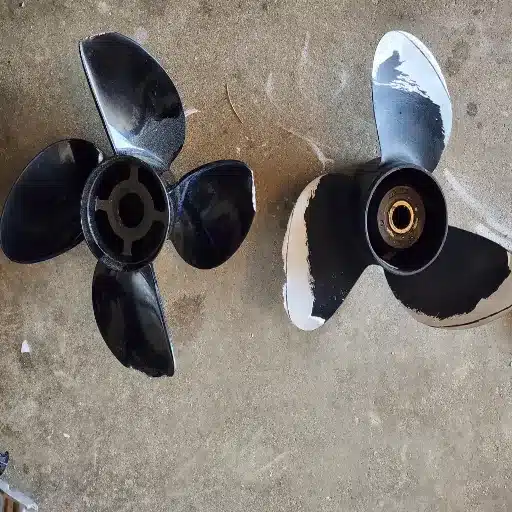
Types of Propellers for Yamaha Outboards: Aluminum vs. Stainless Steel
Aluminum propellers are lightweight and cost-effective, while stainless steel propellers offer superior durability and performance at higher speeds.
| Parameter | Aluminum | Stainless Steel |
|---|---|---|
|
Durability |
Less durable |
Highly durable |
|
Performance |
Moderate |
High-speed optimized |
|
Cost |
Affordable |
Expensive |
|
Weight |
Lightweight |
Heavier |
|
Maintenance |
Prone to damage |
Low maintenance |
How to Remove the Old Propeller from Your Yamaha Outboard?

Removing the old propeller from your Yamaha outboard is a straightforward process that requires basic tools and careful handling to avoid damage. Follow these detailed steps for a seamless experience:
- Turn Off the Engine and Ensure Safety
Start by turning off your outboard engine and removing the key from the ignition to prevent accidental startups. For additional safety, engage the engine in neutral and consider wearing gloves to protect your hands during the process.
- Gather the Necessary Tools
You’ll need a socket wrench or a propeller nut wrench, a pair of pliers, and marine grease. Ensure all tools are appropriately sized for Yamaha outboard models. A block of wood may also come in handy to secure the propeller during removal.
- Inspect the Propeller Shaft
Before removal, visually inspect the area around the propeller for fishing lines, weeds, or debris tangled around the shaft. These can often interfere with removal and impact the engine’s performance.
- Remove the Propeller Nut
Use the wrench to loosen the propeller nut, which is located at the center of the propeller. Place a block of wood between the propeller blade and the anti-ventilation plate to prevent the propeller from spinning as you turn the nut counterclockwise. Remove the nut and washer, keeping them in a safe place.
- Slide Off the Propeller
Gently slide the propeller off the shaft. Be cautious during this step to avoid damaging the splines or the propeller shaft. If the propeller is stuck, lightly tap it with a rubber mallet to loosen it.
- Examine the Shaft and Components
Once the propeller is removed, inspect the shaft for any signs of wear, corrosion, or damage. Also, check the splines and rubber hub for any deformations that may cause issues in the future.
- Clean and Grease the Propeller Shaft
Clean the exposed shaft with a soft cloth and apply a thin layer of marine grease. This helps prevent corrosion and ensures easier installation of the new or serviced propeller.
Step-by-Step Guide to Propeller Removal
- Prepare Your Tools and Workspace
Before beginning, gather all necessary tools and ensure you have a clean workspace. Tools may include pliers, a socket wrench, a rubber mallet, marine grease, a spare propeller, and protective gloves. Ensure your boat is securely out of the water and stable to work on.
- Engage Safety Protocols
To prevent accidents, turn off the engine and disconnect the battery. This eliminates any risk of the motor accidentally starting during the removal process.
- Remove the Propeller Nut
Locate the propeller nut at the center of the propeller. Use a socket wrench to loosen and remove the nut. Keep this nut in a safe place, as you will need it again when securing the new propeller.
- Take Off the Propeller Washer
Once the propeller nut is removed, you will find the propeller washer beneath it. Carefully take off the washer and set it aside with the nut for reinstallation purposes.
- Slide off the Propeller
Gently pull the propeller straight off the shaft. If it is stuck, avoid forcing it too hard. Use light pressure or a rubber mallet to tap the propeller and loosen it. Be cautious not to damage the shaft or surrounding components.
- Inspect the Propeller and Shaft
Examine the removed propeller for cracks, bent blades, or other signs of wear. Simultaneously, inspect the propeller shaft for debris, such as fishing line, or for signs of corrosion or damage. Cleaning the shaft thoroughly and applying marine-grade grease will ensure optimal performance when the new propeller is installed.
- Check Hub Components
Inspect the hub assembly on the propeller. If it shows excessive wear or damage, it may need replacing to maintain balance and efficiency during operation.
- Secure All Loose Components
Store the removed propeller, nut, washer, and other components in a secure, dry place. Label or organize them as needed to avoid misplacing items during the reinstallation process.
By following these detailed steps and inspecting each component as you proceed, you can safely and effectively complete the propeller removal process with minimal hassle. Proper care during removal will also help enhance the longevity and performance of your motor system.
Tools Needed: Propeller Nut Wrench and Specialized Propeller Holder Tool
Propeller Nut Wrench
The propeller nut wrench is an essential tool designed to effortlessly loosen or tighten the propeller nut during the removal or installation process. Typically constructed from durable, corrosion-resistant materials such as stainless steel, it offers the strength needed to handle marine conditions. A high-quality propeller nut wrench often features an ergonomic handle, enhancing grip and reducing hand fatigue during use. Standard sizes vary to accommodate different motor models, making it crucial to match the wrench to the specific size requirements of your propeller nut.
Specialized Propeller Holder Tool
This tool is indispensable for securely holding the propeller in place while removing or installing the propeller nut. By preventing the propeller from spinning, it ensures the safety and efficiency of the process. Most propeller holder tools are adjustable, allowing compatibility across a wide range of propeller sizes and designs. Advanced models can feature non-slip grips and anti-scratch materials to protect the propeller’s surface. Some tools are also built compact for easy storage on the go, supporting both professional marine technicians and recreational boat owners.
Investing in these tools not only simplifies maintenance tasks but also significantly reduces the risk of damaging delicate motor components, ensuring the long-term performance and reliability of your equipment.
Common Challenges: How to Handle a Stuck Propeller Nut
Dealing with a stuck propeller nut can be a frustrating challenge, but it’s a common issue that can be resolved with the right approach and tools. Propeller nuts often become stuck due to saltwater corrosion, debris buildup, or excessive tightening during previous installations. To effectively address the issue, here are some proven methods and precautions to consider:
- Use Penetrating Oil: Start by applying a high-quality penetrating oil around the nut. Allow the oil to sit for several hours or overnight to break down rust or corrosion. Products designed for marine applications, such as PB Blaster or WD-40 Specialist, are particularly effective in such scenarios.
- Apply Heat Carefully: If the oil alone doesn’t work, applying heat to the area can help expand the metal slightly, loosening the nut. A heat gun is often ideal for this, as it allows precise control of the temperature. Avoid using an open flame near the propeller to prevent accidental damage to nearby components or seals.
- Leverage the Correct Tools:
- Propeller Wrenches: Specifically designed for removal, these wrenches offer a better grip and reduce the chances of damaging the nut’s edges. Opt for non-slip or rubber-coated models to enhance usability.
- Breaker Bars: For particularly stubborn nuts, a long breaker bar provides additional torque, making it easier to loosen the nut without excessive physical strain.
- Prevent Stripping the Nut:
Excessive force or using the wrong tools may cause the nut to strip, making removal even harder. If this occurs, you might need a nut extractor or professional help. It’s always wise to use tools designed specifically for marine applications to avoid this issue.
- Preventative Measures for the Future:
- Apply an anti-seize lubricant to the threads before installing the nut to prevent future rust and sticking.
- Regularly inspect and maintain your propeller components to address minor issues before they escalate.
Installing the New Propeller on Your Yamaha Outboard

- Position the Propeller
Slide the new propeller onto the propeller shaft carefully. Make sure it is aligned properly and fits snugly onto the shaft’s grooves. If necessary, apply a light coat of marine grease to the shaft to ensure smooth installation and prevent future corrosion.
- Install the Thrust Washer and Spacer
Place the thrust washer and any required spacer onto the shaft before securing the propeller. These components help distribute force evenly and ensure proper operation, so confirm they are seated correctly.
- Secure with the Propeller Nut
Use the correct propeller nut and tighten it onto the shaft by hand first. Once aligned, use a wrench to securely tighten the nut based on the specifications mentioned in your Yamaha outboard manual.
- Attach the Cotter Pin
Insert a new cotter pin into the hole on the propeller shaft to lock the nut in place. Bend the ends of the cotter pin to ensure it stays secure during operation.
- Final Inspection
Spin the propeller by hand to verify it moves freely without resistance or wobbling. Check all components to confirm they are properly installed and secure before operating the engine.
How to Slide the New Propeller Onto the Shaft Correctly
To properly slide the new propeller onto the shaft, follow these detailed steps to ensure a secure and efficient installation:
- Clean the Propeller Shaft
Before attaching the new propeller, thoroughly clean the propeller shaft to remove any dirt, debris, or old grease. Use a clean cloth or a mild solvent if necessary. A clean shaft ensures smooth movement and prevents potential damage to both the shaft and propeller.
- Apply Marine-Grade Grease
Coat the propeller shaft lightly with marine-grade grease. This step minimizes friction during installation and protects the shaft from corrosion, especially in saltwater environments. Ensure the grease covers the entire length of the shaft without overapplying.
- Align the Propeller Hub
Position the new propeller so that the splines on the propeller hub align with the grooves on the shaft. Gently rotate the propeller as you slide it onto the shaft to match the alignment precisely. Misalignment can cause damage to the splines or lead to operational issues later.
- Install the Thrust Washer
Place the thrust washer back onto the shaft if it was removed during the process. Ensure it is seated correctly against the base of the propeller to evenly distribute the force when the engine is running, preventing excessive wear.
- Secure with the Propeller Nut
Once the propeller is in place, thread the propeller nut onto the shaft by hand. Use a torque wrench to tighten the nut to the manufacturer’s recommended torque specification, which is typically specified in the manual (e.g., 55 to 75 foot-pounds for many outboards). Over-tightening may cause damage, while under-tightening can result in the propeller loosening during operation.
- Install the Cotter Pin
Insert a new cotter pin into the hole in the propeller shaft to lock the nut securely. Spread the ends of the cotter pin outward to hold it firmly in place. This step ensures added safety by preventing the nut from loosening during use.
Following these steps keeps your propeller securely installed and optimizes performance, whether navigating freshwater lakes or tackling challenging saltwater conditions. Regular maintenance and proper installation practices significantly extend the life of your outboard motor and propeller.
Importance of Applying Grease to the Propeller Shaft
Applying grease to the propeller shaft is essential for maintaining the performance and longevity of my outboard motor. It prevents corrosion by creating a protective barrier against moisture and salt, especially in harsh marine environments. Additionally, grease makes it easier to remove the propeller for maintenance or inspection, avoiding potential damage caused by rust or seizing. Regularly greasing the shaft not only ensures smoother operation but also saves me time and effort in the long run.
Securing the Propeller: How to Properly Tighten the Propeller Nut
Properly securing the propeller is a critical step in ensuring the smooth and efficient operation of your outboard motor. To tighten the propeller nut correctly, follow these detailed steps:
- Clean the Propeller Shaft
Before installing the propeller, inspect and clean the shaft to remove dirt, old grease, or any debris. This step prevents uneven tightening and ensures a secure fit.
- Apply Marine Grease
Coat the propeller shaft with a thin layer of high-quality marine grease. This not only eases installation but also helps prevent corrosion and simplifies future maintenance.
- Install the Propeller and Hardware
Slide the propeller onto the shaft, ensuring it is seated properly against the thrust washer. Then, place the spacer and washer (if applicable) in their correct positions.
- Hand-Tighten the Propeller Nut
Begin tightening the nut by hand until it is snug. This step minimizes the risk of cross-threading, which could damage the shaft or nut.
- Secure with a Torque Wrench
Use a torque wrench for precise tightening. Check your outboard motor’s manual for the manufacturer-recommended torque specification, often ranging between 40-50 ft-lbs. This ensures the nut is tight enough to keep the propeller secure without over-tightening, which could damage components.
- Install the Cotter Pin or Locking Mechanism
Insert a new cotter pin through the hole in the propeller shaft and secure it by bending the ends to lock the nut in place. If your model uses a different locking mechanism, such as a locking tab washer, ensure it is properly engaged.
- Inspect and Test
After securing the nut, visually check that all components are correctly installed. Rotate the propeller by hand to ensure it spins freely without resistance or abnormal noise.
What to Consider When Choosing the Right Yamaha Propeller?

When choosing the right Yamaha propeller, consider the following key factors:
- Engine Compatibility – Ensure the propeller is designed for your specific Yamaha engine model to guarantee proper fit and performance.
- Material – Decide between aluminum and stainless steel. Aluminum is lightweight and economical, while stainless steel is more durable and delivers better long-term performance.
- Propeller Size – Choose the correct diameter and pitch based on your boat’s usage and manufacturer recommendations. A lower pitch offers better acceleration, while a higher pitch provides greater top-end speed.
- Application – Consider the type of boating you’ll be doing, such as water sports, fishing, or cruising, to select a propeller optimized for your needs.
- Performance Goals – Determine whether you prioritize speed, fuel efficiency, or handling, and choose a propeller designed to enhance those aspects.
Always consult Yamaha’s propeller guides or a certified dealer for advice tailored to your engine and boating requirements.
Factors to Consider: Size, Pitch, and Material of the Propeller
When selecting a propeller, understanding how size, pitch, and material impact performance is crucial to optimizing your boating experience.
- Size (Diameter)
The diameter of a propeller plays a vital role in determining thrust. Larger diameters are ideal for heavier boats, as they can push larger volumes of water, providing the necessary power. Conversely, smaller diameters work best for lightweight boats, offering better speed and efficiency. Always ensure the diameter matches the engine specifications to avoid overloading the motor.
- Pitch
Pitch refers to the distance a propeller moves through the water in one complete rotation, measured in inches. A lower pitch propeller provides better acceleration and pulling power, which is advantageous for towing activities like water skiing or wakeboarding. On the other hand, a higher pitch propeller allows for greater top speed, making it suitable for cruising. Selecting the correct pitch helps prevent your engine from over-revving or underperforming.
- Material
The material of the propeller significantly influences durability, performance, and cost. Aluminum propellers are lightweight and affordable, making them a popular choice for casual boaters. Stainless steel propellers, though more expensive, provide superior performance due to their strength, resistance to flexing, and corrosion resistance—ideal for high-performance and saltwater applications. Additionally, composite propellers offer a balance between cost-efficiency and durability, offering sufficient resilience for moderate use.
Optimizing these three factors—size, pitch, and material—ensures that your propeller effectively supports your boating objectives, whether it’s achieving top speed, towing capability, or fuel efficiency.
How to Ensure the Propeller is a Good Fit for Your Yamaha Outboard Motor
To determine if a propeller is a good fit for your Yamaha outboard motor, several factors must be considered to ensure optimal compatibility and performance. Start by identifying the diameter and pitch of the propeller. The diameter is the total width of the circle made by the propeller’s blades during rotation, while the pitch refers to the distance the propeller travels forward in one full spin. Yamaha recommends that your propeller’s pitch should be suited to your engine’s ability to operate within its wide-open throttle (WOT) RPM range, typically specified in the owner’s manual. For example, Yamaha outboards often have a recommended RPM range of 5000-6000 RPM, and selecting the right pitch will help keep the engine within this band.
Material is another critical consideration. Stainless steel propellers offer enhanced durability and performance for high-demand applications, while aluminum options are more cost-effective and suitable for casual or moderate use. Blade count also plays a role; three-blade propellers are known for their speed and efficiency, while four-blade designs provide better acceleration and stability.
It’s also essential to account for your specific boating needs. Whether you’re focusing on speed, towing power, or fuel economy, different propeller configurations will deliver different balances of these traits. For example, a higher-pitch propeller can deliver greater top-end speed but may reduce low-speed torque critical for towing activities.
Measuring performance through sea trials is a practical approach to ensure your propeller choice aligns with your Yamaha outboard’s capabilities. During these tests, monitor your engine’s RPM at wide-open throttle and adjust propeller specifications as needed to optimize performance. By combining these data-driven insights with Yamaha’s engineering guidelines, you can ensure your propeller is a perfect match for excellent boating experiences.
Where to Find Yamaha Outboard Resources for Propeller Selection
Selecting the right propeller is crucial for maximizing the performance and efficiency of your Yamaha outboard engine, and Yamaha provides a wealth of resources to guide you. The Yamaha Propeller Selector tool, available on their official website, is an excellent starting point. This intuitive tool allows you to input key details such as your outboard model, boat type, and desired performance goals. It then offers tailored propeller recommendations that align with your needs.
Additionally, Yamaha’s Digital Technical Library contains comprehensive documentation, including owner’s manuals, performance bulletins, and detailed specifications for various propellers. These materials help you deepen your understanding of propeller dynamics and how they interact with different boat configurations. For more personalized guidance, certified Yamaha dealers are invaluable. They can not only advise on propeller selection but also offer expert installation services for optimal compatibility and performance.
Online forums and boating communities also feature discussions and real-world reviews from Yamaha outboard users, providing practical insights and feedback. Combining Yamaha’s official tools with these insights ensures you make a well-informed decision and enjoy enhanced boating experiences tailored to your vessel and activity needs.
How to Maintain Your Yamaha Outboard Propeller for Longevity?

- Inspect Regularly
Check the propeller for damage or wear after every trip. Look for cracks, dents, or bent blades that can affect performance and fuel efficiency.
- Clean Thoroughly
Remove debris, algae, or barnacles that may accumulate on the propeller. Use a soft brush and mild soap to avoid scratching the surface.
- Apply Protective Coating
Apply a marine-grade anti-corrosion spray to protect the propeller from rust and saltwater damage.
- Tighten the Propeller Nut
Ensure the propeller nut is securely fastened. Use a properly sized wrench and refer to the manual for torque specifications, if needed.
- Grease the Shaft
Periodically remove the propeller and apply marine grease to the propeller shaft. This prevents seizing and makes future maintenance easier.
- Store Safely
When not in use, store the boat in a dry and covered area. Use a propeller cover if possible to prevent accidental damage.
By following these simple steps, you can extend the life of your Yamaha outboard propeller and ensure optimal performance on the water. Always consult your owner’s manual for specific maintenance recommendations.
Regular Propeller Maintenance Tips for Boat Owners
Proper care and upkeep of your boat’s propeller not only extends its lifespan but also ensures peak performance and fuel efficiency. Here are some detailed tips to achieve effective maintenance:
- Inspect for Damage Regularly
Check your propeller for any signs of physical damage, such as dents, cracks, or chips. Even minor imperfections can cause vibrations and reduced efficiency. Studies show that damaged propellers can decrease fuel efficiency by up to 10%, leading to increased operational costs over time.
- Clean and Remove Debris
After every outing, especially in saltwater, clean the propeller thoroughly to remove algae, barnacles, and other debris. Use a soft brush or non-abrasive cleaner to avoid scratching the surface. Regular cleaning prevents buildup, which can impair performance and increase drag.
- Check for Proper Alignment
Ensure the propeller is properly aligned on the shaft. A misaligned prop can lead to uneven wear and strain on the engine. Regularly verify alignment during routine maintenance, as it can save you from costly repairs down the line.
- Lubricate Moving Parts
Corrosion is a common issue for propellers, particularly in marine environments. Apply a good quality marine grease to the propeller shaft whenever you remove the prop. This ensures smooth movement and protects metal surfaces from rust caused by exposure to moisture.
- Perform Annual Balancing
A well-balanced propeller optimizes engine performance and prevents vibration that can damage other components. Experts recommend getting your propeller professionally balanced at least once a year to maintain optimal functioning and avoid unnecessary wear and tear.
- Select the Right Propeller for Usage
Choosing a propeller suited to your boat’s size, engine, and primary use is crucial. For example, recreational boating might require a different pitch or blade design compared to towing water sports. Best-fit props enhance acceleration, top speed, and fuel economy.
- Store with Proper Precautions
When storing your boat, keep the propeller in a secure position and apply a protective cover if applicable. This prevents scratches and exposure to elements that could lead to long-term damage.
By adhering to these comprehensive maintenance practices, boat owners can ensure that their Yamaha or other outboard propellers remain in top condition for years to come. Proper care translates to improved safety, efficiency, and overall boating enjoyment.
Signs of Propeller Damage: When to Consider a Replacement
Recognizing the signs of propeller damage is crucial to maintaining your boat’s performance and efficiency. Here are key indicators that it might be time to replace your propeller:
- Reduced Speed and Acceleration
If you notice a drop in your boat’s top speed or slower acceleration despite the engine functioning normally, your propeller may be damaged or worn out. This can occur due to bent or chipped blades, which reduce the efficiency of water displacement and thrust.
- Excessive Vibration or Noise
A damaged propeller often causes unusual vibrations or noise while the boat is in motion. This could result from uneven blade wear or a misaligned propeller shaft, which creates imbalance and decreases smooth operation.
- Visible Damage to Blades
Inspect your propeller regularly for any visible signs of damage. Dents, cracks, or bends in the blades can impair the propeller’s ability to generate thrust. Even minor damage can worsen over time, impacting performance significantly.
- Poor Fuel Economy
An inefficient propeller forces your engine to work harder, consuming more fuel than usual. If you’re refueling more frequently without a change in usage patterns, the propeller could be the source of the problem.
- Overheating Engine
A damaged propeller can fail to move water efficiently, leading to strain on the engine and causing it to overheat. Overheating can result in further mechanical issues if left unchecked.
- Difficulty Maintaining Plane
If your boat struggles to stay on plane or requires higher RPMs to maintain it, this may indicate propeller wear or damage disrupting the proper thrust-to-weight dynamics.
How to Enhance the Boating Experience with Proper Propeller Care
Proper propeller care is essential for maintaining an efficient, safe, and enjoyable boating experience. Here are some key steps and valuable insights to ensure your propeller remains in optimal condition:
- Conduct Regular Inspections
Check your propeller for visible damage such as cracks, dents, or bends. Even minor imperfections can reduce performance, leading to higher fuel consumption or vibration issues. Experts recommend inspecting the propeller at least once every two months, especially if you use your boat frequently or in rough waters.
- Clean the Propeller Thoroughly
Marine debris, algae, and barnacles can build up on the propeller over time, reducing its efficiency. Cleaning the propeller routinely with safe, non-abrasive solutions prevents corrosion and ensures smooth performance. Studies indicate that a clean propeller can improve fuel efficiency by up to 10%.
- Monitor for Corrosion
Propellers made from aluminum or stainless steel are highly resistant to corrosion, but saltwater and prolonged exposure can still cause wear over time. Applying anti-corrosion sprays and maintaining the protective layers on your propeller will extend its lifespan and reduce the likelihood of expensive repairs.
- Consider Propeller Balancing
A balanced propeller minimizes vibrations and ensures even thrust distribution. Professional balancing services can assess whether your propeller’s blades are aligned correctly, as misalignment can lead to mechanical strain and reduce fuel efficiency.
- Replace or Repair When Needed
If your propeller is significantly damaged or worn, replacing it might be the most cost-effective option. Modern propeller materials and designs offer enhanced performance tailored to specific boating needs. Be sure to choose a propeller size and pitch that align with your boat’s engine specifications for optimal results.
- Invest in a Spare Propeller
Carrying a spare propeller can save time and prevent delays if the primary one becomes damaged during use. Having a backup ensures that you can address unexpected issues without compromising your boating experience.
By prioritizing these maintenance practices, you can significantly enhance your boat’s performance, fuel economy, and safety while prolonging the life of your propeller. Taking proactive care of your equipment not only reduces the likelihood of costly repairs but also ensures that every outing on the water is a smooth and enjoyable one.
Reference Sources
-
Village Science: Outboard Motor Cooling System – This resource from the University of Alaska Fairbanks discusses various aspects of outboard motors, including potential issues with propellers.
-
F200 Yamaha Motor Corporation USA Owner’s Manual – A government-hosted document that includes maintenance and replacement instructions for Yamaha outboard components, including the propeller.
-
15 Tips for Winterizing Your Boat and Motor – Published by the Virginia Department of Wildlife Resources, this guide provides practical advice on boat and motor maintenance, including propeller care.
Frequently Asked Questions (FAQs)
Q: How do I know when it’s time for a Yamaha outboard propeller replacement?
A: It’s time to consider a Yamaha outboard propeller replacement when you notice reduced speed and fuel efficiency, visible damage to the boat propeller, or difficulty in achieving the desired performance. Regularly inspect the propeller for signs of wear, including cracks, dents, or bends, to maintain the efficiency of your boat.
Q: What tools do I need to replace a Yamaha outboard propeller?
A: To replace a Yamaha outboard propeller, you’ll need a block of wood or propeller holder, a socket wrench, pliers or a similar tool, and possibly a propeller puller. These tools will help you secure the propeller, remove the cotter pin, and turn the propeller nut counterclockwise for removal.
Q: How do I remove the old propeller from my Yamaha outboard motor?
A: First, locate the cotter pin at the end of the propeller shaft and remove it using pliers. Then, use a block of wood or propeller holder to keep the prop steady, and turn the nut holding the propeller counterclockwise with a socket wrench. Once the nut is off, slide the propeller off the prop shaft.
Q: What should I inspect before installing a new propeller?
A: Before installing a new propeller, check the prop shaft for any damage or marine growth and ensure it moves freely. Clean the area located behind the propeller, and examine the thrust hub or spacer for wear. This helps ensure a smooth installation and optimal performance of the boat and engine.
Q: How do I choose the perfect propeller for my Yamaha outboard?
A: To choose the perfect propeller for your Yamaha outboard, consider the boat’s size, the motor’s horsepower, and your performance needs, such as speed and fuel efficiency. Consulting a marine expert or referring to your motor’s specifications can help find the best propeller for your needs.
Q: Can I use a propeller from mercury outboard motors on my Yamaha outboard?
A: While some propellers from mercury outboard motors may fit, it’s essential to ensure compatibility with your Yamaha outboard model. Always check the specifications to avoid potential damage to the motor and other components.
Q: What is the proper method for installing a new propeller?
A: To install a new propeller, slide it onto the prop shaft, ensuring it aligns with the thrust hub or spacer. Secure the nut holding the propeller by turning it clockwise, and use a block of wood or propeller holder tool between the blades to tighten it securely. Finally, insert and bend a new cotter pin to lock the nut in place.
Q: What are the benefits of keeping my boat propeller clean?
A: Keeping your boat propeller clean from marine growth and debris enhances performance, ensures longevity, and maintains the efficiency of your boat. A clean propeller reduces drag, improving speed and fuel efficiency.
Q: How often should I check my Yamaha outboard propeller?
A: It’s advisable to inspect your Yamaha outboard propeller every few outings for signs of damage or wear. Regular checks help catch potential issues early, ensuring consistent performance and avoiding costly repairs.