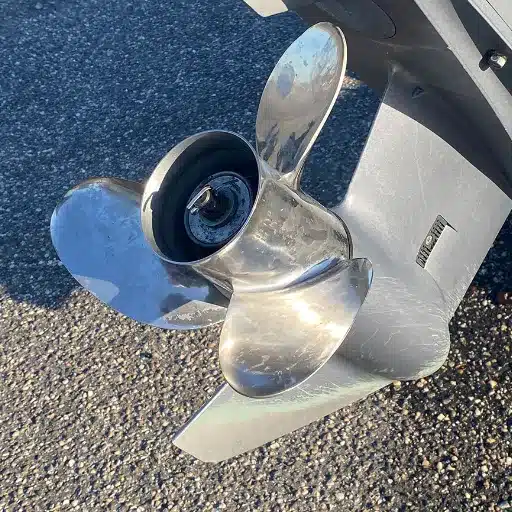
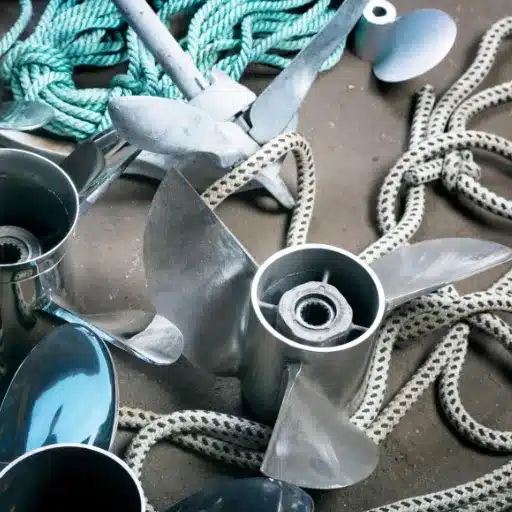
You can install a boat propeller yourself in 10 to 20 minutes with a socket wrench, a block of wood, and a torque wrench. The process is nearly identical across outboard, sterndrive, and inboard engines — remove the old prop, clean the shaft, grease the splines, slide on the new prop, torque the nut, and install a new cotter pin. That is it.
Most boaters pay a marine shop $80 to $150 for this 10-minute job because they assume it requires special tools or training. It does not. At Captain Marine, we walk customers through prop swaps at the dock every season. If you can change a car tire, you can change a boat propeller. Before you start, make sure you have the right propeller for your engine and hull. If you are unsure, our boat propeller selection guide walks you through the matching process. This article gives you the complete installation procedure, torque specs by manufacturer, and the first-run test that catches problems before they leave the dock.
Key Takeaways
- Outboard prop installation takes 10 to 15 minutes with basic hand tools
- Always use a block of wood to stop prop rotation — never hold the blade with your hands
- Torque specs vary by manufacturer: Mercury Flo-Torq hubs need 55 ft-lbs, Yamaha specs are around 40 ft-lbs
- Never reuse a cotter pin or loosen a nut to align cotter pin holes — always tighten to align
- Run a first-run test after installation: idle check, vibration check, and WOT RPM verification
Safety First: Pre-Installation Checklist
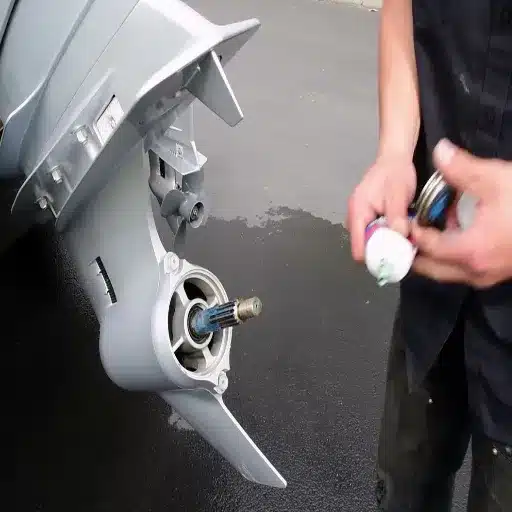
Before you touch a wrench, complete these safety steps. A spinning propeller can cut flesh to the bone, and an engine that starts accidentally can throw a prop across the yard.
Engine and Power
- Turn the engine OFF and remove the keys from the ignition
- Disconnect the battery negative terminal if you are working on an inboard
- Shift into neutral and verify the prop shaft spins freely by hand
- Work on level ground or a stable trailer — not on a floating dock
Personal Protection
- Wear safety glasses — cotter pins can snap and fly when bent
- Wear work gloves — prop edges are sharp, especially stainless steel
- Keep a first-aid kit within reach
The Golden Rule
Never hold a propeller blade with your bare hands while loosening or tightening the nut. A slipping wrench transfers full torque to your fingers. Always wedge a block of wood between a blade and the anti-ventilation plate or transom to stop rotation safely.
Tools You Need (and What They Cost)
The required tool list is short. Most boaters already own half of these.
| Tool | Why You Need It | Approximate Cost |
|---|---|---|
| Socket or prop wrench (often 1 1/16″) | Loosen and tighten the prop nut | $15-25 |
| Torque wrench | Tighten to the exact manufacturer spec | $25-40 |
| Block of 2×4 lumber | Stops prop rotation safely | Free |
| Marine grease | Prevents corrosion on shaft splines | $8-12 |
| Flathead screwdriver | Bends locking tabs, pries cotter pins | $5-10 |
| Needle-nose pliers | Bends and removes cotter pins | $5-10 |
| Rags or shop towels | Cleans the shaft and old grease | $5 |
Total one-time investment: $40 to $80. Compare that to $80 to $150 per swap at a dealer, and the tools pay for themselves on the first job.
How to Remove Your Old Propeller
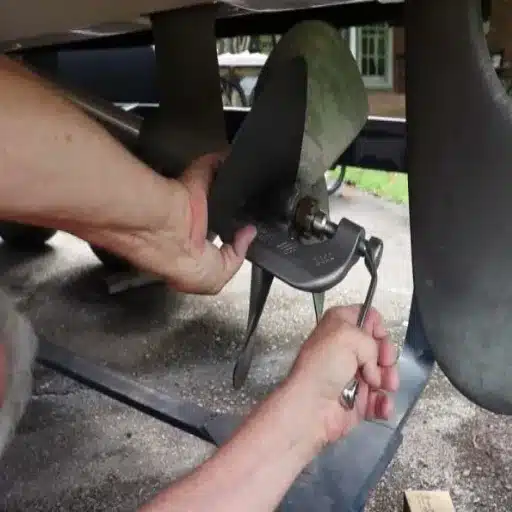
The removal process is nearly identical across outboard and sterndrive brands. BoatTEST provides a visual walkthrough with annotated screenshots showing the standard propeller removal and installation sequence for reference.
Outboard and Sterndrive Removal
- Remove the cotter pin. Straighten the bent legs with needle-nose pliers, then pull the pin out through the shaft hole. Discard it — cotter pins work-harden when bent and should never be reused.
- Bend back locking tabs (if equipped). Some props use a lock washer with tabs bent up against the nut flats. Use a flathead screwdriver to bend the tabs back down so the nut can turn.
- Block the prop. Slide a piece of 2×4 lumber between one blade and the anti-ventilation plate. The wood jam will stop rotation without damaging the blade or your hands.
- Loosen the nut. Turn the prop nut counterclockwise with your socket. Once it breaks free, remove it by hand. Note: Some older props use reverse threads. If the nut will not budge counterclockwise, try clockwise.
- Slide the prop off. Support the propeller as you slide it aft. Small parts — thrust washer, delrin sleeve, drive sleeve adapter — may fall out. Note their exact order. Take a photo with your phone if you are unsure.
- Inspect the shaft. This is the step that saves lower units. Look for fishing line wrapped around the shaft near the seal, grass, weeds, or corrosion. Fishing line can saw through the prop shaft seal and allow water into the gearcase, leading to a $1,500 to $3,000 rebuild.
When Tom pulled the prop off his 150 HP Yamaha last spring, he found three feet of braided line wrapped tight around the shaft. The line had been there long enough to score a groove in the seal housing. He cleaned it off, inspected the seal, and caught the problem before water intrusion destroyed the lower unit. Ten minutes of preventive maintenance saved him a $2,200 repair bill.
Inboard Propeller Removal
- Remove the cotter pin and loosen the prop nut about two turns. Do not remove it completely yet.
- Set up the prop puller. A C-clamp style puller costs $30 to $50 and is essential for inboard props. Position the puller fingers behind the prop hub and the center bolt on the shaft end.
- Snug the puller bolt by hand, then strike the opposite end of the puller with a hammer. The vibration breaks the taper seal without damaging threads. Never use an impact wrench — it can strip threads or crack the hub.
- Remove the prop. Once the prop loosens, remove the nut and slide the propeller off. Catch the key as it falls out of the shaft keyway. For a detailed video walkthrough of inboard propeller removal using a C-clamp puller, WakeMAKERS demonstrates the hammer-vibration technique that safely breaks the taper seal without thread damage.
How to Install a New Propeller
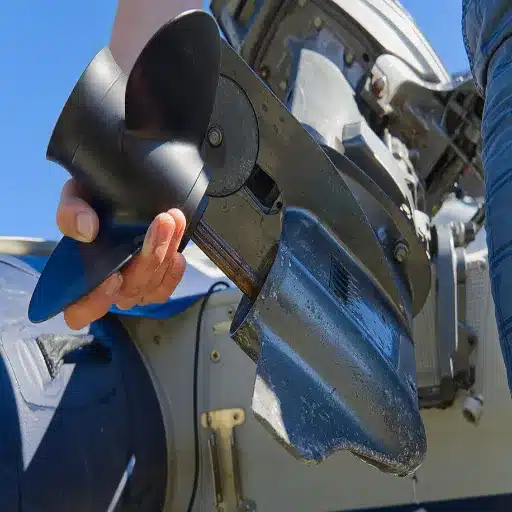
Outboard / Sterndrive Installation
- Clean the shaft splines. Use a rag to remove old grease, corrosion, and debris. The splines must be clean for the new prop to seat fully.
- Apply marine grease. Squeeze a thin, even coat of marine grease onto the shaft splines and the shaft surface. This prevents corrosion and makes future removal easier. Do not over-grease — excess grease flings off and collects debris.
- Install the thrust washer. If your setup uses a thrust washer, slide it onto the shaft first with the concave side facing aft (toward the prop). Flo-Torq SSR HD hubs typically do not use a thrust washer.
- Slide on the new prop. Align the propeller hub splines with the shaft splines and push it forward until it seats fully. Rotate the prop slightly if the splines do not engage immediately. Never force it.
- Install the washers and nut. Follow the exact order from your hub kit or the photo you took during removal. For Flo-Torq SSR HD hubs: largest thick washer first, then the Belleville (cupped) washer, then the smaller thick washer, then the nut.
- Hand-tighten the nut. Turn it clockwise until it is snug against the washers.
- Block and torque. Wedge the 2×4 block between a blade and the anti-ventilation plate. Use the torque wrench to tighten the nut to the manufacturer’s spec. See the torque table below.
- Align the castle nut holes. If your nut is a castle type (slotted), the slots must align with the cotter pin hole in the shaft. Critical: tighten further to align the holes. Never loosen the nut to make them line up.
- Install a new cotter pin. Slide a new cotter pin through the aligned holes. Use needle-nose pliers to bend both legs around the nut, one leg forward and one aft, fully locking it in place.
- Spin test. Rotate the propeller by hand. It must spin a full 360 degrees without binding, wobbling, or catching. If it binds, remove it and check for debris or misaligned splines.
Inboard Installation
- Check taper fit (optional but recommended). Apply Prussian Blue (engineer’s blue) to the shaft taper. Slide the prop on without the key, remove it, and inspect the bore contact. You need at least 80 percent even contact. Scrape high spots with a scraper if needed.
- Mark the shaft depth. With no key installed, slide the prop onto the shaft and mark the shaft where the hub’s forward edge stops. This confirms the prop seats fully when the key is added.
- Install the key. Place the key in the shaft keyway. Coat the shaft with light oil only — never use heavy grease or anti-seize, which can prevent proper seating.
- Slide the prop on. Push the propeller onto the shaft until it lines up with your mark. If it stops short, the key is too tall. File it down until the prop seats are fully seated.
- Install jam nuts correctly. Place the thin nut against the propeller first, then the thick nut. Torque the thick nut against the thin one. This loads the thick nut’s threads and creates a self-locking effect.
- Torque to spec. Common spec is around 35 ft-lbs for many ski and wake applications, but verify for your shaft diameter. See manufacturer documentation for exact numbers.
- Install a new cotter pin through the shaft hole and bend the legs to lock it.
Propeller Torque Specifications by Manufacturer
| Manufacturer / Hub Type | Torque Spec | Notes |
|---|---|---|
| Mercury (Flo-Torq SSR HD) | 55 ft-lbs | Verify with the hub kit instructions; some hubs differ |
| Yamaha | 40 ft-lbs (54 Nm) | Varies by horsepower; check the service manual |
| Honda (small HP, shear pin) | Finger tight | Larger HP models use 20-25 ft-lbs |
| Suzuki | 40-50 ft-lbs | Varies by engine size |
| Evinrude / Johnson / BRP | 35-45 ft-lbs | E-TEC and legacy models may differ |
| Inboard (ski/wake, 1″ shaft) | ~35 ft-lbs | Varies by shaft diameter and prop size |
| Volvo Penta sterndrive | 45-55 ft-lbs | Check DuoProp specific instructions |
| MerCruiser Bravo | 55 ft-lbs | Same as Mercury outboard spec |
If your manufacturer is not listed: Tighten until the nut is snug, then tighten an additional 1/4 to 1/2 turn. The prop should not spin on the shaft, but you should not need excessive force either. When in doubt, consult your engine service manual.
The First-Run Test: What to Check After Installation
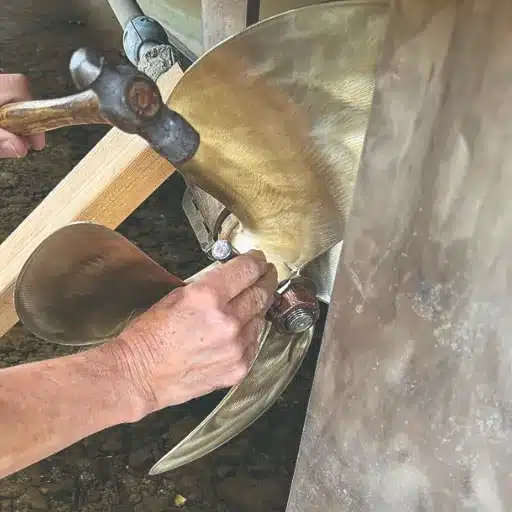
Installation is not complete until you verify the prop is running correctly. Run this checklist before you leave the dock.
Visual Inspection (Engine Off)
- The propeller spins freely by hand with no wobble
- No visible gap between hub and thrust washer
- The cotter pin is fully seated, and the legs are bent
- No tools or rags left near the lower unit
Idle Test (In Gear at Dock)
- Start the engine and shift into forward at idle
- Listen for any new vibration or rattling
- Watch for propeller wobble at the waterline
- Shut down immediately if anything sounds wrong
Run Test (On the Water)
- Accelerate gradually to the plane. The boat should plane normally without new vibration.
- Run at cruise RPM (typically 3,000 to 4,000). Listen and feel for vibration through the hull or helm.
- Run at WOT briefly. Verify RPM is within the manufacturer-specified range. A loose prop can cost you 200 to 400 RPM.
- Check for leaks around the prop shaft seal after the run.
When Karen installed a new stainless prop on her 21-foot runabout, she skipped the first-run test and headed straight across the lake. At 4,200 RPM, she felt a new vibration that had never been there before. She idled back to the dock, pulled the prop, and found she had installed the thrust washer backward. The washer’s concave face was facing forward, creating a gap that let the prop wobble. A five-minute fix — but only because she caught it early. Now she runs the full test every time.
Common Installation Mistakes (and How to Avoid Them)
| Mistake | Why It Matters | How to Avoid |
|---|---|---|
| Reusing the old cotter pin | Work-hardened pins can crack and fail | Always install a new cotter pin |
| Loosening the nut to align the cotter pin holes | Reduces clamping force; prop can spin loose | Tighten further until holes align |
| Wrong washer order (Flo-Torq hubs) | Incorrect load distribution; vibration | Follow the hub kit diagram exactly |
| Overtightening trolling motor props | Strips drive pin or cracks the hub | 1/4 turn past finger-tight only |
| Skipping fishing line inspection | The line destroys the shaft seal; the gearcase floods | Inspect the shaft every time the prop is off |
| Installing the wrong rotation prop | LH prop on RH engine = no thrust | Verify rotation (RH or LH) before installation |
| Using an impact wrench on the inboard puller | Strips threads, cracks hub | Hammer vibration only |
| Forgetting grease on the shaft splines | Corrosion seizes the prop to the shaft | Light coat of marine grease every time |
| Not checking the torque after the first run | Nut can settle and loosen | Re-torque after 5 hours of runtime |
When to Call a Professional
DIY prop installation is straightforward for most boaters, but some situations require a prop shop:
- The prop is seized and will not come off with a block of wood and a normal force
- Shaft threads are damaged, cross-threaded, or stripped
- Taper fit shows less than 80 percent contact, and you do not have the tools to correct it
- You do not have a torque wrench and cannot borrow or rent one
- Prop vibration persists after checking installation, washer order, and shaft condition
- You are converting from a three-blade to a four-blade and need advice on pitch adjustment. A pitch change of 2 inches is usually the right starting point. For the full sizing methodology, consult your engine manufacturer’s propeller selection chart or speak with a certified prop shop.
- The lower unit seal is leaking — this is a gearcase repair, not a prop issue
A good prop shop charges $40 to $75 for a basic swap and will inspect the shaft and seal as part of the service. The extra $20 over a DIY job is worth it if you are unsure about any step.
Maintenance Tips After Installation
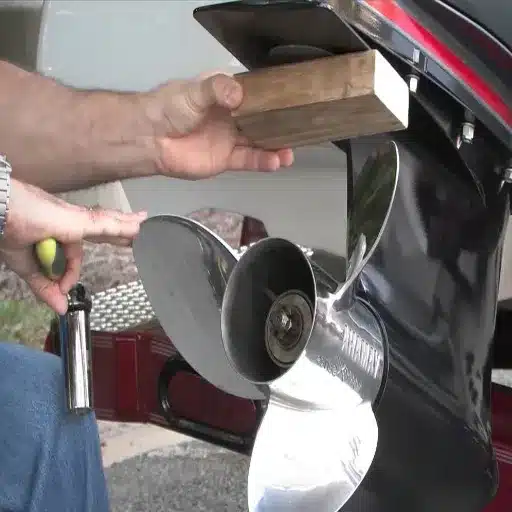
A new propeller deserves a simple maintenance routine to maximize life and performance. For the complete seasonal checklist, see our boat propeller maintenance guide.
After the First 5 Hours
- Re-torque the prop nut. The nut may settle as washers compress during initial use.
- Check the cotter pin for any signs of movement.
Monthly
- Inspect the propeller for nicks, cracks, or bent blades
- Verify the cotter pin is intact, and the legs are still bent
- Look for fishing line near the shaft seal
Every Oil Change (or 100 Hours)
- Remove the prop, clean the shaft, and re-grease the splines
- Inspect the seal area for corrosion or line damage
- Check prop nut torque
After Saltwater Use
- Rinse the propeller and lower unit with fresh water
- Dry thoroughly before storage to prevent corrosion pitting
Frequently Asked Questions
Do I need a torque wrench to install a propeller?
A torque wrench is strongly recommended but not strictly required. If you tighten the nut until it is snug, then add 1/4 to 1/2 turn, you are close to spec for most outboards. However, a torque wrench removes all guesswork and is the only way to hit the exact manufacturer specification. Most auto parts stores rent them for free.
Can I reuse the cotter pin?
No. Cotter pins work-harden when bent, which makes them brittle. A reused pin can crack and fall out, allowing the prop nut to back off. New cotter pins cost pennies. Always install a new one.
What if the castle nut holes do not line up with the cotter pin hole?
Tighten the nut further until they align. Never loosen the nut to make the holes line up. Loosening reduces clamping force and can allow the prop to spin on the shaft. Tightening further increases clamping force, which is always safer.
How tight should I tighten without a torque wrench?
Tighten by hand until the nut is snug against the washers, then tighten an additional 1/4 to 1/2 turn with the wrench. The prop should not spin on the shaft when you try to turn it by hand against the wood block. If you can turn the prop and the nut does not move, it is tight enough.
Why is my propeller hard to remove?
Corrosion between dissimilar metals (aluminum hub on stainless shaft, or vice versa) is the most common cause. Marine grease prevents this. If the prop is stuck, soak the hub with a penetrating lubricant, let it sit for an hour, then try again with the wood block and a longer wrench for more leverage. Never hit the prop blade with a hammer.
Can I install a propeller in the water?
Technically, yes, but it is not recommended. Working in the water makes it harder to keep small parts from dropping overboard, harder to apply grease cleanly, and harder to torque the nut properly. Do it on the trailer or a stable lift if possible.
Do I need to grease the shaft every time?
Yes. A light coat of marine grease on the shaft splines prevents corrosion and makes the next removal much easier. It takes 30 seconds and can save you hours of frustration later.
What is the difference between inboard and outboard prop installation?
Outboard and sterndrive props slide onto splines and are held by a single nut. Inboard props mount on a tapered shaft with a key and are held by one or two jam nuts. Inboards require a prop puller for removal and a taper fit check for proper seating. Outboards are simpler and faster.
How do I know if my prop is in the right rotation?
Check the propeller markings. Most props are stamped RH (right-hand) or LH (left-hand). Your engine manual will specify the correct rotation. Installing the wrong rotation prop will not damage anything, but the boat will not generate thrust and will not plane.
Can I install a stainless prop on an aluminum hub?
Most modern props come with a hub kit (Flo-Torq, XHS, etc.) that includes the correct hub material for your engine. Do not mix hub types without verifying compatibility. The hub kit instructions specify which engines the kit fits.
How much does a propeller installation cost at a shop?
A basic prop swap at a marine dealer costs $80 to $150 in labor. Some shops charge a flat fee; others bill at $80 to $120 per hour. A prop shop typically charges $40 to $75. DIY takes 10 to 20 minutes and costs nothing beyond the one-time tool investment.
Should I replace the thrust washer when changing props?
If the thrust washer shows wear, scoring, or deformation, replace it. A damaged washer can cause vibration and uneven loading. Most propeller shops include a new thrust washer with the prop or sell them for 5 to 15.
The Bottom Line
Installing a boat propeller is one of the easiest maintenance jobs you can do yourself. The tools cost less than a single dealer visit, the procedure takes 15 minutes, and the safety checks prevent costly problems down the line. The keys are simple: block the prop with wood (not your hands), torque the nut to spec, always use a new cotter pin, and run the first-run test before you leave the dock.
If you have installed your prop and the boat is still not performing right — vibration, RPM loss, or poor acceleration — the issue may be propeller selection rather than installation. Double-check that your prop diameter, pitch, and material match your hull and engine. If you are unsure, send us your boat specs and current prop markings. The Captain Marine rigging team will confirm you have the right prop and that it is installed correctly.