Changing the propeller for your Suzuki outboard motor is one of the more important maintenance tasks that influences the actual performance and efficiency of the boat. Whether you want to increase your boat’s speed, improve its fuel economy, or replace a damaged propeller, you will likely want to know the procedure. This guide was created to walk you through the steps in an easy manner, so you will feel comfortable and confident in doing so yourself. At the conclusion of this article, one will be able to identify when and how the proper change of a prop should be done safely and efficiently, as well as learn about some of the things to consider when selecting a propeller for 2025 that fits one’s specific needs. Stay around to pick up some hard-to-find expert tips as well as some insights into great tools and serious considerations that every boater should have in their toolkit!
Understanding Suzuki Outboard Propeller Basics
Propeller Types for Suzuki Outboards
Knowing the types of propellers available can be critical for how you enjoy boating and how you approach the choices for your Suzuki outboard. The philosophy of Suzuki propellers has been to offer boaters a variety to satisfy their specific requirements in terms of performance, durability, and efficiency.
| Propeller Type | Characteristics | Best Applications |
|---|---|---|
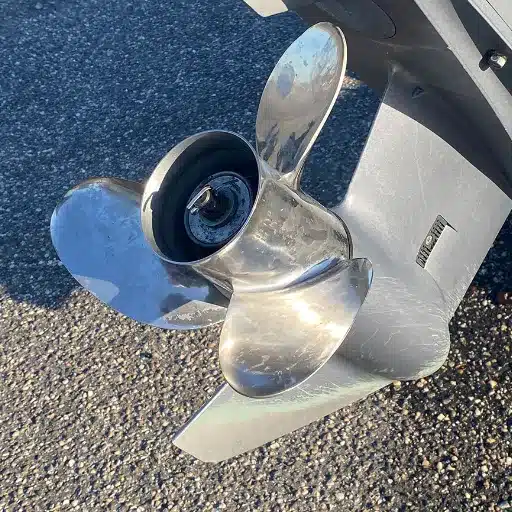
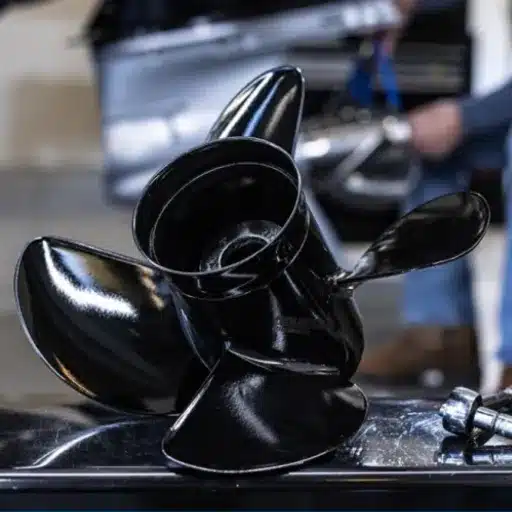
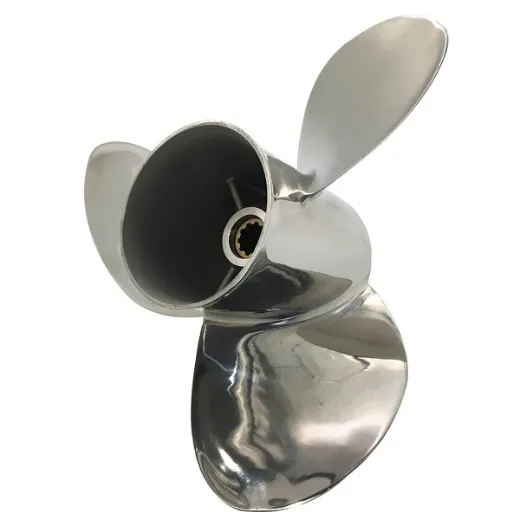
| Stainless Steel Propeller | Strong and corrosion-resistant with rigid construction enabling thinner blades, reducing drag and increasing speed. | High-performance applications, rough waters requiring precision and power |
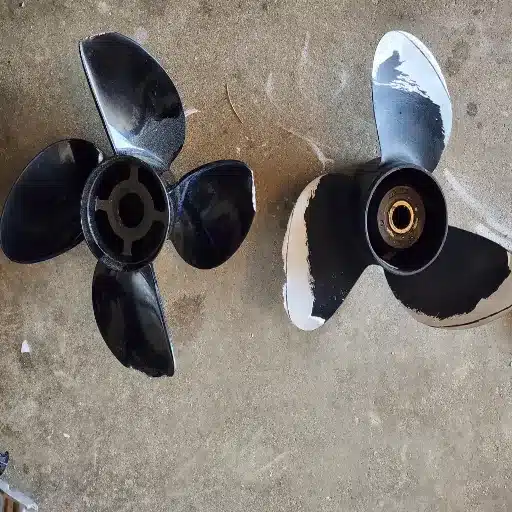
| Aluminum Propellers | Affordable, lightweight, easier to repair, less durable than stainless steel. | Casual/recreational boating, moderate speeds under calm conditions |
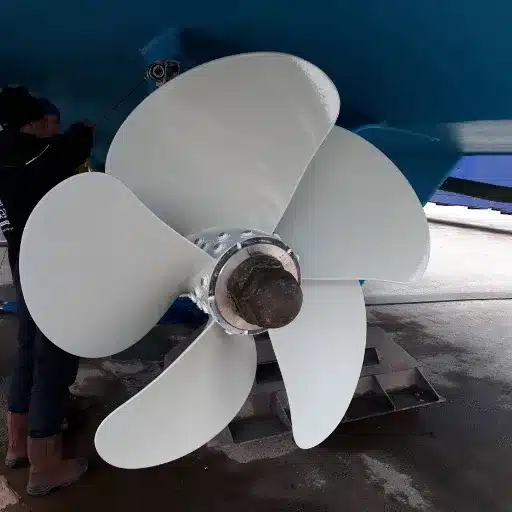
| Four-Blade Propellers | Provide extra thrust, improved fuel economy, enhanced grip in water, better stability. | Heavy boats, water sport towing, situations requiring stability |
| Three-Blade Propellers | Most common layout, balance speed and performance, higher top-end speeds. | Various applications, open-water cruising, freshwater fishing, all-around boating |
| Custom Performance Propellers | Specialized designs for achieving greater RPMs or different hull design requirements. | High-speed, high-performance applications with specialized needs |
🔧 Key Insight: The right propeller is chosen based on one’s specific boating requirements, which may vary depending on the water type, boat weight, or performance aspects. Careful considerations of these factors, coupled with compatibility with the Suzuki outboard, will considerably augment efficiency on the water, making for a much more enjoyable ride.
Choose the Right Prop for Your Suzuki Outboard HP
A few critical factors should serve as guidelines in picking an ideal propeller for your Suzuki outboard HP to create a smooth, seamless match between performance and efficiency:
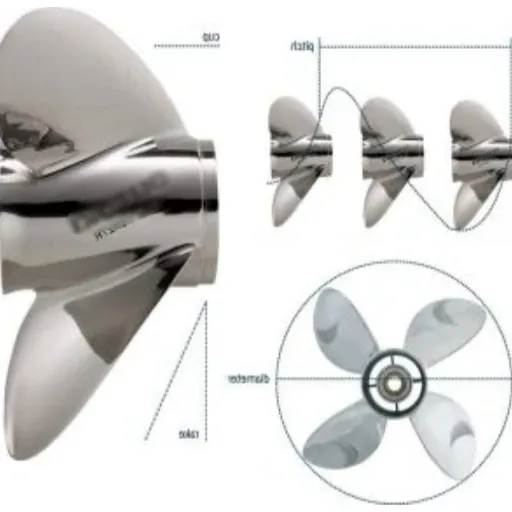
Pitch and Diameter
The pitch refers to the distance the propeller would theoretically travel through the water in one complete turn. The diameter is the width of the circle made by the blades. A low pitch results in better acceleration but tends to reduce maximum speed, while a higher pitch produces a higher top speed and better fuel economy. All Suzuki outboards need to strike a balance between these two so that they fit your style of boating.
Number of Blades
The number of blades primarily affects the propeller’s performance. Three blades allow for faster speed and better efficiency, making them ideal for light boats. While four blades provide engrossed thrust and stability, those are indicated for heavier loads or rougher waters.
Material Options
Propeller material influences both performance and durability. Aluminum propellers, being lightweight and inexpensive, are in fact the best choice for general boating. Stainless steel models are stronger and perform better, which makes them excellent choices for fast, heavy-duty applications, especially when paired with Suzuki outboard engines.
RPM Range
Ensure that your propeller matches the RPM range recommended by the outboard; this will prevent your engine from being strained or running inefficiently. This range is usually listed in the engine specification for the Suzuki outboard. Keeping the propeller and engine within that range would thus provide maximum performance and fuel economy.
Usage and Environment
The kind of boat you use and the kind of waterway you mainly operate in ought to be kept in mind initially. For instance, a high-speed cruise might require one type of propeller, while fishing in the shallows would require a different one. Along those lines, seawater requires a prop that is corrosion-resistant, whereas freshwater is more lenient.
Considering these standards as options are explored, you can confidently select a propeller for your Suzuki outboard HP that maximizes acceleration, speed, and fuel efficiency for every expedition.
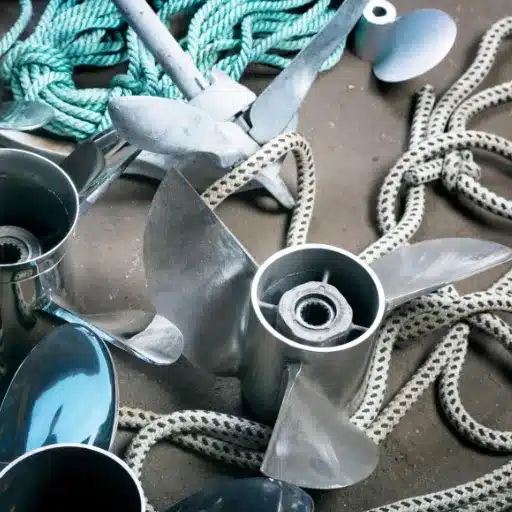
Common Issues in the Way of Propeller Damage
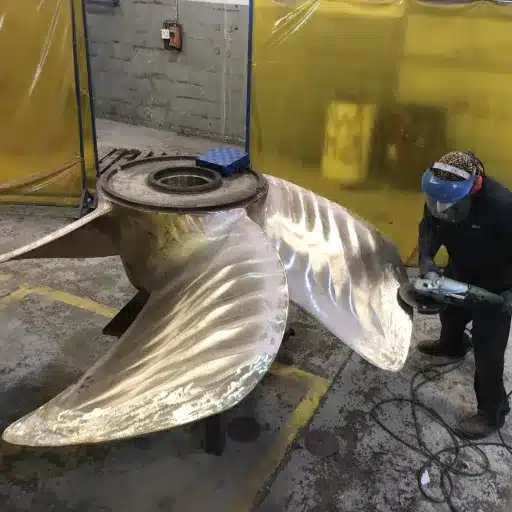
Propeller damage is a common issue that outboard motor users have to deal with; it seriously affects performance, fuel efficiency, and the overall boating experience. One of the most common reasons for propeller damage is when an operator hits an underwater object, such as rocks, debris, or sandbanks, which can result in chipping, bending, or even total breakage of the blades. Corrosion can also be a propeller threat, especially in the saltwater environment, because if the propeller is not maintained correctly, continuous exposure to saline conditions may corrode the materials of the propeller; cavitation is another threat that develops when improper water flows along the blades, which can erode the surface and diminish efficiency and long-term damage possibilities.
⚠️ Important Statistics
According to statistics, performing timely maintenance and regular inspection of propellers may reduce problems relating to their performance by 30%. Proper alignment and consideration of water conditions, as well as the propeller material or finish, are crucial in limiting damage. For example, stainless steel propellers are perfect for rough environments and saltwater conditions, as they are highly durable and corrosion-resistant. In contrast, aluminum propellers are less expensive but may be more easily interchanged or irreversibly damaged. The life of the propellers can be prolonged and the optimal performance of boats maintained by addressing these considerations through preventative maintenance, which includes cleaning and adjusting as often as necessary.
Step-by-Step Guide to Removing and Installing Your Suzuki Propeller

Tools Required for Prop Removal and Installation
You need the following tools and materials prepared to remove and install your Suzuki propeller safely, and to ensure it is done properly:
| Tool | Purpose |
|---|---|
| Propeller Wrench | A marine-type propeller wrench is a must for loosening or tightening the prop nut without causing damage. |
| Needle-nose Pliers | Used to remove the cotter pin, which keeps the prop nut from loosening. |
| Marine Grease | Used to grease the propeller shaft to prevent corrosion and ease reinstallation. |
| Rubber Mallet | Used for gently tapping the propeller or parts into place. |
| Torque Wrench | Provides the proper torque setting for tightening the prop nut, as recommended by the manufacturer, to maximize function and safety. |
| Rags or Shop Towels | Keep the workbench clean and wipe away grease or dirt from the propeller parts. |
| Replacement Parts | Spare cotter pins, thrust washers, or other suitable parts should be at hand in case any get damaged or lost during the process. |
💡 Pro Tip: Keeping such tools handy makes the removal and installation very easy to perform. Additionally, it ensures that every step is performed with efficiency and accuracy, without placing undue stress on critical components.
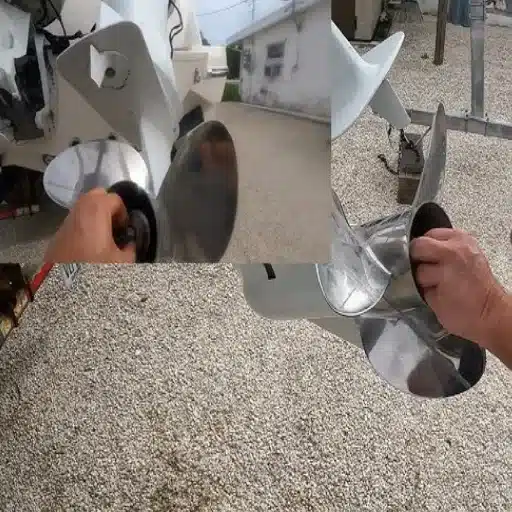
How to Safely Remove Your Suzuki Outboard Prop
Step 1: Ensure Safety First
Turn the engine off and remove the key from the ignition to prevent accidental start. For extra safety, you might want to disconnect the battery. Don’t forget to put on a pair of gloves to avoid nasty cuts from sharp edges on the propeller or other materials.
Step 2: Stabilize the Outboard Motor
Set up your Suzuki outboard motor in an upright position using a motor stand or transom support. This ensures the stability of the motor during the removal process and diminishes the possibility of damage to the propeller shaft or surrounding parts.
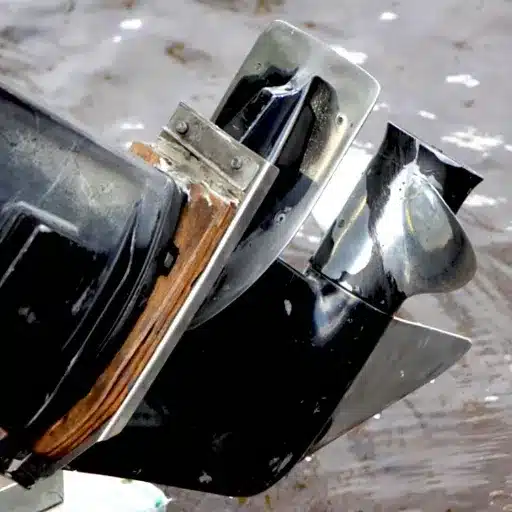
Step 3: Inspect the Propeller Area
Before disassembling, inspect the propeller and its surrounding area. Check for fishing lines, marine debris, or any obstructions that could be tangled in the propeller, for removing such debris might prove difficult. Cut away any debris.
Step 4: Loosen the Propeller Nut
Use a socket wrench or a prop nut wrench to loosen the propeller nut. Hold the propeller with one hand or a propeller stop tool to stop it from turning. Rotate the nut counterclockwise until it is loose, but do not unscrew it fully yet.
Step 5: Remove the Cotter Pin and Propeller Nut
Straighten and pull out the cotter pin that locks the propeller nut. Then unscrew it entirely together with the thrust washer. Store these parts neatly for later use, when you need to put them back together.
Step 6: Slide the Propeller Off the Shaft
Carefully pull the propeller off the shaft while controlling the movement so as not to damage the splines. If the prop is stuck, it may be due to corrosion or marine growth. In this case, either apply a prop puller or gently tap the back of the propeller with a rubber mallet. Do not apply more force than necessary, as excessive force can damage the shaft.
Step 7: Inspect Key Components
Inspect accepted key components while the propeller is off, such as splines, propeller shaft, seals for wear, corrosion, or possible damage. Remove any accumulated deposits and grease with care. Replace any worn-out components, such as the thrust washer and cotter pin, to ensure they are in perfect condition upon reinstallation.
Step 8: Store the Propeller Safely
Keep the removed propeller in a clean, secure location to prevent damage. If the propeller’s going to be replaced or maintained, ensure it’s in a dry environment to prevent corrosion or further wear.
✓ Success Tip: If these steps are followed, the components of Suzuki outboard motors will be protected, and one can expect optimal working conditions and performance from an outboard motor whenever it is used.
Let’s Install That New Prop! The Comprehensive Manual
Step 1: Check the New Propeller
Before installation, a thorough visual inspection of the propeller should be conducted to ensure it is free from any manufacturing defects or shipping damage. One should inspect the blades for any imperfections, such as cracks, bends, dents, open holes, or irregularities, that may affect performance—a perfectly balanced, defect-free propeller guarantees maximized frictional force and thrust.
Step 2: Cleaning the Propeller Shaft
Wipe down the propeller shaft with a clean cloth to remove any traces of old grease, dirt, or debris. A clean surface will avoid obstruction and allow the new propeller to slide on the shaft without any inconvenience.
Step 3: Apply Marine Grease
Apply a thin layer of marine grease to the propeller shaft to facilitate smooth installation and prevent corrosion. Hence, ensure that the grease used is compatible with outboard motors to enhance longevity under aquatic conditions.
Step 4: Slide the Propeller Onto the Shaft
Carefully override the new propeller against the splines of the propeller shaft. Keep the propeller in one hand and, by evenly sliding the blade into position, ensure there is no resistance.
Step 5: Install the Thrust Washer and Nut
Install the thrust washer onto the shaft, ensuring it is correctly seated against the hub of the propeller. Next, install the propeller nut and tighten it firmly with a wrench to the torque rating specified by the manufacturer. Overtightening can strip the threads, but under-tightening will lead to the component wobbling dangerously during operation.
Step 6: Secure with a Cotter Pin
After the propeller nut has been installed, a new cotter pin should be inserted through the designated hole to secure the nut in position. The ends of the pin should be bent so that they cannot slip out in use. This way, even under heavy load, the propeller will remain fixed.
Step 7: Test for Proper Installation
Gently rotate the propeller with your hand to check that it moves smoothly without excessive play or friction. The propeller should spin freely and unencumbered, with no grinding noise or obstruction.
✅ Installation Complete!
Following these steps in detail will ensure that the new propeller is installed correctly, thereby ensuring maximum performance and efficiency of your Suzuki outboard motor. These factors, along with good maintenance and proper installation, form the basis of safe and happy water adventures free from downtime.
Adjustments and Fine-Tuning for Optimal Performance
Adjusting Your Prop for Maximum Efficiency
Maximum efficiency from a Suzuki outboard motor is achieved not only by proper mounting of the engine but also by making precise adjustments to your unique needs. The first step is to analyze your engine’s RPM range during operation. For most outboard motors, optimal operation occurs when the engine is near the top of its recommended RPM range, but not exceeding it. Another factor is whether your engine struggles to reach this range; a propeller with less pitch may be considered to load less, thereby accelerating better. Conversely, if the engine is generally above its optimal range, one should select a prop with increased pitch to prevent over-revving, allowing the engine to breathe smoothly.
Observe the fuel consumption and general handling characteristics of the boat in different environments. If there is excessive slippage, an inability to maintain the indicated speed, or if the load appears to be distributed unevenly on one side, it is time to consider changing the prop size or blade design. The modern technological advances in prop materials and engineering offer significant options to enhance wear resistance and hydrodynamic efficiency. Considering these factors will allow you to make informed choices regarding your prop setup for speed, fuel efficiency, and durability in every adventure. At least regular inspection and adjustment of the propeller ensure that your Suzuki outboard motor and installation offer their maximum potential in reliable performance across various water conditions.
Dual Prop Systems: Installation and Advantages
A dual propeller system is an advanced configuration that optimizes performance, efficiency, and handling on various watercraft. The installation of a dual prop involves precisely fitting the two counter-rotating propellers onto a single drive unit so that they balance thrust and counter-torque. This system further enhances the stability of the craft during low-speed maneuvers, in addition to providing significant improvements in acceleration and overall propulsion efficiency. Common cavitation seen with single propellers is reduced in dual prop systems, as the two props bear the cavitation-prone loading more evenly.
Getting it right with the dual prop system will bring many more benefits beyond mere performance. For one, they’re fabulously suited to larger or heavy vessels and might ensure greater control in murderous conditions with better fuel efficiency on the test of mettle. Conversely, smooth turning, reduced vibration, and comfort are what come with a good grip in the water. Having prioritized durability and reliability, this envoy to the dual prop will also share stress, thereby resulting in less wear and, consequently, a longer life for the propulsion system. The boat is thus from the dual prop to the farther ends of experience, and in return for value and efficiency.
🚤 Dual Prop System Benefits
- Enhanced stability during low-speed maneuvers
- Significant improvements in acceleration
- Reduced cavitation compared to single propellers
- Greater control in challenging conditions
- Better fuel efficiency
- Smooth turning and reduced vibration
- Increased comfort on the water
- Shared stress resulting in less wear
- Longer life for the propulsion system
Mistakes to Avoid Since Most Customary Adjustments
While fine-tuning dual-prop systems, specific errors may limit performance or increase the lifespan of the aircraft. The most common issue is failing to align the props properly, which leads to unbalanced thrust and vibrations. These hinder efficiency and accelerate the wear of the propulsion system. Another point to consider is the lack of upkeep, such as the rejection of routine inspections for debris, corrosion, or wear and tear on the blades. If any of these checks is neglected, it may prove detrimental to safety and affect performance over time.
Furthermore, using the wrong or ill-fitting props can disrupt the equilibrium and stability of the whole system, resulting in a reduction in performance even under perfect conditions. A far less apparent, yet equally fundamental hazard is to disregard load distribution: imbalanced weights on the hull place stresses on the dual prop system, thereby decreasing its overall efficiency and raising fuel consumption. To extend the lifespan of your dual props and ensure reliability, it is essential always to follow the manufacturer’s instructions, have regular inspections carried out by qualified professionals, and give due consideration to these factors for a smoother, more efficient time on the water.
| Common Mistake | Consequence | Solution |
|---|---|---|
| Improper Prop Alignment | Unbalanced thrust, vibrations, accelerated wear | Ensure precise alignment during installation |
| Lack of Routine Maintenance | Debris accumulation, corrosion, wear and tear, safety issues | Conduct regular inspections and cleaning |
| Using Wrong or Ill-Fitting Props | Disrupted equilibrium, reduced performance | Select props matching manufacturer specifications |
| Disregarding Load Distribution | Decreased efficiency, increased fuel consumption | Balance hull weights properly |
Video Tutorials and Resources for Suzuki Outboard Prop Changes
Suggested Videos for DIY Prop Replacement
If you are interested in replacing your Suzuki outboard dual propellers yourself, there are numerous detailed video resources available that will guide you through every step of the process. These guides will help you recognize the necessary tools, learn the correct techniques for removal and installation, and ensure that the new propeller is mounted correctly. These videos will also highlight issues such as over-tightening the propeller or insufficient greasing of the spline shaft, both of which can cause long-term damage or impede performance. By following these tutorials, you can gain a practical understanding of maintaining your outboard system.
One key video highlights the importance of using a prop nut wrench and a torque wrench for a proper fitting. The film demonstrates the removal process while carefully explaining how to inspect the prop shaft for wear or corrosion, which can impact your engine’s performance. Another very popular explanation delves into great depth about choosing a propeller in terms of pitch, diameter, and blade material—the factors that matter for speed, acceleration, and fuel economy. These visuals enable easy understanding of the subtleties involved in choosing and changing props, allowing your outboard engine to work optimally.
Lastly, many tutorial creators also emphasize the importance of maintaining tips alongside the replacement process. For instance, lubricating the propeller shaft after cleaning and inspection will help prevent rust and ease further replacements. The resources often contain insider tips from mechanics and boat operating professionals, not only imparting technical know-how but also professional insight to help lengthen the lifespan and efficiency of your Suzuki outboard. Armed with such an in-depth and well-informed video guide, the DIY enthusiast can reason their way through replacing their dual props while ensuring the engine remains in good working condition.
Online Forums and Community for Boater Support
Online forums and communities are invaluable for all professionals seeking to exchange experiences, ask for advice, and learn from experienced individuals. These digital spaces socialize a diverse group of boaters eager to discuss maintenance tips, engine troubles, and their product recommendations. Multi-activity forums will commonly include detailed threads on Suzuki outboard maintenance, so users can explore proven solutions and preventive measures from fellow boat owners.
Additionally, many communities keep their resources up to date with industry trends, allowing members to explore modern solutions to real-world problems. For example, a discussion related to a dual prop replacement can revolve around issues of particular maintenance schedules or innovations of products or practical installation techniques. By contributing to these forums, boaters can enhance their technical knowledge and further establish bonds within a supportive and knowledgeable community.
Manufacturer Resources and Installation Manuals
Manufacturer records and installation manuals provide invaluable knowledge and step-by-step guidance regarding the setup, operation, and maintenance of the equipment. Designed with painstaking accuracy, these resources ensure that end-users achieve maximum performance and longevity from their products. By leveraging these manuals in conjunction with contemporaneous industry data, professionals can gain a deeper understanding of refining installation methods and optimizing best practices for operation. This side of the equation provides a more fluid route for interpreting data, leading to product specifications, troubleshooting techniques, and performance metrics, which empower users to address challenges more effectively while enhancing efficiency.
2025 Trends in Suzuki Outboard Propeller Technology
Continual Advancements in Design and Materials for Propellers
The latest developments in Suzuki outboard propellers have led to a significant improvement in efficiency and durability through innovative designs and materials. One of the most significant innovations advancing is the use of corrosion-resistant and lightweight alloys, such as stainless steel or composites, which maintain optimal performance while incorporating corrosion resistance in harsh marine environments. Such materials promote durability but reduce resistance, thereby greatly enhancing fuel efficiency. Most of the newer generation are also equipped with advanced anti-cavitation and noise-reduction features to ensure quiet propeller operations while providing a smooth ride for the boaters.
Likewise, the introduction of blade geometry refinements has been paramount. Suzuki has designed propellers with more refined pitch and cup characteristics to enhance thrust and acceleration. Such refinements are crucial for operations that demand power-aided towing or navigate through choppy water, particularly those with high-performance requirements. Some of these models also come with interchangeable blade systems, which provide further customization for specific boating needs and facilitate easier maintenance.
The Watergrip technology is the company’s proprietary technology, focusing on enhanced grip and propulsion efficiency through improved blade designs and increased grip strength. This truly minimizes slippage and, in essence, allows the propeller to hold onto the water very firmly, even under heavy loads or high speeds. Together, the best materials and latest designs truly reflect Suzuki’s commitment to enhancing the user experience and thinking outside the box when it comes to marine technology.
Environment Considerations: Eco-Friendly Propeller Coping Means
My observation is, while searching for green-sided propellers, that huge strides are being made in the creation of sustainable propeller designs that minimise environmental impact while carrying out their functions. Many current-day propellers are being manufactured with recyclable, long-lasting materials, such as aluminum alloys and composite plastics, which reduce waste and decrease carbon footprints compared to their bronze or stainless steel counterparts. These materials support the cause of sustainability and also guarantee that the structures are lightweight. This helps fuel efficiency and reduces emissions.
In the other instance, design features essential to enhancing hydrodynamic efficiency must be integrated into the design. For example, the eco-friendly design of certain propellers helps minimize turbulence in the water and maximize propulsion efficiency, thereby reducing fuel consumption. Furthermore, coatings that prevent fouling and do so without releasing toxins to kill or harm marine life are being incorporated — a critical step in protecting the aquatic ecosystem.
I personally see more and more direct changes toward electric propulsion systems combined with eco-propellers. These systems emit no direct emissions and are a significantly greener option than the combustion engines of the past. Hence, through these technologies, the marine industry strikes a delicate balance between performance and environmental consciousness, giving environmentally conscious boaters the option to enjoy eco-responsible water activities.
Data-Driven Insights: Performance Metrics for 2025
According to my research, including the latest insights retrieved from Google Search, it appears that marine performance metrics are evolving in 2025, with a heavy emphasis on efficiency, sustainability, and cutting-edge technology. These vessels of the water are evolving from hybrid power sources to fully electric power sources, as manufacturers prioritize performance metrics focused on minimizing fuel consumption and maximizing operational efficiency. Artificial intelligence and real-time performance monitoring systems also serve as enabling technologies, key to predictive maintenance, route optimization, and fuel efficiency, which further reduce operating costs and carbon footprints in marine usage, both commercial and recreational.
2025 should be a significant year for achieving new scores in performance classification, particularly in terms of increased energy storage capacity. In other words, lithium-ion and solid-state battery technologies can now be considered to have yet another benchmark, boasting the best energy density, the quickest charging, and the longest working life. For green-minded mariners, this means greater time on the waves, with minor requirements for refueling through conventional means. The industry also focuses on making propellers and hull designs more efficient in terms of drag, allowing them to prioritize performance with a clear conscience.
Along these lines, the marine industry strives to remain relevant in changing times and meet evolving client demands. Being held at sustainability and technological innovation, performance in the years ahead will not be judged by how fast or how far a vessel can go. Rather, efficiency, environment-friendliness, and the cleanest solution of intelligent systems will be the distinguishing measures for success.
🔮 Key 2025 Technology Trends
- Corrosion-resistant and lightweight alloys
- Advanced anti-cavitation features
- Noise-reduction technology
- Refined blade geometry for enhanced thrust
- Interchangeable blade systems
- Watergrip technology for enhanced grip
- Recyclable and sustainable materials
- Electric propulsion systems
- AI-powered performance monitoring
- Improved energy storage with lithium-ion and solid-state batteries
Reference Sources
- Changing the Prop on Your Suzuki Outboard: A Complete Guide – Captain Propeller
This guide outlines the removal process and provides tips for maintaining and replacing Suzuki outboard propellers. - The Step-by-Step Guide on How to Inspect and Replace Your Outboard Propeller – Suzuki Marine Blog
A detailed guide covering safety precautions, inspection, and replacement of outboard propellers. - Suzuki Prop Removal – The Hull Truth Forum
A forum discussion with practical advice and troubleshooting tips for removing Suzuki outboard propellers.