Changing a propeller on your Evinrude outboard may seem like a daunting task; however, with some appropriate guidance, it becomes a straightforward process that saves you time and money and keeps your boat running at peak performance. Changing a damaged propeller, upgrading for better performance, or just some general maintenance-it is a good skill to have for any boat owner. In this article, we shall walk you through a straightforward step-by-step procedure for changing your propeller safely and quickly. By the end, you should be able to confidently do this vital task to get your outboard set for the next water fest.
Understanding the Evinrude Outboard Propeller

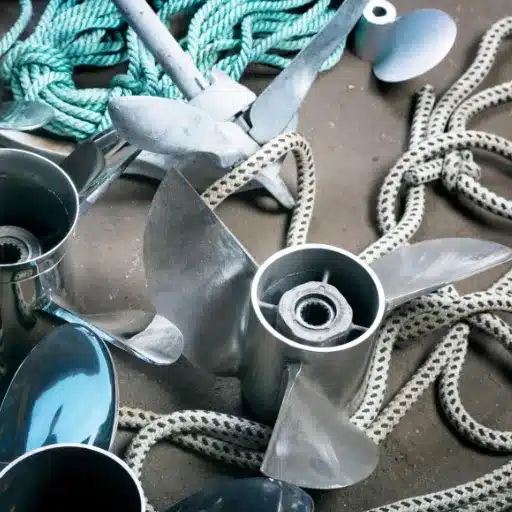
Types of Evinrude Outboard Propellers
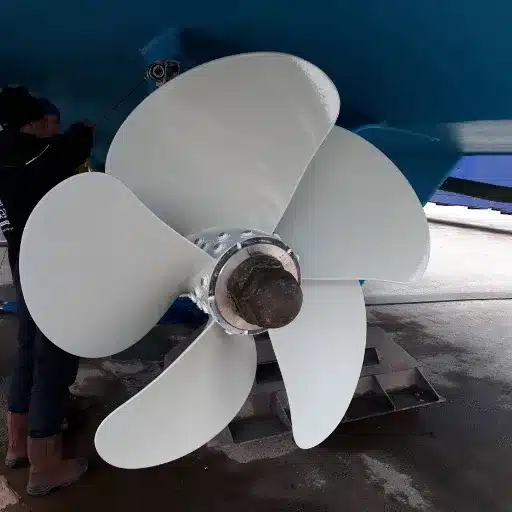
Evinrude outboard propellers come in various types for different boating considerations. The most common types are aluminum and stainless steel propellers. Aluminum propellers are lightweight, inexpensive, and suitable for recreational boating. They are suitable for the casual boater who cruises in still waters or who does not need highboat performance capabilities. However, the stainless steel propellers are more durable and provide greater performance. They perform great for high-speed cruising, pulling water skiers, or tough conditions because they resist damage well.
Another difference in Evinrude outboard propellers is in the fixed-pitch and variable-pitch design. Fixed-pitch propellers have a fixed blade angle and tend to be used widely because of their simplicity and reliability. They are low-maintenance and, thus, are suitable for general boating activity. Variable pitch propellers, however, allow changes in blade angle for more flexible performance and are most appropriate for boaters who find their water conditions or speed and power demands changing.
Evinrude also carries propellers with special features for better thrust and accuracy. A case in point is the high-thrust propeller that delivers maximum thrust and is an appropriate solution for larger boats or higher loads. Also, there are propellers whose blade geometries and coatings are designed for minimum fuel consumption and drag. The choice of the right propeller depends on your boating style, engine specifications, and requirements for performance; hence, it is extremely important that the type of propeller selected is the one that best suits your specific needs.
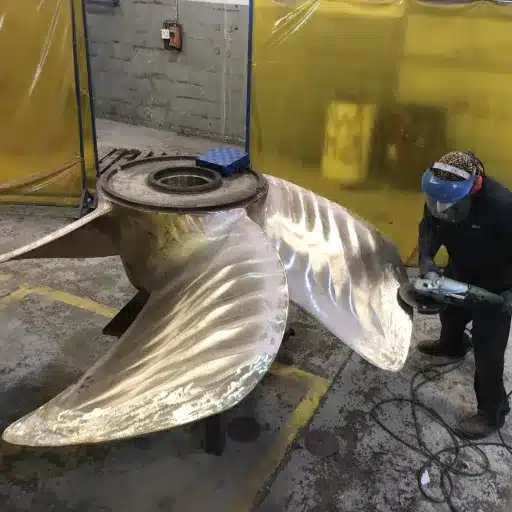
Importance of the Prop Shaft
The prop shaft can rightly be said to be the driving component in the propulsion system of a vessel. It connects the engine to the propeller and, essentially, is a method by which power is imparted for this movement. A dead prop shaft means there would be practically no rotation of the propeller, thereby making the boat immobile. It is that literal link that represents moving forward or backward by engine power; therefore, it becomes important for any boat operation.
With the right care and maintenance, the prop shaft will smoothly and efficiently transmit power, which soothes any wear, sparing the engine from harsh treatment, besides enhancing performance. Vibrations arise when prop shafts are either damaged or poorly aligned, lowering fuel efficiency, and causing damage to other components of the drivetrain. Regular inspection and maintenance of the prop shaft are needed to counteract any wear or corrosion that sets in, and to keep away from expensive repairs or breakdown.
The material and design of the prop shaft also contribute to its life and efficiency. With high-quality materials such as stainless steel, the shaft will resist corrosion and resist the torque exerted by the engine far better. Good installation and alignment can also greatly contribute to the life of the prop shaft, ensuring that it remains fit for purpose and ensures long-term reliance of the boat.
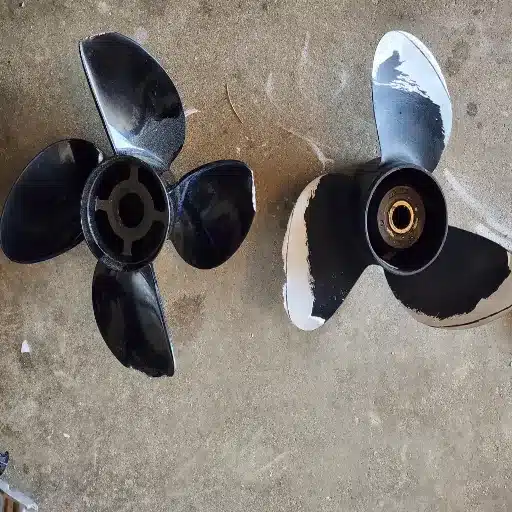
When to Replace Your Outboard Propeller
Changing the propeller of your outboard motor is necessary if you find some damages, poor performance, or improper RPMs. Any chip, crack, or bend along the blades is a sure indication that the propeller is compromised and should be renewed for proper and safe operation.
Performance in another respect is another symptom. Slow acceleration, slow top speed, or slow fuel consumption could be from an overly worn or damaged propeller. Over-revving may be a sign that your propeller is simply no longer suitable for your boat and engine set-up, or the engine may be struggling not to reach the ideal RPM range for its rating because of an unsuitable or worn prop.
Be vigilant in conducting regular checks to detect these issues at an early stage. Undertaking measures on time will not only prevent problems with optimal performance but also secure the engine from unnecessary strain.
Tools and Materials Needed for Propeller Removal
Essential Tools for Evinrude Prop Removal
The right tools assure a smooth and smooth process for propeller removal. Here is a list of tools that are considered necessary when working with the Evinrude propeller:
- Wrench for the Propeller: This is a special wrench made to ensure the nuts of the propeller fit into that wrench perfectly without any damage being done.
- Rubber Mallet: It helps gently free a jammed prop without introducing scratches and dents.
- Needle Nose Pliers: For the removal of cotter pins that usually lock the propeller nut.
- Grease or Lubricant: The best marine grease will serve for reassembly and protection against corrosion and seizing in future.
- Replacement Cotter Pins: Sometimes they get damaged in the removal process and should be immediately replaced for safety.
- Rags/Towels: To clean off the propeller shaft of any grease or grime or dirt.
- Socket Set: To loosen or tighten nuts of different sizes holding the prop to the shaft.
- Anti-Seize Compound: Provides additional protection against corrosion between the shaft and the prop hub especially in saltwater.
Having these tools ready before hand can fast-track the removal process and prevent unnecessary delays and damages to your prop or engine components.
Safety Gear and Precautions
During the propeller shaft work, safety must always be considered since tools are employed and there is a close interaction with mechanical components. Here, therefore, go some essential safety gear and precautions one needs to consider:
- Gloves: Durable gloves keep your hands from oily or greasy sharp edges. They also provide proper grip when using tools or handling the propeller.
- Eye Protection: Always wear safety glasses or goggles to ensure your eyes are safe from flying debris, rust particles, or an occasional slip of a tool.
- Anti-Slip Footwear: Use non-slip and waterproof shoes in order to avoid slipping when the deck is wet or unstable.
- Secure Work Area: Make sure that the boat is stable and secure down there before you start. If on land, ensure that it is well chocked or on a secure trailer so that it cannot move.
- Emergency Readiness: Have a first aid kit and fire extinguisher nearby should any untoward incidents occur.
Anybody having these in place with the proper equipment will minimize risks and guarantee a smooth and safe maintenance experience for the propeller.
Step-by-Step Guide to Propeller Removal
Preparing Your Outboard Motor
Your outboard motor must be prepared before removing the propeller. Follow the steps below for proper preparation:
- Turn off the Engine and Disconnect the Battery: Make sure the engine is completely off, and the battery is disconnected to avoid accidental starts. This will prevent any hazards during maintenance.
- Raise Motor: If access to the propeller is limited, tilt or raise the motor appropriately to provide more local room to work and less strain.
- Check the Area for Debris: Ensure any debris or entanglement around the motor and propeller that could obstruct removal is kept clear.
- Gather Your Tools: Keep the necessary tools handy, including a wrench set, pliers, and a propeller nut socket, to ensure a smooth removal process.
- Apply Lubricant: If the propeller seems to get stuck or resists removal, apply a marine-grade lubricant to gently loosen the components.
Properly preparing your outboard motor will save time and help keep the equipment from unnecessary wear and tear during the maintenance process.
Removing the Old Propeller
- Ensure Safety First: The key should be taken out of the ignition. In some boats, raising the throttle to neutral will ensure safe handling of the propeller.
- Check for Damage or Further Debris: Should one notice fishing lines, weeds, or anything else that can hinder the prop removal, carefully clear the obstruction so as not to make further problems.
- Loose Nut: Hold the propeller firmly to stop it from spinning while you are loosening the thrust nut with a propeller nut socket that is counterclockwise turning.
- Remove Washers and Hardware: Slide off the nut and washers or other hardware as well. Be mindful of their order for proper reassembling later.
- Pull the Propeller Off: Slide the propeller smoothly off the shaft. If it seems tight, a little marine-grade lubricant may help. Also, gently hit it on the backside with a rubber mallet to ease its removal.
- Inspect the shaft: After removing the propeller, clean the prop shaft and check it for wear, corrosion, or damage.
Using the process above, safely and efficiently removing the old propeller will prepare the installation of the replacement to regain its performance.
Inspecting the Prop Shaft and Hardware
One must pay great attention during propeller shaft inspection and examination of the accompanying hardware to ensure the propulsion system’s longevity and performance of one’s boat. Start by checking for any pitting, scoring, or uneven wear on the propeller shaft, as those can be indications of misalignment or improper lubrication. With a caliper, measure the diameter of the shaft at various points to ascertain it conforms with the manufacturer’s specifications.
Inspect hardware, including the keyway and key, for any deformation, cracks, or wear and discard any that fail to meet standards. Check the locking nuts, cotter pins, and other securing means for rust or damage-they should ensure a secure fit. Also, check that the coupling of the shaft lies in full alignment with the coupling of the engine since misalignment of the two couplings can lead to vibrations that reduce efficiency and damage the components in the long term.
Before installing the propeller, ensure that the component is devoid of dirt, grease, or marine growth. A clean shaft and hardware go a long way in smooth operation and ultimate performance of the boat. If any abnormalities are found in the course of the inspection, engage a professional for repairs before they possibly pose a safety risk or cost you extensively in damages.
Installing a New Outboard Propeller
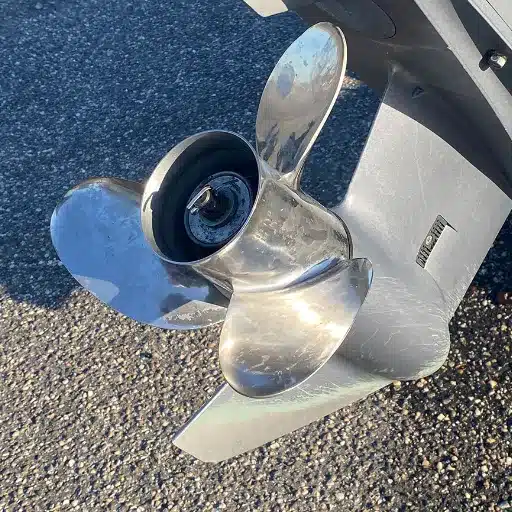
Selecting the Right Evinrude Prop
While selecting Evinrude boats propellers, the considerations of engine type, weight of craft, and use need to be taken into account so that best performance can be decided. Evinrude manufactures several propellers to suit various activities in boating, varying from cruising fast to towing and fishing. Pitch of the propeller is the main factor in determining speed and power of the boat. Low pitch propellers accelerate faster and have greater pulling power; they are ideal for towing heavy loads. Contrarily, the higher pitch propellers go faster. Hence carefully study your boat’s needs and select propeller specifications fitting those needs.
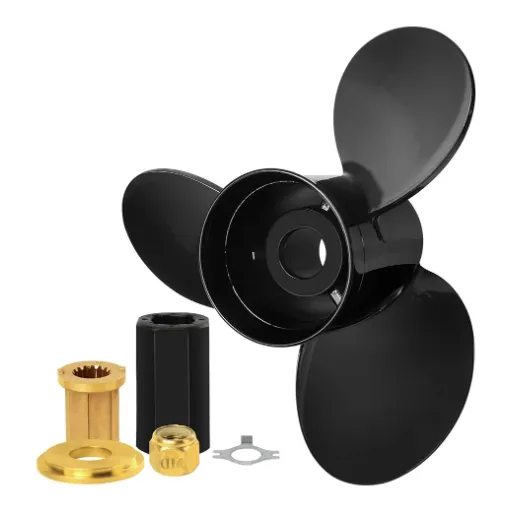
The composition of the material from which the propeller is made is another important consideration for it greatly influences performance and wear. Aluminum propellers are lightweight and less expensive; thus, casual boating purposes are therefore suited to them. But stainless steel propellers resist wear and corrosion better; they suit situations requiring more rigorous treatment or for performance-above-average conditions. Know the conditions under which you use your boat most often; that consideration will help decide the propeller material.
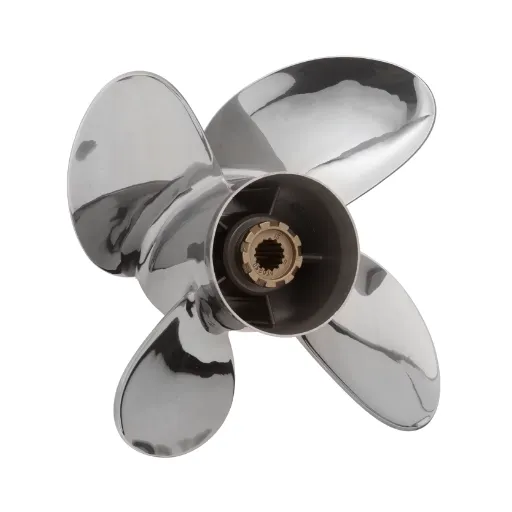
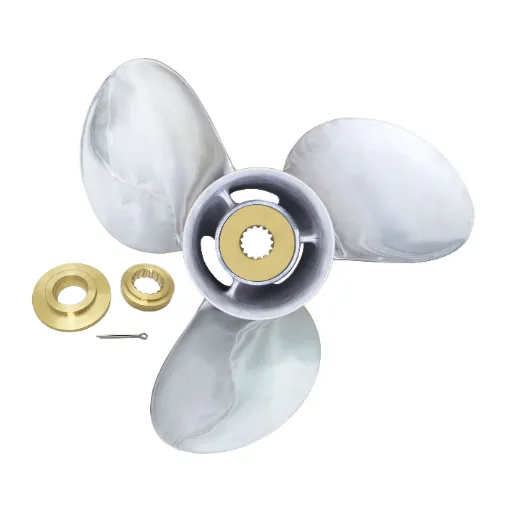
Next, look at blade number and diameter. A three-bladed propeller is common and is said to maintain an acceptable speed and efficiency for general-purpose boats. Conversely, a four-bladed propeller might be desirable for better handling or stability with heavier loads. The diameter of the propeller is also vital when thrust and performance are concerned; thus, it is suggested that you check your engine specification to know which diameter is right for you. Choosing the right Evinrude prop will guarantee that you stay at peak performance with smooth and efficient running between.
Step-by-Step Installation Process
- Tools and Supplies: Before installation, collect the necessary tools from the following list: a wrench, pliers, a block of wood, and marine grease.
- Place the Boat Securely: You should secure your boat on the trailer or lift it from the water to make it a comfortable and safe working atmosphere. For an extra level of safety, consider placing chocks or supports.
- Removal of the Old Propeller: Put a block of wood in the space between a propeller blade and the gear case to keep it from turning. Using the wrench, loosen the prop nut by twisting it counterclockwise, remove the nut followed by the washer and the old propeller, and inspect the shaft and hardware for any damage.
- Inspect and Clean the Propeller Shaft: Clean the propeller shaft of any debris and corrosion. Look out for wear and tear, for such may affect the performance of the new prop.
- Marine Grease Application: Apply a light coating of marine grease on the propeller shaft. This helps in preventing corrosion of the shaft and also aids the eventual removal of the propeller during maintenance.
- Installation of the new propeller: Slide the new Evinrude propeller onto the shaft, making sure it is aligned correctly. The washer is then fitted onto the shaft and the prop nut threaded onto the shaft. The nut should be securely tightened with a wrench, but over-tightening should be avoided since that may cause damage.
- Secure the Prop Nut: The cotter pin is inserted into the hole of the shaft and bent securely to prevent it from loosening during operation. If your propeller employs a locking tab or any other securing device, follow the manufacturer’s instructions for correct installation.
- Final Check and Testing: Ensure that everything is tightened and aligned properly. Lower your boat back in the water for a test-run to check that the new propeller performs smoothly and efficiently.
In following the above steps, you confidently install a new Evinrude propeller to gain optimized performance on your boat and maximize the lifespan of your marine equipment.
Tightening and Securing the Propeller
The trick here is about proper tightening and securing of the propeller, which ensures correctness and efficiency in operation of your boat. To begin, fully slide the propeller on the shaft, aligning it carefully with the splines. Place the thrust washer and then the propeller nut onto the shaft. Using the torque wrench, tighten this nut to the torque specifications set out in the manual. To over-tighten can cause damage to the propeller or the shaft; to under-tighten can allow the propeller to loosen or fly off during operation. Correct torque ensures the maintenance of your marine gear in good condition.
For even greater security, fit a new cotter pin through the hole in the propeller shaft. Bend the ends outwards to lock it in place, preventing the nut from turning loose. If the lock is a tab washer instead, ensure those tabs are securely folded against the nut. Regular inspection as part of the maintenance routine will confirm they have not deteriorated over time, for if they have, the weakened or corroded parts will preciously contribute to the instability of the propeller.
Last but not least, dry-install a thin layer of marine grease at the prop shaft; it shall guard against corrosion and help ease future prop replacements. Simultaneously, examine the shaft for any fishing lines or trash caught around it, as nothing can be more detrimental and cause damage than throwing everything aside. After finishing these steps, the propeller should be securely and perfectly installed for optimal performance in the waters. Double-check every single component before following up with a test run, as every least thing left unchecked might jeopardize the entire boat safety.
Troubleshooting Common Propeller Issues
Identifying Performance Problems
When I notice that performance is going down, the very first thing I would observe with pin-drop attention is the engine’s behavior. If it over-revs without moving the boat as efficiently as it should, then it means a damaged or worn-out propeller. Sometimes, I would also try to find cavitation occurrences—that being when air bubbles are forming around the blades—which would create vibrations and reduce thrust. With one slight nick, one dent, or an unevenly ground surface on the blades of the propeller, these problems can arise.
Another frequent type of problem I run into is keeping a steady speed going. If the boat has difficulty accelerating properly or suddenly feels sluggish, then I begin suspecting improper size or pitch of the propeller. I would also be checking in the propeller hub for any sign of slipping as this, then again, could stop power transfer from the engine. Detecting these kinds of troubles ahead gives me the chance to sort them out before furthering into.
One last thing I would make sure to check for would be anything physically obstructing or wrapped around the propeller. Fishing lines, seaweed, or any sort of debris can easily wrap around the shaft and cause strain and inefficient operation. Most of the time, just inspecting and cleaning the prop would solve these problems. Periodical maintenance along with a keen eye would ensure that my boat runs smoothly and effectively.
Addressing Misalignment Issues
When any of the boat components become misaligned, especially the propeller shaft, inefficiencies start creeping in, and the problem worsens with time. If the shaft is not correctly aligned with the engine or the bearings, there will be vibrations and abnormal noises, speedily taking away the life of the bearing, shaft, and couplings. In that case, the noises cannot be dismissed since these discomforts impair operational efficiency and may contribute to eventual irrevocable damages from which the investments yield expensive repairs. Regular inspection and alignment checks will certainly get the vessel into good health.
Another step to take before proceeding is to check the engine mounts. Loose or worn engine mounts can put even a slight shift on the engine, enough to cause shaft misalignment. Adjusting or replacing the mounts can help resolve the problem. Also, checking the alignment with the help of the feeler gauge or an alignment laser can expose any gap present in the shaft alignment. Properly aligning these elements decreases the amount of stress placed on the engine and the propeller shaft system.
Preventative approaches are the key factors for long-term solutions to misalignments. For example, the alignment can be checked during the periodic maintenance schedules to catch early faults and make them prohibitively expensive to repair. Keeping a record of vibration levels, unusual sounds, or altered performance changes does provide useful information for diagnosing a misalignment problem. Going pro-active corrects operations with the supporting modern diagnostic tools on the boat and lessens the chance of an unexpected breakdown.
When to Seek Professional Help
At times, professional help is necessary to uphold the boat’s performance and ensure the safety of those in the water. If any vibration seems to persist or worsen, excessive noise is present, or there’s a noticeable drop in fuel efficiency, then you may be facing a more serious condition that warrants expert advice. The professionals have the know-how to assess those complicated situations that basic troubleshooting will not unravel. When you pay no attention to these signs, you might be inviting irreparable damage along with expensive repairs and a threat to operational safety.
Any removal of a major component calls for professional repair. For example, the alignment issue would require either shaft or engine adjustment, thereby necessitating the services of a certified marine mechanic. These technicians use sophisticated diagnostic gear like laser alignment equipment and digital vibration analyzers for the accurate identification and remediation of severe misalignment problems. Their experience is guaranteed to ensure the repairs are done correctly such that they prevent any future failures and guarantee the continued longevity of the boat.
If one is preparing to cruise for long distances or operate the boat under heavy loads, professional inspection is certainly recommended, as any kind of stress could aggravate minor troubles and lead to unexpected breakdowns or serious damage. Modern diagnostics, when teamed with data and maintenance record insight, allow professionals to come up with the right solutions that keep your investment protected and let you enjoy your time on the water trouble-free.
References
- Evinrude Service Manuals Collection – Stony Brook University
This collection of service manuals provides detailed information on various Evinrude outboard motor models, including maintenance and propeller replacement. - Johnson Evinrude Manual 1971-1989 – University of Iowa
This manual covers various models of Johnson and Evinrude outboard motors, offering guidance on inspecting and replacing propellers. - Evinrude Spare Parts and Training – SAM.gov
A government resource detailing spare parts and training for Evinrude outboard motors, including propeller-related components.
Frequently Asked Questions (FAQ)
Q: What tools do I need to change the propeller on an Evinrude outboard?
A: To change the prop on an Evinrude outboard, a propeller wrench and pliers, a rubber mallet, and maybe a socket set are needed. Having a service manual for your particular model at hand is also of great assistance.
Q: How does one remove and install a propeller on an Evinrude outboard?
A: To remove and install a prop on an Evinrude outboard, first ensure the engine is off and in neutral, then unscrew the prop nut, take out the cotter pin and prop nut, and pull the prop off the shaft. Fit the new prop onto the shaft, replace the prop nut, and reinstall the cotter pin.
Q: What should I check before installing a new prop?
A: Always check for damage or corrosion on the propeller and shaft before installing a new propeller on the Evinrude outboard. You should also check that the o-ring and seals are in good condition, or else there may be a leak.
Q: Can you tap the propeller into place with a rubber mallet?
A: Yes, using a rubber mallet helps to knock in the prop gently, avoiding any damages to it. Just be sure the prop is aligned properly on the shaft before tapping.
Q: How often should the propeller be changed on my Evinrude outboard?
A: You should inspect the propeller regularly and replace it if you find it worn, damaged, or after it has hit something. Also, with 20 years of service by your outboard, it may be time to change to a new propeller to obtain good performance.
Q: What do I do if the propeller nut is stuck?
A: The same thing. Try pliers or a propeller wrench, if that doesn’t work then a little penetrating oil might help. Do not get the oil or dirt into the threads or you will have problems later.
Q: What is the function of the shift rod in the removal of the propeller?
A: The shift rod connects a gear shift to the lower unit. During removal of the propeller-the shift rod must be in the proper position and not interfere with the removal of the propeller.
Q: How do I then ensure that my Evinrude Outboard is ready to go back in the water after I have changed the propeller?
A: When replacing the propeller, verify twice that the propeller nut is fully tightened and the cotter pin has been installed properly, then inspect the lower unit to make sure that no leaks are occurring. Once done, everything should be set up for the outboard to be launched back into the water.
Ready to Get Back on the Water?
With these comprehensive steps and safety guidelines, you’re now equipped to confidently change your Evinrude outboard propeller and keep your boat running at peak performance!