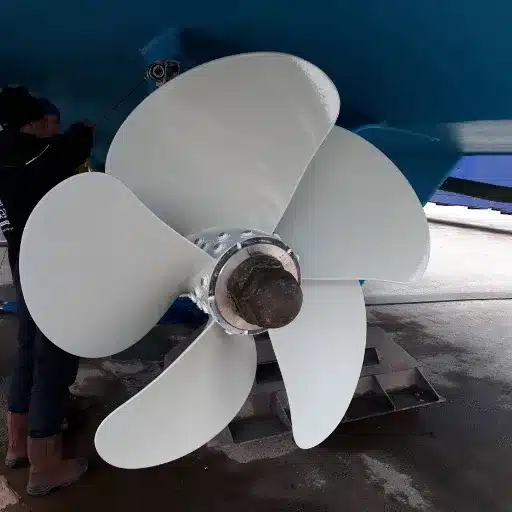
Changing the propeller on a Yamaha outboard may sound like a daunting task. Still, it is essential for maintaining the highest level of performance and, consequently, ensuring a longer engine life. Whether a boating expert or just beginning their marine journey, knowing the right way to approach it will save the person a lot of time and subsequent money, not to mention the frustration on the water. This guide comprehensively walks you through the entire process of replacing an outboard propeller for the 2025 model year, highlighting essential maintenance tips, ways to improve performance, and safety precautions. By the time you finish reading, you will walk away with a proper set of confidence and knowledge to change a Yamaha outboard propeller like a pro and simultaneously enhance your overall boating experience. So, shall we?
Understanding the Importance of Propeller Replacement
Regular Replacement of Yamaha Outboard Propellers: Necessity
Regular replacement of your Yamaha outboard propeller is necessary to maintain peak performance and fuel efficiency, and to ensure the utmost safety while on the water. Propellers are subject to wear and tear, due in part to physical impacts, corrosion, and general use. This explains that it reduces thrust and additional work on the engine. A damaged or inefficient propeller will, in fact, consume more fuel and slow you down, resulting in an economic burden in the end.
Another key consideration is to ensure that the propeller’s pitch and size are matched for your boating conditions. A poorly functioning propeller will not only reduce speed and performance but also damage the engine, resulting in significant repair costs. Changes in propeller designs and materials offer you an option to upgrade for increased speeds and smoother rides, in addition to fuel savings.
With the propeller condition constantly monitored and replaced when necessary, you basically guarantee a smooth and efficient boating experience. During maintenance, this would be a very significant yet often overlooked step that contributes to outboard engine longevity and ensures a pleasant and safe trip for the customer.
The unusual good work, however, was the destruction and corrosion of some parts in this area. If the propeller is not maintained correctly, it will result in reduced speed, increased fuel consumption, and higher stress on the engine. A minor nick or dent on a propeller blade may be enough to disrupt the water flow, impair propulsion, and require the engine to work harder to deliver the necessary performance.
Studies show that an efficient and reconditioned propeller can increase fuel efficiency by 10%, resulting in cost savings and a reduced environmental impact. The right choice of material and design, such as stainless steel for durability or aluminum for lightweight efficiency, also contributes to this significant degree of benefit. At the same time, the size and pitch of the propellers greatly influence acceleration, stability, and rpm efficiency when matched to a Yamaha outboard engine specification, ultimately ensuring a smooth boating experience.
Regularly inspecting the propeller, followed by timely repairs or replacements, extends beyond merely preventive measures and becomes an investment in your boat’s increased worth and safety. By looking after your propeller, you will always have a high-performing engine and many fun outings on the water.
Signs Indicating It’s Time to Change the Propeller
A worn or damaged propeller can significantly impact your boat’s performance, safety, and operational efficiency. Here are some signs to look out for, which may indicate it’s time for replacement:
- Reduced acceleration and speed: Should there be any placing of charges against the engine for delays in acceleration or loss of topend speed, despite good engine maintenance, improper propellers could be a contributing factor. Decreased performance is often due to damaged or worn-out blades.
- Unusual vibratory or noise: Excessive vibrations or odd noises during operation can result from irregular blades or bent edges. Somewhere in this drama, comfort is the first casualty, but an adequately protected engine surely tastes this strain with time.
- Difficult Maintaining RPMs: If you are struggling to achieve or maintain your engine’s optimal RPM range, this is a red flag for a propeller change. This can be brought on by the pitch of the propeller or by distortion therein.
- Visible Damage or Corrosion: Any cracking, denting, or corrosion on the blades would almost certainly indicate wear. Even a minor imperfection can affect hydrodynamics and demand immediate attention.
- Increasing Fuel Consumption: If your boat starts consuming more fuel to travel the same distance or perform the same task, it could simply be inefficiency brought on by a poorly functioning propeller.
- Incorrect Fit or Frequent Slippage: If a loose fit is probable or slippage is observed during the time of propeller operation, it simply means that the correct replacement needs to be purchased. Either way, neglecting this will cause damage to the engine’s drive system over time.
Making your own checks and ensuring maintenance whenever these signs occur benefits the lifespan of your propeller and engine, as well as providing efficient and safe boating experiences.
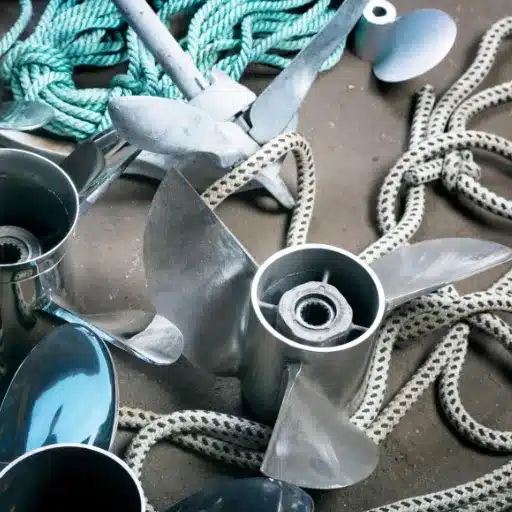
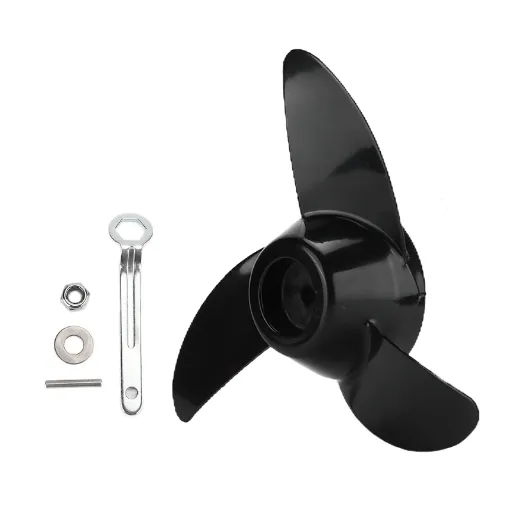
Tools and Materials Needed for Yamaha Outboard Propeller Replacement
Tools Required for Propeller Replacement
Having the right tools on hand ensures a smooth, efficient Yamaha outboard propeller replacement process. Below are the essential tools you’ll need during the procedure:
🔧 Propeller Wrench
A special tool to remove the prop nut and apply the knob back securely; hence, it must fit perfectly to avoid damaging the nut or propeller shaft.
⚙️ Torque Wrench
To tighten the propeller nut to the manufacturer’s recommended specifications, a torque wrench must be used to apply the exact torque.
🔩 Socket Set
A complete socket set provides easy access and the ability to use various nut sizes or bolts in the assembly.
🔨 Propeller Puller
If the props have been wedged too tightly, this puller is used to remove the prop without causing any damage.
🛢️ Marine Grease
The marine grease acts to prevent corrosion on the propeller shaft, thereby facilitating even installation and removal on a later date. Therefore, ensure that the grease used is of the finest, waterproof quality.
🔨 Rubber Mallet
It helps to tap components into position and ensure alignment without damage, gently.
🪚 Screwdrivers
A simple flathead screwdriver can be handy for removing any spacers or retaining items on the shaft.
These tools help to enhance the replacement process, decreasing the chances of mistakes while fostering the good reputation and efficiency of the Yamaha outboard motor. Being well prepared allows for an easy process and excellent engine performance for many trips on the water.
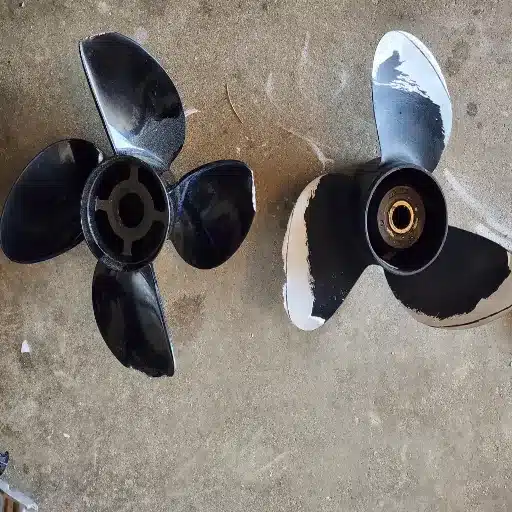
Choosing the Right Yamaha Propeller: OEM or Aftermarket?
Choosing the perfect propeller for any Yamaha outboard engine is vital for optimal performance, fuel economy, and overall boating satisfaction. Several factors influence the decision between OEM and aftermarket propellers, including price, reliability, and customization options.
✅ OEM Propellers
Yamaha OEM propellers have been carefully designed and tested to meet the exact engineering standards required by Yamaha outboard motors. These propellers, therefore, fit perfectly and are compatible, thus giving consistent performance. Usually, they are made from high-quality materials, such as stainless steel or aluminum, which provide durability and resistance to wear in saltwater conditions. They can carry a higher price tag than aftermarket options, but their value lies in long-term reliability and performance.
⚡ Aftermarket Propellers
These propellers are manufactured by third-party companies, offering a significantly wider range of materials, designs, and prices. They are attractive to people who want to experiment with different pitches, diameters, or blade distributions as a means to maximize a specific aspect of their boat’s performance, such as speed or acceleration. Quality varies significantly among aftermarket propellers, and one must be very careful when choosing. Improperly made options could lead to inefficiencies or, over time, outright damage may also be inflicted upon your outboard motor.
💰 Cost Comparison and Performance Metrics
The cost of aftermarket propellers is usually lower than that of OEMs; however, in marine applications, fuel efficiency and reduced vibrations due to improved operability often favor OEMs. On the other hand, the cost savings aspect and slight performance alteration offered by new propellers may involve a lot of trial and error to get it right. For instance, a test carried out between a Yamaha OEM stainless steel propeller and a cheaper aftermarket aluminum propeller revealed that the OEM propeller showed a better top-end speed and fuel efficiency upon extended use, while the aftermarket one performed well in shallower water.
Ultimately, selecting OEM or an aftermarket propeller is a matter of budget, performance objectives, and maintenance preferences. OEMs, of course, have always been the top choice for the plug-and-play solution with guaranteed compatibility. Yet, boats willing to invest more hours in research might find that aftermarket products suit finetuning their craft’s performance better.
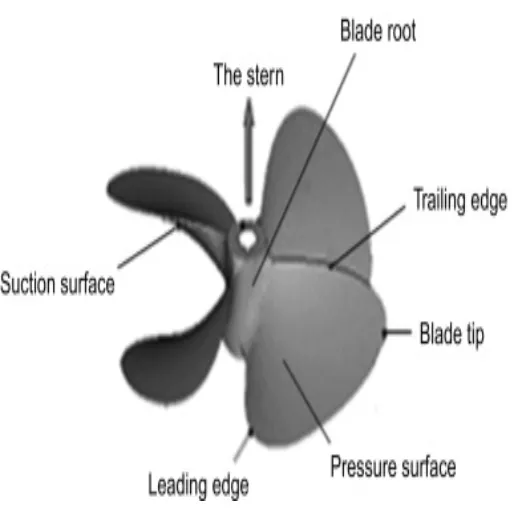
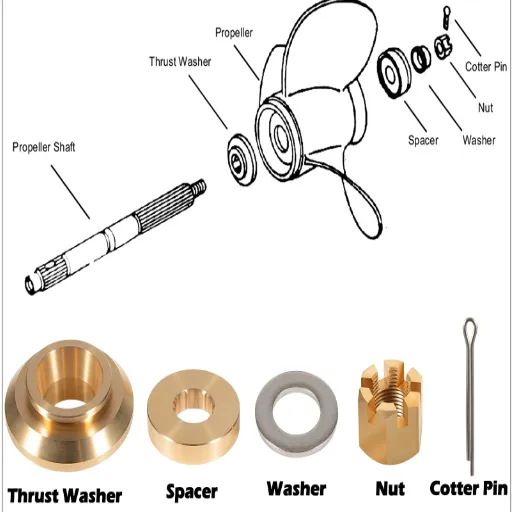
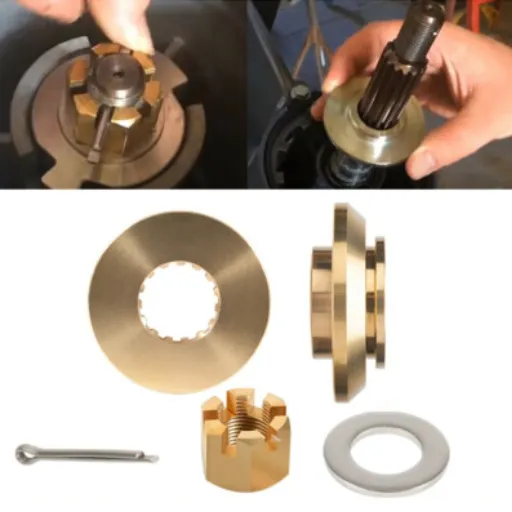
Understanding Propeller Components: Nut, Thrust Washer, Cotter Pin, and Spacer
The parts of a propeller ensure that the propeller is securely fastened and operates at peak performance. Here is a detailed list of these crucial parts and their descriptions:
🔩 Propeller Nut
The Propeller nut fastens the propeller to the shaft and retains it during operation. Historical types are made of difficult materials, such as stainless steel and brass; the nut should be fitted tightly enough to prevent loosening under vibrations. The nut must be tightened according to the manufacturer’s torque specifications for safe and reliable operation.
⚫ Thrust Washer
From the underwater side of the thrust washer, water pressure and engine thrust act through it. It distributes the forces produced by the propeller to the shaft, interfering with proper alignment and causing uneven operation, as well as a reduction in the drivetrain’s lifespan.
📎 Cotter Pin
One of the most minor yet crucial components of any assembly, the cotter pin is inserted through the propeller nut and the shaft to prevent the nut from backing out during operation. Made from corrosion-resistant materials, the cotter pin provides an additional state of security as a failsafe mechanism.
🔲 Spacer
Spacers maintain clearance between the propeller and other parts, such as those of the strut or gearcase. Proper spacing prevents components from interfering with each other, which could impede operation or even damage the system. They are typically designed to accommodate precise configurations of propeller and shaft.
If fitted and maintained correctly, these components ensure that your boat is running properly and safely. These parts should be inspected regularly for wear, corrosion, and damage to ensure optimal output, performance, and safety.
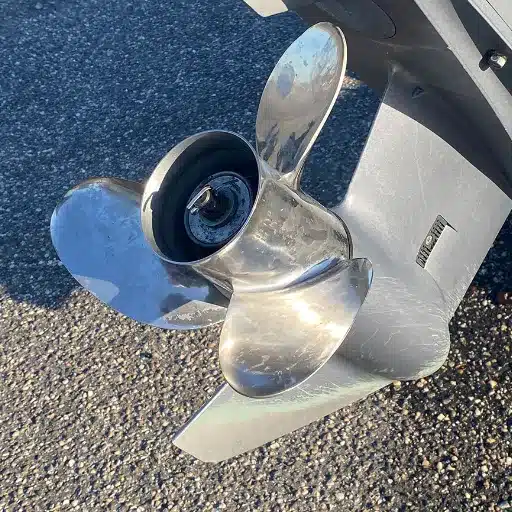
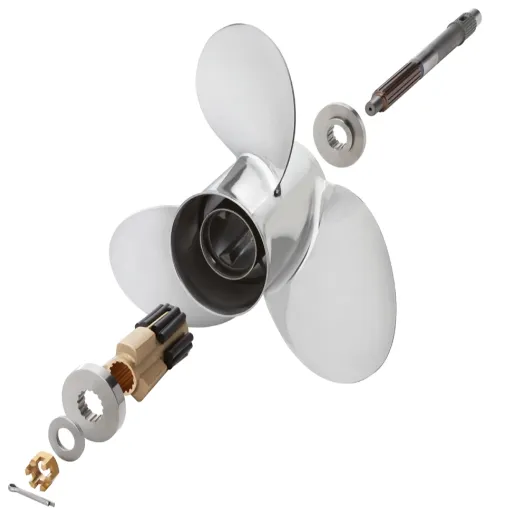
Step-by-Step Guide to Replacing Your Yamaha Outboard Propeller
Preparing for Propeller Replacement
🚤 Safety First: Pre-Replacement Checklist
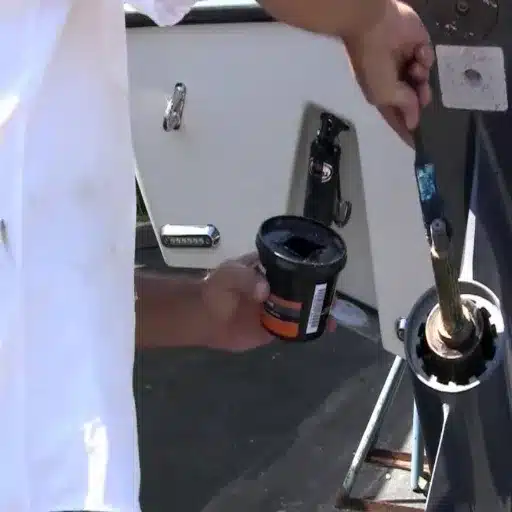
Propeller replacement for a Yamaha outboard requires adequate preparation to assist in an easy and safe process. Turn the engine off and disconnect the boat battery to prevent accidental starts. Ensure your boat is either docked or on a trailer to stabilize it during the replacement process. Collect all the tools necessary: a light socket wrench, gloves, marine grease, and a new propeller that conforms to your boat’s performance specifications.
Inspect for dents, cracks, or excessive wear, any of which can hamper the complete rotation of the prop and may affect thrust efficiency. Also, check the propeller shaft for fishing lines or debris that can obstruct it. Apply marine grease on the propeller shaft to ease the replacement process and prevent corrosion. Adhering to this procedure will yield a safer and more efficient experience when replacing your Yamaha outboard propeller.
Removing the Existing Yamaha Outboard Propeller
-
1
Safety Preparation: Start by ensuring that the engine is off, and the key must be removed from the ignition to prevent accidental engagement. Place it securely upward; this will make it easy to reach the propeller.
-
2
Remove Cotter Pin: Then identify the propeller nut that usually has a cotter pin for a locking mechanism. Using needle-nose pliers, straighten and remove the cotter pin. With a locking tab washer, simply use a flathead screwdriver to bend the tabs back gently.
-
3
Loosen Propeller Nut: After removing the cotter pin or its locking mechanism, a socket wrench must be used, selecting the correct size to loosen and unscrew the propeller nut. The propeller blades should be firmly held during this operation to ensure harmonization with the use of a propeller wrench, which provides better leverage and blade protection.
-
4
Remove Propeller: Upon the removal of the nut, and if there is no resistance from debris or corrosion buildup, the propeller should be slid off the shaft very carefully. If the propeller does not slide off freely, look for fishing lines or other material twined around the shaft and remove them gently.
-
5
Organize Components: Remember to keep track of all components, such as thrust washers, spacers, and the nut, arranging them in the order in which they were removed for easy reinstallation. Cleaning down the shaft and the surrounding area at this step will provide a clean planting surface for the new propeller, while also preventing any mechanical problems further down the road.
Following these steps makes the removal process extremely smooth and stress-free, setting the Yamaha outboard motor up for further optimal performance once the replacement propeller is installed.
Installing a New Yamaha Outboard Propeller
-
1
Prepare the Shaft: When installing the new Yamaha outboard propeller, apply a thin coat of marine-grade grease to the propeller shaft first to ensure smooth operation and prevent future corrosion.
-
2
Install the Propeller: Slide the new propeller on to the shaft with care, aligning it with the splines. Ensure the propeller sets snugly without applying force, as this could damage the shaft or propeller hub.
-
3
Replace Components: Next, reinstall the thrust washer and spacers in their correct order, using your owner’s manual for reference if necessary. These components maintain the balance and enable the prop to rotate efficiently.
-
4
Tighten the Nut: In perfect alignment, the nut should be threaded on the shaft by hand to avoid cross-threading. Apply the use of a torque wrench to tighten the nut to the manufacturer’s recommended specifications for secure fastening and optimal propeller movement.
-
5
Secure with Cotter Pin: Finally, secure the propeller by installing a new cotter pin through the nut and shaft. Bend the ends outward to secure them in place. This prevents the nut from loosening during operation. Once everything is locked in, spin the propeller manually to check if it’s free.
The installation of the new propeller on your Yamaha outboard must be carefully and precisely followed to achieve peak performance on the water. Always double-check that all components are securely fastened before using your motor.
Best Practices for Yamaha Outboard Propeller Maintenance
Regular Checks and Maintenance Tips
Keep your Yamaha outboard propellers maintained to ensure performance under warranty and to avoid costly repairs later. Consistent inspections will prevent potential problems from escalating out of control.
🔍 Visual Inspection Guidelines
Start by inspecting the propeller regularly for any signs of damage, such as dents, cracks, or bends, which often occur when the propeller strikes underwater debris. Even the slightest nick can cause engine efficiency to drop by a few percentage points over time.
Ensure that fishing lines or weeds are not wrapped around the propeller, as they may twist onto the shaft, potentially damaging the seals or allowing water ingress. Check the propeller hub carefully, as wear can cause it to slip, resulting in reduced thrust.
🛠️ Preventive Maintenance
Good maintenance will ensure that corrosion is prevented by applying marine grease to the propeller shaft. This grease also helps in the easy removal of the propeller in the future. Checking the torque of the propeller nut periodically ensures that the nut remains tight during operation.
For optimal performance, the propeller is best inspected and possibly replaced at the beginning and end of each season by experts. For a more in-depth inspection, one can have it professionally evaluated every few seasons, providing a precise view of the overall health of the propeller and engine.
These maintenance practices will extend the life of the propeller, thus ensuring that your Yamaha outboard motor remains as efficient as it is reliable.
How to Store Your Outboard Propeller Correctly
Proper storage of your outboard propeller is the best way to preserve its condition and, thereby, ensure its long-term performance.
🧽 Cleaning Process
First, give the propeller a thorough cleaning with mild detergent and water, as salt, dirt, and corrosive substances can damage it. Any dings, cracks, or other damage noticed during inspection must be addressed before storage. After cleaning, drying should ensue to prevent the development of rust or corrosion during storage.
🛡️ Protection Application
Protecting the surface of the propeller requires a very light application of marine grease or an anti-corrosion spray. This is especially important if storage hours are set in a humid environment.
🏠 Storage Location
Mark the inventory in a dry, cool place, away from direct sunlight and any extreme temperatures that could warp or damage its materials. You can also store it in a padded storage bag or wrap it with any soft material to protect against scratches or damage.
⚠️ Safety Considerations
Once removed from the engine, ensure the propeller is safely stored to prevent accidental mishandling.
By following these procedures, the owner helps increase the life of the outboard propeller and is ready to enjoy an easy boating season without any hassle ahead.
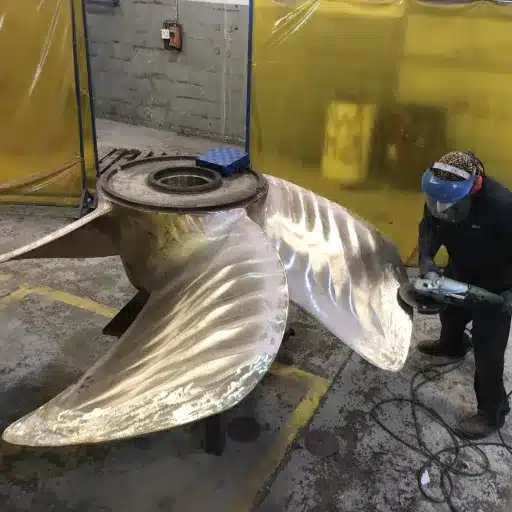
Identifying and Fixing Common Propeller Problems
Outboard propellers are shown to be the most and the least responsible for where the vessel becomes damaged and subjected to wear during these times. Recognizing common problems early and applying proper remedies allows one to maintain optimal performance and avoid costly repairs.
⚡ Physical Impact Damage
Hitting a submerged object or debris is one of the most frequent causes of propeller damage. Even minor dents or bent blades affect balance and efficiency, thus increasing noise and vibrations that consume more fuel.
Solution: To counteract this, ensure regular checks are carried out, especially after traversing through unfamiliar or debris-filled waters. Minor nicks can be taken care of by propeller services, whereas one may have to resort to replacing badly dented propellers.
💧 Cavitation
Due to pressure differences around the propeller, bubbles develop, and these bubbles cause pitting on the blade faces, thereby affecting thrust and noise.
Solution: Cavitation can be reduced by ensuring that the propellers are the correct size and pitch for your engine and boat. Also, you might want to keep the propeller clean of marine growth to help prevent cavitation.
🦠 Corrosion and Material Deterioration
Water may corrode the metal propellers, especially those made of aluminum. This gradually wears out the propellers, reducing their life span and efficiency. Stainless-steel propellers hold better against corrosion but are still prone to degradation under gore-and-grisly conditions.
Solution: Hence, the finish of a propeller, given any, should be rinsed with fresh water after every use.
⚖️ Unevenly Balanced Propeller Blades
Propeller blade imbalance causes vibrations, leading to uneven or excessive wear on the propeller and engine. Either damage to the blades or uneven repairs to the blades often cause this.
Solution: Check for unusual vibrations while in operation to diagnose blade imbalance, or inspect the propeller for physical damage or inconsistencies. Regular maintenance by an expert should address these issues through proper balancing.
📏 Incorrect Propeller Size or Pitch
Using a propeller of the wrong size or pitch will reduce top speed and make the engine less efficient. For instance, a higher-pitch propeller produces higher speeds but places more stress on the engine; conversely, a lower-pitch propeller enhances acceleration yet reduces it at top speed.
Solution: Hence, viewing and comparing an array of options and testing actually help to identify the best propeller for your boating needs.
🌿 Marine Growth Excess
Environmental marine settings can cause the accumulation of barnacles, algae, and various types of growth, thereby significantly reducing propeller efficiency.
Solution: Cleaning is performed regularly using non-abrasive tools and environmentally safe cleaners to prevent any deterioration in performance. Anti-fouling paints can also help to deter marine growth.
Therefore, by addressing some of these common problems proactively, you can tune up the life and performance of your outboard, providing the owner with a smooth and thrilling boating experience.
Future Trends in Outboard Propeller Technology
Innovating Propeller Design for Increased Thrust
Propeller design innovations have significantly enhanced the efficiency and performance of outboard motors. One thrust has been developing hydrodynamically efficient propellers. Therefore, designers are considering blade geometries that reduce drag and allow for a smooth flow of water, which then permits propulsion with significantly less resistance and greater energy efficiency. Consideration of materials such as light alloys and composites also helps increase durability while reducing weight, which benefits speed and fuel consumption.
🔧 Variable-Pitch Technology
Adjustable or variable-pitch propeller integration is yet another fascinating option. For example, it allows for precise blade angle adjustments according to various operational demands, such as the load on the propeller or water resistance, ensuring the optimal amount of thrust is produced at different speeds. More thrust leads to performance beyond expectations; thus, propellers do not exert undue stress on the motor, thereby increasing the motor’s lifespan.
🖥️ Advanced Manufacturing
Different manufacturing processes, such as 3D printing and computer modeling, are utilized to create highly customized propeller solutions. These solutions provide intricate designs for specific applications-from high-speed racing boats to heavy-duty fishing vessels.
The design of propellers is further advanced to offer significantly smoother and more powerful thrust than ever, catering to the demands of modern boating by addressing a wide range of needs with advanced technology.
Effect of Eco-Friendly Materials on Propeller Longevity
In my opinion, green raw materials are reshaping durability concepts in propeller design. Traditional materials, such as regular stainless steel and aluminum, have long been used due to their proven strength and reliability. However, with the dominance of sustainability spheres, alternative materials such as bio-composites and recycled alloys are yet to enter the market. The green raw materials further aim to reduce the environmental footprint while meeting the requirements of current-day maritime applications.
⚖️ Balancing Sustainability and Performance
I observed that one of the significant problems with green materials is striking a balance between strength and environmental responsibility. For example, while bio-composites are lighter and greener, they often need further development to resist deterioration when used in place of regular counterparts. This is likely due to material science advancements; new types of recycled metal and coatings are being developed to make them more resistant to corrosion, impact, and aging, thereby making them viable in an increasing number of working conditions.
Finally, to consider an element of sustainable materials, it must truly stand up against traditional choices in terms of durability and cost. With all manufacturers utilizing the latest technologies to enhance these materials, there is optimism about an increased number of sustainable alternatives that are no less reliable than those that the propeller drives demand. Sustainable design shall meet present-day environmental requirements and drive innovation in the building industry.
Data-Driven Insights on Propeller Performance Trends for 2025
📊 Enhanced Fuel Efficiency Focus
Preliminary perspective, the primary trend shaping propeller performance in 2025 lies in the industry’s focus on enhancing fuel efficiency through aerodynamic and materials technology. Increasingly, manufacturers are targeting data analytics and simulation for design into the propeller, thereby reducing drag and improving thrust. With the advent of predictive modeling, engineers are increasingly capable of optimizing blade geometries for specific types of vessels based on environmental conditions. This optimizes performance and reduces operating costs. Data-driven innovation is the backbone of such developments.
🔗 Smart Technology Integration
Another important observation is the increasing integration of innovative technologies into propeller systems. Sensors are increasingly being embedded in them to monitor wear and efficiency in real-time, thus allowing boat operators to act on preventive maintenance. It is also worth noting that these sensors provide operational data for manufacturers to use in improving lifecycle management and downtime minimization. I am inclined to think that the amalgamation of IoT (Internet of Things) with conventional engineering will lead to reliability and performance optimization, further transforming the marine industry.
🌱 Sustainability as Performance Driver
Lastly, sustainability is developing as a key intervening variable in performance trends. Recyclable materials and cleaner manufacturing processes are being introduced to help propellers align with greener objectives. By sincerely implementing sustainability and innovative designs, the industry provides a working example of a world where responsibility and performance converge.
Looking forward, I am confident that these trends will satisfy the demands of today at a rising scale while pointing to the environmental concerns in some critical way.
Reference Sources
-
How to Replace a Yamaha Outboard Propeller PartsVu: Provides a detailed stepbystep guide, including preparation, cotter pin removal, and propeller installation.
-
Yamaha Outboard Propeller Removal, Inspection, and Maintenance Yamaha Outboard Maintenance: Covers removal, inspection, and replacement processes with clear instructions.
-
Yamaha Propeller Replacement and Inspection: Your Complete StepbyStep Guide Yamaha Outboard Maintenance: Offers a comprehensive guide for replacing and inspecting Yamaha outboard propellers.
- Click here to read more.
Frequently Asked Questions (FAQs)
❓ What are the steps of Yamaha propeller replacement?
There are various steps involved in replacing a Yamaha propeller to ensure proper installation and optimum performance. First, refer to the owner’s manual for any specific instructions that apply to your Yamaha outboard engine model. Secure the boat and hoist it if needed. Use a block of wood or a propeller holder to stop the prop from spinning while loosening the propeller nut. Loosen the propeller nut by loosening it in a counterclockwise direction and pulling off the existing propeller from the prop shaft. Align the new propeller onto the shaft, thread the propeller nut onto the rod, and finally, tighten it securely.
🔍 How do I look for signs of wear on an outboard propeller?
Regular inspections for wear on the Yamaha outboard propeller are necessary to preserve performance and safety. Any dents or nicks should be checked on the blades; a visual inspection may reveal corrosion that could potentially affect fuel efficiency. When significant damage is found, the time might have arrived for a propeller change. Another thing to check is the prop nut to ensure it is tight. A loose prop nut can cause wobbly motions, potentially incurring further damage.
🛠️ What are the required tools to maintain a Yamaha outboard propeller?
A few essential tools are required for proper Yamaha outboard propeller maintenance. A propeller nut wrench will be required to loosen and tighten the propeller nut. Having an adjustable wrench for other fittings is also beneficial. Needlenose pliers or a similar tool may help work with smaller components. A possible specialized propeller holder tool is a good stabilizer for the prop during maintenance. It is always a good idea to have a block of wood to hold the prop in position while you work on it.
⛽ How can I improve the fuel economy of my Yamaha outboard?
Various methods, including routine propeller maintenance, can improve Yamaha outboard fuel efficiency. Ensure that your propeller is in good working condition; if the blades are damaged, not only will your speed and acceleration change, but fuel efficiency will also be diminished. It is just as essential to have a clean prop shaft free of any debris. Your prop pitch may require adjustments if you frequently feel overheated or your RPMs are not within their respective recommended ranges. Apply these small maintenance tips and watch how your boating improves tremendously.
🔩 What is the role of the prop washer during the propeller replacement with a Yamaha outboard?
A fastener that prevents the free removal of a propeller from a shaft on a Yamaha outboard motor is a propeller nut. It prevents the propeller from flying off during operation, thereby avoiding damage to either the propeller or the motor. When changing the propeller, the propeller nut must be tightened firmly according to the manufacturer’s specifications. This will ensure the safety of your family and good sightseeing during the ride. It may sometimes be helpful to inspect the propeller nut for signs of wear or corrosion.
⚙️ How do I choose the right prop for my Yamaha outboard?
Choosing the right propeller for your Yamaha outboard involves considering factors such as the engine’s horsepower and how the boat is used. For instance, a 115hp Yamaha may require a different pitch than a 200hp engine. Check your owner’s manual and specifications for the recommended prop. Also consider the kind of boating you do: fishing, skiing, or cruising. Each activity may benefit from a different prop design. A consultation with Yamaha outboard parts specialists can further enlighten you on selecting the prop most suitable for your needs.