Fitting a propeller to your Honda outboard motor is essential to ensure maximum performance and efficiency while in the water. This article will assist you in evaluating the situation carefully, describing the required tools and stage-by-stage installation procedure, and providing practical additional recommendations. Moreover, we will highlight specific measures one should undertake before beginning the installation, help the reader choose a proper propeller for a particular motor, and tell the reader what to do if things go wrong at any point in time. This article is for people with sailing experience and those who want to improve their outboard motor working experience. It seeks to empower you with the necessary information and the confidence to undertake such activities.
What Tools Do You Need to Install a Honda Outboard Propeller?

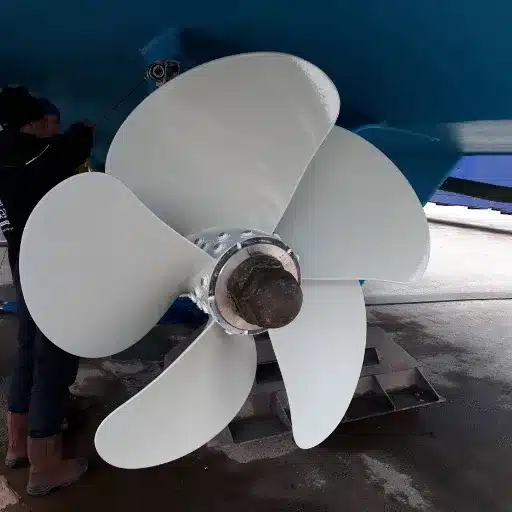
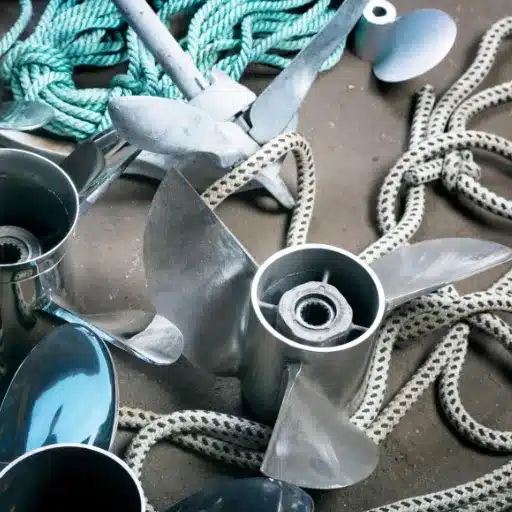
Image source: https://partsvu.com/
The proper tools are required to mount a propeller to your Honda outboard motor successfully.
- Wrench or Socket Set: This is the wrench or socket set required to disengage the retainer milling nut, which locks the propeller.
- Propeller Puller (optional): A propeller puller helps when the propeller is stubbornly held in place.
- Grease: Repair grease for the propeller shaft for its unhindered movement.
- Safety Glasses: These are worn to avoid eye injury during installation.
- Torque Wrench: This wrench secures the propeller nut according to the manufacturer’s standards.
Having these tools at hand will ensure a smooth, stress-free installation process, which will get you back to the water without a hassle.
Essential Tools for Propeller Installation
When attaching a propeller to a Honda outboard motor, the propeller installation will be quick and efficient if the necessary tools are accessible. Here’s a brief presentation of the leading and most needed tools that have been picked:
- Propeller Wrench or Socket: The propeller socket is commonly used to unscrew the propeller. Because the propeller nut has a special shape, it is important to use the propeller socket when both taking out and fixing the nut.
- Rubber Mallet: Fixing the propeller using a rubber mallet helps erect the guard without damaging the propeller or the surrounding parts.
- Pliers: A needle-nosed plier aids in manipulating small parts, such as cotter pins, which can be used in assembling the propeller.
- Torque Wrench: A torque wrench is essential to ensure correct torque values are applied to the propeller nut. It also helps ensure the propeller remains on for proper use and avoids loosening.
- Cleaning Supplies: Have some marine-type cleaning agents and clean rags. The current propeller cleaning practice before installation is to mop the propeller shaft and area to avoid dirt settling in that could affect performance.
Preparing these tools ahead of time makes the process of installing the propeller easier, thereby paving the way for the best that can be derived from it.
Using the Right Hardware Kit for Honda Outboard
In my search for the most appropriate hardware kit for my Honda outboard, I have always considered the need to make sure it is suited for that particular model. Each kit must have the appropriate screws, bolts, and nuts to persevere the correct structure of the product. I prefer a Honda hardware kit because it ensures I have the right combination of the parts and how they interrelate. In addition, I also take the time to check the parts included to ensure there are no out-of-place parts that will hinder performance. Considering all types of hardware, I believe that I can fix the propeller without any risk of damaging it.
Recommended Marine Tools and Accessories
In improving your boating experience, implements and accessories relevant to marine activities are a must-have.
- Marine Tool Kits: A standard marine tool kit consists of various tools, including wrenches, screwdrivers, and pliers, among others. In this case, such tools are intended for marine use, and thus, one will not run out of tools when dealing with maintenance and repair activity.
- Boat Covers and Tarps: With quality boat covers and tarps, there will be no more trouble with weather exposure, UV rays, and pets, and as a result, those concerns will enhance the longevity of the boat.
- Safety Equipment: Failsafe items like the essentials, which include life vests, flares, and first aid kits, are essential and should always be present. Given the unforeseen circumstances that might occur, using items such as fire fryers or sound-making items, like emergency whistles, should not be left out.
- Batteries and Charging Systems: You will inevitably need to use your equipment while on the water, and thus, reliable batteries and charging systems are desirable. It would be advisable to look for batteries for such applications that are marine-type and, hence, tough and can withstand abusive situations.
- Navigation Tools: The use of GPS systems and even nautical charts is in no way underrated, as these tools assist in the safe navigation of boats. Rope in your navigation devices while traversing previously untouchable in-water cruising areas or areas already well known in relation to the water.
By including all these tools and accessories in your boating activities, you will promote safety and enjoyment on the water.
How Do You Remove an Old Outboard Propeller?

An old outboard propeller can be removed without much effort as long as proper steps are followed. These steps are important for the propeller’s safe removal.
- Prepare Your Tools: This requires you to prepare certain props, such as a propeller wrench, a socket set, and safety gear.
- Remove the Battery: Disconnect the boat’s battery; it should be removed or disconnected for safety to avoid accidents, such as starting the ship by accident when you are working on it.
- Look at the Propeller: Look for any locking devices, such as a propeller nut or a cotter pin, on the propeller. If one is present, it should be pried off.
- Take Out the Propeller Nut: Turn the propeller nut anti-clockwise using the propeller wrench or the socket to unloosen it.
- Extract the Propeller: Now that the nut is off, the propeller can be pulled directly off the shaft using a steady force. If it is firmly in place and cannot come off, you can try to hit the propeller in the direction of the shaft using a rubber hammer to free it without harming the shaft.
- Wipe the Surface: After the shaft has been removed, the cleaned shaft should be examined for signs of wear or damage before installing the new propeller.
Using this procedure, an operator can easily remove the old outboard propeller and prepare to install a new one.
Step-by-Step Guide to Remove an Outboard Prop
Props are easier to handle with the following methods:
- Gather Your Tools: Whatever steps you intend, don’t forget to equip yourself with relevant tools, i.e., propeller wrench, socket set, and most importantly, protect yourself with gloves and goggles.
- Safety First: Although this part may seem irrelevant, it is essential not to disconnect the boat’s battery, which is the power source.
- Inspect the propeller: Any form of security an operator can notice, such as a propeller cotter pin or nut. You can use plain pliers to clip one out if you see one.
- Remove the Propeller Nut: Hold the lower half of the prop nut with the prop wrench, and turn the prop nut counterclockwise and almost any roller portion of the prop wrench’s handle. Ensure enough strength is applied evenly to prevent the nut from being stripped.
- Detach the Propeller: Remove the propeller from the shaft after unscrewing the nut. When you find that the propeller is stuck on the shaft, don’t pull it, but tap a rubber mallet around it. Just be careful; do not damage the shaft while performing the mallet rubber tap.
- Clean and Inspect the Shaft: After removing the propeller, wipe out any dirt, grime, or corroded parts from the shaft. Check it for signs of bending or denting, which may hinder the fitting of the new veneer.
Through strict adherence to these steps, it is possible to safely remove an old outboard prop, eventually allowing for a new installation without any compromise on safety and equipment performance.
Checking for Damage Before Replacement
I pay more attention to each detail and methodically check that the propeller and shaft are free of defects before installing a new outboard prop. First, I look for nicks, bends, and cracks on the prop’s blades, as even the slightest damage will affect its performance and add additional loading on the engine. I then check the hub and the locations of the propeller’s mount to the shaft for any indication of shredding or rust that might be problematic for the upcoming installation. I also investigated the shaft and examined its straightness and distortions on the surface as well as clean dust, rust, and other contaminants that could be present as deposits. Such a deep inspection assures that the new propeller will be effective and improve the safety and efficiency of the operations onboard the vessel.
Importance of Using a Cotter Pin
Concepts that require dependable locking must feature using a cotter pin in a mechanical assembly, especially in boating, where safety is a priority. As a locking device, a cotter pin can prevent a screw, bolt, or other fastener from vibrating loose. Such is the case for outboard motors, as vibrations are experienced during use. When it comes to holding components together with bolts or nuts, cotter pins are most convenient since they can be replaced during machine servicing. Components fitted without a cotter pin are prone to mechanical failure, which causes losses and injuries to the sea. The need for cotter pins in external mounting motor systems cannot be disregarded.
What is the Proper Way to Install a New Outboard Propeller?

Take the motor up the raised position to the propeller shaft and install the new outboard propeller, ensuring the propeller leg is straight. Dismantle the old propeller prop by following the steps in unscrewing the other hardware with concentration bearing all the parts for later reconstruction. Wipe the shaft free of any dirt, dust, or rust. Then, the new propeller is fitted into position such that the key is in the keyway of the shaft. Once the propeller is placed on the rod, secure it using the hardware provided and follow the tightening instructions indicated by the manufacturer. Then, insert the cotter pin and secure it to prevent the nut from coming loose during the operation of the equipment. Before testing the new fitment, quickly inspect everything to ensure no loose parts are anywhere.
Installing the Propeller Install Hardware Kit
A proper propeller install hardware kit for use during a propeller installation, especially a new one, should also be applied. It should include nuts, washers, and a cotter pin when the kit has bolts specific to your outboard motor model. For the safety and efficiency of the activities that involve the usage of the hardware kit, the manufacturer’s recommendations for the usage of the hardware kit should be followed and met.
While doing so, once you have acquired the appropriate tools, the next step in business includes cleaning up the propeller shaft, as it should not contain any foreign materials. After this, place the new propeller on top of the shaft and adjust the propeller so that the key is attached to the keyway of an attached shaft. After this, utilize the nuts and washers provided alongside the propeller and firmly fit them onto the propeller to a torque that will not allow them to come loose while in use. Lastly, insert a cotter pin into the nut and lock it while bending it to secure it and ensure all other parts have been fastened. Inspection of the hardware after an overhaul period would also be beneficial in maintaining the serviceability of your outboard motor’s propeller system.
Aligning the Propeller with the Outboard Engine
Proper propeller alignment with the outboard motor ensures peak performance and efficiency. Therefore, I first check that the propeller is correctly located on the shaft and the key is in its keyway. It is also essential to verify that the propeller is on the horizontal plane of the anti-cavitation plate, which usually involves looking at the rear side of the boat. If necessary, I change the engine’s height so that the propeller blades are on the outside, barely submerged when the boat is in the water, so as not to aerate the blades. For the final verification, I take the boat out for a spin while looking for any vibrations or sound anomalies indicating that the ship is out of alignment. Regular post-installation checks help prevent vivid ‘catastrophic failures’, which can warp the system and ensure perfect order.
Securing the Prop with a Thrust Washer and Cotter Pin
In securing the propeller, the first step is to take the mb001 thrust washer, which says the member, and install it on the shaft so that it is fitted to the propeller hub. During the thrusting process, this washer helps absorb the concentrated force and is used to protect the propeller’s hub. After this, the cotter pin is introduced into the propeller nch1 propeller shaft and passes through the given nut to fix the propeller. Taking the arms of the cotter pin and applying outward force makes it possible for the pin to stay in place. This is an essential procedure since the nut will not get loose in the course of operating, and the propeller will, therefore, be firmly held, indicating that this is an essential factor in the effective working of the vessel. Check the thrust washer and the cotter pin from time to time to ensure that they are good, and replace them in case there are droppings or other causes indicating wear and tear.
Are There Different Types of Outboard Propellers for Honda Engines?

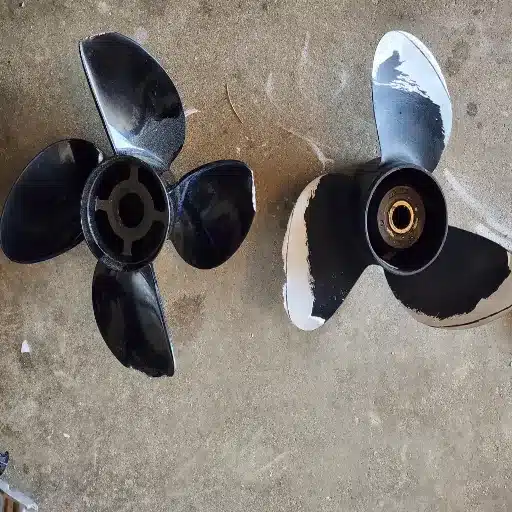
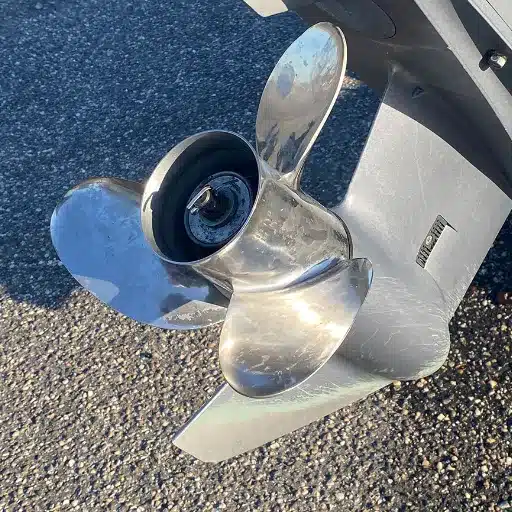
There are various categories of outboard propellers for Honda engines. These include aluminum and stainless steel propellers, both of which have advantages. There are more mass-produced and easier-to-use aluminum propellers that are primarily for average everyday usage and are usually inexpensive. Conversely, stainless steel engine props are built to be more resilient, perform better under high operating speeds, and work more efficiently, making them suitable for bigger boats or those intended for sport use. There can also be variations in propeller pitch and diameter, affecting the acceleration and top speed of the ship, hence making it necessary to purchase a propeller that does not only fit the engine but is also appropriate for the type of boating in question.
Choosing Between Aluminum and Stainless Steel Props
If you have made up your mind to use Honda outboard engine props, whether aluminum or stainless steel, you should keep the following in mind:
- Cost: Cost is slashing as the typical attributes of aluminum props are more accessible to purchase; therefore, they fit perfectly for thrifty boaters. They are expendable and can be easily replaced if noted to be broken. Customers’ money is saved in the long term since such props, while a little expensive initially, are hardy and do not get replaced often.
- Durability and Performance: Stainless steel propellers are more resistant to dings and nicks, which can help maintain performance, especially at higher speeds and in rough conditions. This provides better acceleration and efficiency, making them ideal for large or performance-oriented vessels. On the other hand, aluminum props, while acceptable for play, can break easily.
- Usage Needs: Metal propellers can suffice for boating purposes that do not prioritize performance or durability. However, if you have a habit of repeatedly running fast in short bursts or loading a lot of weights, you should consider buying a stainless-steel propeller, as it can be a great asset to your boating ventures.
As always, consider your exact boating activities, available resources, and individual preferences to choose the option that will suit your engine specifications and operational requirements.
Understanding Propeller Diameter and Pitch
The diameter and pitch are crucial concepts I must consider when choosing a new propeller for my Honda outboard engine. The propeller diameter is the distance corresponding to the circumference of the circular imaginary shape outlined by the moving propeller blades. The understanding of the relation between the diameter and the load, generally, larger diameters tend to give better thrust at a heavier load. In contrast, smaller diameter tends to favor faster moving vessels. Pitch, in contrast, refers to how far the boat will travel on traversing a complete revolution of the propeller, just as a screw thread indicates. A higher pitch means the vessel has the potential for more incredible speed; however, it may require more engine power. A lower pitch seems beneficial for more excellent acceleration. It is famous for towing purposes and for carrying more weight. Making the tradeoffs between these two based on my particular boating context will enable my outboard engine to attain maximum efficiency.
OEM vs. Aftermarket Propeller Options
When choosing propellers for your Honda outboard engine, you have two main options: OEM (Original Equipment Manufacturer) and aftermarket propellers. OEM propellers simply refer to a specific category of propellers designed and produced by the primary manufacturer of the engine to be compatible with the configurations of their engines. The appliance on this option ensures matching and good working performance and often comes with a warranty. All these advantages come at a cost, though. This can be, however, at a higher price range.
Aftermarket propellers, in contrast, are made and distributed by external suppliers and are more likely to increase internal competition and provide variety than the former. These propellers can sometimes enhance performance precise like in speed and fuel consumption, however a lot of scrutiny should be exercised for not all of them are of good quality. OEM propellers Manufacturer other options, such as aftermarket options, have advantages and shortcomings. Carefully balance all these requirements while ensuring that whatever you buy is suitable for and proportional to the requirements and usage of the outboard.
How to Test Your Honda Outboard After Installing a New Propeller?

After fitting your new propeller, you should always perform some sort of assessment on it. Begin this procedure by looking at the propeller and the areas near it. Next, do not sit on the shore, provide the new propeller with a test by taking the boat out on water through various gears. There is no absence of obstructions, and the engine responds when required; acceleration is there. The bore reaches the recommended RPM range for the boat, which was guided by the manufacturer as standard. In addition to the new propeller, check how the stability and control of the ship have been affected, particularly when executing right and left turns or when the boat is moving on the rough seas. Assessment tests can sometimes be dangerous, especially for the new parts installed, and after completion of the testing, you will have to avoid any dangers from overheating cases from the engines.
Performing a Water Test for Functionality
Performing a thorough water test would be best or ideal to make that assessment accurate and effective. First, take the boat out and perform all operations in a controlled environment, such as in water, where the performance can be satisfactorily observed. When in proper maneuvering mode, increase your edge combinator gradually to check how fast the boat can pick up speed. The ship is expected to be able to pick up speed at a reasonable tempo. The engine RPM may be checked on the tachometer, making sure the revs do not exceed or remain too low compared to the manufacturer’s specifications, indicating that the propeller and the engine are well matched.
Pay attention to how the boat maneuvers in different water conditions. The centrifugal force caused by appropriate propellers allows one to make the turns and project out into the choppy waters. Also, always look out for strange vibrations or sounds, which may indicate something that is out of alignment. After performing the water test, cool the engine down and get ready to review all collected performance metrics. Compare them with the expected values, and if need be, amend those values to bring out the best in the outboard engine.
Monitoring Engine Performance with the New Prop
Today was the time to use a new propeller that was fitting. During the rest of the outings, I carefully examine how the engine functions. At first, I concentrate on the engine revolutions per minute (RPMs) as I start adding more throttle, which I expect should be within the limit set by the manufacturer. If I realize these rotating parts are beyond the prescribed levels or lower than expected, I have to rethink the size of the propeller or its pitch. I also take the boat’s performance by subjecting it to jerky, steep depressions and rapid accelerations and assess whether it will turn smoothly and if the level of discomfort in rough seas is tolerable. If any abnormal sounds or vibrations are present, I will be sure to include them as a list of items for future checks as far as the level of imbalance is concerned. Lastly, it is perfect practice to regularly check the engine’s temperature range to ensure it is not over or under-heated. When doing face-lift, a propeller selection overhaul would help address passive cooling due to altered driving techniques over time.
Common Issues to Look Out For
Some common concerns need your attention while testing the performance of your outboard motor fitted with a different propeller. First, propeller cavitation may be visible when its design or pitch is inefficient and might cause some deficiencies in thrust. The symptoms of cavitation include but are not limited to, a drop in velocity and strange vibrations. Second, it usually means there is too much stress by the propeller on the engine, which is why overheating is likely; this often brings alarm lights on your dashboard, a severe issue that needs to be resolved quickly. Third, watch out for propeller damages that include but are not limited to deformations or blade angle, which, in one way or another, can entirely ruin the performance and economy of gas. A constant feeling of foreboding about such defects would benefit you as it would ensure your boat is capable of safe and smooth movements on the water.
References
-
Alaska Outdoors Forums: Honda Prop Installation – Discusses the proper method for tightening the castle nut during propeller installation.
-
Marine J: Propeller Installation Instructions – Provides specific installation instructions for Honda outboard applications, including thrust washer placement.
-
Plan B Marine: Honda Outboard Set-Up Installation and Pre-Delivery – Offers detailed instructions on installing the thrust washer and propeller on the propeller shaft.
Frequently Asked Questions (FAQ)
Q: What is the first step in installing a propeller on a Honda outboard?
A: The first step is to ensure you have the correct propeller size for your Honda outboard. Check the specifications, including diameter x pitch, to find the right prop for your engine’s hp.
Q: How can I remove and replace an outboard propeller?
A: To remove and replace an outboard propeller, disconnect the battery and use a propeller wrench to loosen the prop nut. Then, remove the old propeller and install the new one, ensuring that you follow the installation instructions from the seller.
Q: Is it necessary to use a hardware kit for Honda outboards when installing a propeller?
A: Yes, an installation hardware kit for Honda outboards is recommended to install and ensure all components fit securely and properly.
Q: Can I install an aluminum boat propeller on my Honda outboard?
A: You can install an aluminum boat propeller, but ensure it matches your engine’s specifications. Some users prefer stainless steel outboard propellers for better performance.
Q: Where can I find a professional propeller for my Honda outboard?
A: You can find a professional propeller for your Honda outboard on websites like amazon.com or through local marine supply stores. It’s essential to shop confidently and check reviews for the best options.
Q: What tools do I need to install a propeller on my outboard boat?
A: You will need essential tools such as a propeller wrench, socket set, and torque wrench to ensure the prop nut is tightened to the manufacturer’s specifications.
Q: How do I know if I have the right prop for my outboard?
A: To determine if you have the right prop, check the specifications for your Honda outboard’s hp and ensure the propeller’s diameter x pitch matches the recommended settings in your owner’s manual.
Q: What should I do if I experience performance issues after installing a new propeller?
A: If you experience performance issues, review the installation transcript for any mistakes. You may need to remove and replace the outboard propeller or consult a professional for assistance.
Q: Can I watch instructional videos on how to install a propeller on my outboard?
A: Yes, many instructional videos are available on platforms like the world on youtube that can guide you through installing a propeller on your outboard.
Q: What is the difference between an aluminum and a stainless steel outboard propeller?
A: Aluminum outboard propellers are generally more affordable and suitable for lighter boats, while stainless steel outboard propellers offer better performance, durability, and efficiency, making them ideal for higher HP applications.