Welcome to our guide on replacing the Yamaha Jet Ski impeller intended for the SVHO models. This article will explain how vital the impeller system is and how it enhances performance and improves the overall enjoyment and experience of riding. We will touch on important issues such as the replacement process, the tools and safety procedures and recommendations included, and the basic techniques on how to maintain your jet ski for a long time. Whatever side of the fence you are, casual or severe, this guide will provide you with practical and theoretical information about the process of impeller replacement so that you are prepared and able to perform in this field.
What is an Impeller and How Does It Work in a Yamaha Jet Ski?

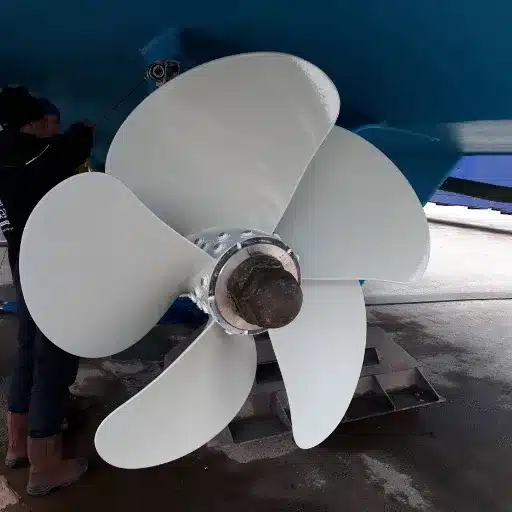
Image source: http://www.captainpropeller.com/
An impeller is essential to a Yamaha Jet Ski’s jet unit and is used like a pump. The primary function of that component is to suck water into the jet pump and push it out at high velocity from a small aperture, thereby causing the jet ski to move. The impeller has a blade that revolves and creates a low-pressure zone, which assists in pulling and releasing water at high speed. Not only does this improve the overall performance of the jet ski from a better acceleration and handling perspective, but it also improves the overall comfort when using the Jet Ski due to an improved PWC acceleration. As such, there is a need to take good care of the impeller for optimum watercraft performance over a reasonably extended period.
Understanding the Function of the Impeller in Watercraft
An impeller acts as a centrifugal pump, which is essential to the working of any watercraft. As water moves into the impeller, the rotating blades of the impeller cause the fluid to gain energy, converting energy to thrust. This not only moves the jet ski ahead but also assists in cornering and reduces the resistance during movement over water. An improved impeller design is crucial as it enables effectiveness in different situations and influences water formation and thrust creation. It also ensures the watercraft’s performance is consistently good and extends its life, assuming that the impeller is taken care of; this is necessary, especially for non-professional and professional riders. Such routine maintenance and critical replacements will avert injuries that cause lower efficiency and higher fuel consumption, making the riding experience enjoyable and dependable.
Types of Impellers Used in Yamaha Jet Skis
The different categories of impellers adopted for use in Yamaha jet skis are based on the riding conditions and the customer’s riding style. An OEM (Original Equipment Manufacturer) impeller is probably the most common type since it is designed uniquely for the specific Yamaha models. Such impellers are usually of a particular pitch type that tends to make acceleration and the highest speed very high, making them perfect for general fun driving.
On the other hand, performance impellers cater to seasoned riders who seek sharper responsiveness and higher top speed for their jet skis. These impellers are typically made from high-performance materials that resist overuse and boost efficiency in extreme conditions. Finally, one can also find new compatible parts, such as impellers, that can be changed or upgraded for those who wish to improve the performance of their watercraft. Selecting the appropriate impeller that fits my riding style makes me a more comfortable rider on the water.
Common Impeller Problems in Yamaha Waverunners
It is well known that Yamaha Waverunners pride themselves in performance only for impeller-related issues to arise and affect their riding quality. Among the most common problems is cavitation, the ‘churning’ of the water caused by the impeller trapping air, causing thrust loss and poor acceleration. This is a result of an impeller fracture or improper fit. The other problematic concern is the wear and damage resulting from debris in the water, which will create chips and dings or even cause the impeller blades to bend, which will affect efficiency and speed, serving a great purpose. Furthermore, impeller use must be cautious because of corrosions, especially regarding alder saltwater places; care interference and examinations are equally reasonably necessary. These factors should be addressed at the early onset of their emergence. If this is done correctly, the riders’ Waverunner activities are optimized but also melancholy-free and fun.
How to Replace the Impeller on Your Yamaha Jet Ski?

On a personal note, removing the impeller on your Yamaha Jet Ski is an uncomplicated task that can greatly improve its performance. So here’s a quick and simple guide with the steps to follow.
- Step Two: Assemble the Required Tools & Equipment: You will need a socket, a socket wrench, a wrench, a screwdriver, and a new impeller. Keep in mind that there should be a technical publication specifically for the model of your Waverunner that you are going to use.
- Remove the Jet Unit: First, remove the battery to ensure safety, and then remove the jet unit from the Jet Ski. This normally consists of unscrewing a few jets and the bolt from some clips on the hull.
- Access the Impeller: When the jet unit is removed, find the impeller. Depending on the specific model, you might also have to remove the wear ring or some other parts.
- Replace the Impeller: Using the socket set, control the old and stuck impeller to center it properly. Install the new impeller in place, but make sure you place it correctly and tighten it according to the prescribed value in the service manual.
- Reassemble the Jet Unit: While properly realigning the wear ring and any other part you detangled, attach all parts back that you had come loosely off. Then again, place the jet unit back into the hull.
- Test the Installation: Switch the battery on, do a water test, and check and handle proper function and absence of leak.
By conducting these processes, you can smoothly replace the impeller in your Yamaha Jet Ski and enhance your in-water usage. Regular care will extend the life of your watercraft.
Step-by-Step Guide for Impeller Swap
In cases of Yamaha Jet Ski impeller replacement, a step-by-step procedure should be adhered to so that the installation is done correctly and the machine functions optimally.
- Preparation: Before you begin, make sure that you have the required tool, a socket kit, and a torque wrench for the new impeller. Read through your model’s service manual.
- Safety: The battery must be disconnected so that you do not experience any electrical hazards while servicing the jet ski. This step guarantees your safety.
- Jet Unit Removal: The first step is to remove the jet unit from the back of the Jet Ski. Usually, this involves unscrewing several bolts that attach the unit firmly to the hull. Care must be taken not to break the hull in the process.
- Old Impeller Removal: The next step is to find the impeller once the jet unit is free. Remove any parts, such as wear rings, that can be removed as necessary. Detach the old shattered impeller with the protection blanket around the rear section and use a socket set.
- Installing the New Impeller: Position the new impeller in the correct orientation such that it goes into the housing and no force is used to make it sit. Finally, bolt it down using the torque settings in the service manual to avoid excessive torque.
- Reassembly: Insert the previously detached components so that the fully flowed and fitted cover is made. Once this is done, return the jet unit to the hull.
- Final Check and Test: Once everything has been reassembled, the battery should be reconnected, and a waterproof test should be done. Check for leakages and abnormalities in the scooter’s operation. If it is successful, you have completed the task of replacing the impeller correctly.
By following these steps, you will be able to replace the impeller on your Yamaha Jet Ski, thus enhancing its effectiveness. Some preventive measures, like maintenance checks, will ensure that the watercraft’s condition is still good.
Tools Required for Impeller Replacement
The tools required for me to change the impeller of my Yamaha jet ski correctly are listed below:
- Socket Set: This is an essential tool for removing bolts and fastening elements in position during the operation. Having a set of many different sizes will ensure I have the correct size for each bolt.
- Torque Wrench: Within this process, there will be instances where I will need to fasten some bolts. I need a torque wrench to avoid fastening them more than necessary, leading to parts breaking.
- Pliers: Pliers are used to hold and manipulate smaller parts that were not used in this configuration. They assist in removing worn rings and several fittings without damaging them.
- Screwdrivers: It is crucial to have a set of both Phillips and flat-headed screwdrivers for various screws across the jet ski assembly.
- Sealant: To fix water leaks, older seals can be discarded, and a high-quality marine sealant can be applied to the appropriate seals.
- Safety Gear: Though many are available, I find gloves and safety goggles mostly useful for self-defense, especially where there are risks of sharp tools and edges.
With these tools at hand, I feel confident that I can change the impeller with sufficient efficiency and care.
Safety Precautions When Replacing the Impeller
Putting the impeller replacement kit on your Yamaha Jet Ski can be challenging, especially in ensuring safety to avoid incidences. Below are the recommended safety measures that must be adhered to:
- Disconnect the Battery: Remove the battery before commencing any form of maintenance to avoid damage through accidental starts and electric shock.
- Work in a Well-Ventilated Area: If you use sealing agents, ensure you work in a place with good air circulation so that your nose can breathe out toxic gases.
- Wear Appropriate Safety Gear: Eye protection with goggles is required to prevent injury from dust and other particles when cutting. It is wise to dust such materials when using glue, as that can cause a dust cloud in the wearable dust mask.
- Follow Manufacturer Guidelines: During the replacement service, the Yamaha Jet Ski service manual must be followed to the last detail, together with the torque settings for replacement, in order not to mangle the parts.
- Keep a Clean Work Area: When working with the jet ski, ensure that the surroundings are well arranged and uncluttered to lower the chances of slips and other sorts of falls.
Following the above-mentioned safety measures, one will be able to enjoy the process of replacing an impeller without experiencing any loss-caused incidents.
What Are the Benefits of Upgrading to a Solas Impeller?

Upgrading to a Solas impeller can bring about noticeable improvements to the performance capabilities of your Yamaha Jet Ski. Benefits include:
- Faster Acceleration: Sola’s impeller helps achieve a higher gravitational pull and, hence, faster acceleration, thus quickening the response time.
- Higher Overall Speed: For maximum speed, Solas impellers achieve and exceed results that kitchen blenders tend to refuse due to poor blade orientation.
- More Range: Sola’s impeller reduces drag due to its hydrodynamic shape, thus optimizing fuel consumption over time.
- More Robust: Made of the right materials, Solas impellers are used in more aggressive applications, which reduces downtime.
- Improved Control: An upgrade to a Solas impeller changes handling and control with every stroke, making complex turns in rough water effortless.
An impeller upgrade on a Sola generally means more performance, lasting fun, and efficiency while riding your Jet Ski.
Comparison of OEM vs. Solas Yamaha Impellers
In the case of Solas Yamaha impellers and OEM (Original Equipment Manufacturer) solutions, I always conclude that each choice has distinct advantages and disadvantages.
I have corroborated my research findings on OEM sites in that aftermarket impellers fit my Yamaha Jet Ski perfectly at all times, even under harsh conditions. That said, they usually do have a warranty policy, which is reassuring. Nevertheless, I have understood that they are not as effective as one would wish.
On the contrary, there are many very good reasons to buy Solas impellers. They not only improve the performance and efficiency of the product but also provide better handling and fuel consumption, which I quite like for longer journeys. As a bonus, Solas impellers also provide long-life services, so they are cost-effective when it comes to maintaining the boat over the years.
In the end, I will have to weigh the advantages and disadvantages between OEM and Solas and decide according to my riding style—whether I am looking for high performance or efficiency and durability, I am likely to go with Solas. No, if I want to shield myself from compatibility issues and am manufacturer-profaned, OEM is probably the better option.
Increased Acceleration and Top Speed with Solas Impellers
In my case, a change to Solas impellers made a substantial difference in both acceleration and the top speed achieved on my Yamaha. These impellers are optimized for thrust purposes, which has enabled my watercraft to reach planning speed quicker. Many users have noted observable gains, especially in mobile, choppy water. In addition, the high fluid performance morphology reduces the resistance, enabling power conversion into speed. Generally, though, I can say that changing to Solas impellers not only improves my jet ski experience but also allows me to harness the performance of my jet ski to the fullest.
Choosing the Right Solas Impeller for Your Model
In the quest for the perfect Solas impeller for my particular model, I am pretty selective about specific parameters to ensure it performs at its peak. First, I look at where I am likely to be riding if I have more calm or choppy water rides since this will likely affect the type of impeller that I may require. From the view of the most relevant websites, I understood that there are different designs of Solas impellers applicable under various conditions, some of which were good at accelerating. In contrast, others were great at maintaining high speed.
Next, I consider the horsepower of my watercraft and the purpose it will be used for. For example, if I like doing towing or making long trips, I may need to look for an impeller that provides more low-end torque. In addition, I consider the compatibility charts found in many forums and articles to be sure that the impeller I pick is available for my Yamaha model. Using the said considerations, I can order a Solas impeller that matches my riding level and desired performance.
How Does the Impeller Size Affect Performance?

The diameter of the impeller is one of the most critical factors affecting a jet ski’s efficiency. Bigger impellers create more thrust, which aids in fast acceleration and movement with more weight. The negative side is that while these impellers tend to be heavier and create a higher thrust, they tend to reduce the top speed of the jet ski due to excessive drag. On the other hand, smaller impellers may help to increase the top speed and are preferred in flatter waters more as they allow for a faster lift to a plane position. It is important to note where the cut has to fall, less compromised in size, and more on what riding style you are targeting. Analyzing these parameters, including water conditions, riding frequency, and weight, will help decide the appropriate impeller size for the best performance.
Understanding 144mm vs. 155mm vs. 160mm Impellers
It is also clear that when selecting either 144mm, 155mm, or 160mm impellers, consideration must be given to how each impeller size affects jet ski performance and the conditions in which such an impeller will be exposed.
144mm Impellers: This type is mainly used on small powerboats that require high-speed and low-speed weight. These types have significant quick power delivery, thus high RPM and excellent power-to-weight ratio. They are quick to plane and are best suited for racing or very shallow water, where speed rather than load-carrying ability is the requirement.
155mm Impellers: The 155mm impellers serve as a ‘Happy Medium’ in thrust-to-speed ratios. They are comfortable in various riding styles, which makes them good for most recreational and towing uses without compromising reasonable top-end speeds.
160mm Impellers: These impellers are usually bigger in size and efficient in high thrust and torque performance, making them ideal for towing loads. However, the downside may be a lower Top Speed due to added drag, making them better suited to more extreme conditions or situations where more power is usably sustained.
In the end, I think what darling of these sizes you’re going to ride with most of the time should be dictated by how you ride, how often you ride it, and the general conditions you encounter when you are riding.
The Impact of Twin Impellers on Performance
Having conducted sufficiently broad research on using a twin impeller system in a jet ski, I concluded that it provides better thrust and stability while enhancing the use of the jet ski. As both the dual impellers work together, faster speed can be achieved with the twin impellers easily while allowing for better steering under adverse conditions. I have observed that single impellers do not do well when heavy loads must be turned quickly, but twin configurations apply the load more evenly, making the journey smooth. Furthermore, looking at some of the top opinions I sought,” more than one impeller can help reduce cavitation and sustain speed, especially when towing or in heavy weather.” In general, such support aligns with my experience, which is that twin impellers are just what the doctor ordered when it comes to performance on the water.
Choosing the Right Size for Your Yamaha SVHO
In choosing the proper size for your Yamaha SVHO jet ski, it is good to know the primary intention of using the jet ski and individual preferences and skills. The standard sizes of impellers are around 155 mm to 160 mm. For casual recreational riders who are into leisure riding and some easy towing, a 155mm impeller may be the most efficient as it provides both speed and excellent turning ability. On the other hand, towing and relaying more extreme tasks should go for the 160mm size, which is more high-stress entertainment and involves higher thrust and torque, though the top speed is bound to go down a notch.
Moreover, riding style should also be taken into consideration. Those who often ride in rough waters or who often have to tow will find a twin impeller system useful as it delivers better power and stability. As can be seen, every individual has particular preferences and conditions in which some will be best suited for maneuvering the seawater while maintaining maximum efficiency.
What Are Common Issues After Impeller Replacement?

Following the impeller replacement on your Yamaha SVHO, some recurrent problems are bound to occur. For starters, one of the most common problems arising from improper installation of an impeller is reduced performance, speed, or acceleration, accompanied by unusual vibrations while operating. Also, if the butter’s impeller does not correspond to the jet ski’s requirements, a phenomenon known as cavitation may occur and, in return, damage both the impeller and casing.
Water leakage is another problem that could arise due to the refusal to replace seals and gaskets during installation. Importantly, do not discard the possibility of a warning light or strange noises after the replacement, as they might point to other mechanical issues. These also are timely inspections of the work done so that its efficient functioning is guaranteed after the replacement of the impeller.
Diagnosing Cavitation Problems Post-Replacement
Performance can be impaired when there is a cavitation problem after the impeller’s replacement. To identify such issues, focus on the impeller installation first to ensure it’s appropriately installed and fastened well. Stress should be placed on the failure limits so that their stretching or twists are less drawn and should also be evaluated.
Then, proceed to inspect the worn ring for any structural defects or excessive wear; if there is a worn ring in the building and it is not tight, water would help create cavitation, which usually causes a great deal of trouble for the mud pump. Further, ascertain that no jet intake pump air leak exists, as this can induce bubbles, which may lead to cavitation.
Last, the appropriate impeller for each model must be precisely gathered and installed. If the impeller is incompatible with a jet ski, a water escape malfunction will ensue, and cavitation problems will be aggravated. Performing these checks will help to combat the issues of cavitation in a more structured way.
Checking for Proper Installation of the Impeller
To check the impeller for correct positioning in the housing, I always start by confirming its firm seating. This entails checking the presence of spaces or any misalignment between the impeller and the housing. Additionally, I dedicate some time to checking the bolts to ensure they are correctly fastened and not over-fastened since this can also create problems. I also check for wear or damage on the wear ring. However, if the wear ring is rough or uneven, the wear ring should also be replaced since this may lead to performance problems. I also check almost all the seals and gaskets for correctness and fit to make sure water does not leak. Finally, I’ll take the unit for a trial run or test run and listen to the sound produced and vibrations felt, looking out for unwanted noise or vibration. By following these steps, I can assure you that the impeller is in its proper position and ready for operation.
How to Maintain Your Impeller for Longevity
Proper servicing of your impeller is necessary for its endurance and functional efficacy. Inspections still must be done for damage. Focus is directed to the blades for chips, cracks, or bending. Make it a point to clean some impellers for debris or other things. Do these carefully and use a cloth or brush to avoid markings on the surface. Fresh water is also needed to flush the cooling system whenever possible after the equipment is no longer in use, especially after being used in seawater. There are times when it is also helpful to apply a recommended lubricant to the impeller bearings to reduce any friction and wear. Finally, the risk of environmental damage to the impeller by storing your jet ski in a dry place and covering it while not in use will reduce any such action. By following these maintenance plans, one can increase the lifespan of their jet ski impeller and improve performance, too.
References
-
JetBoaters.net: 2019+ Yamaha 195 Impeller Replacement – Discusses the tools and process for replacing the stock impeller with an upgrade.
-
YouTube: Yamaha Impeller & Sleeve Replacement – Covers the removal and replacement of the impeller and sleeve.
-
Impellers.com: Impeller Instructions R&R for Jet Ski Sea Doo Yamaha – Provides comprehensive instructions for removing, inspecting, and replacing the impeller.
Frequently Asked Questions (FAQ)
Q: What is the purpose of the Yamaha SVHO impeller in a Jet Ski?
A: The Yamaha SVHO impeller is designed to optimize the performance of the Yamaha Waverunner, providing improved acceleration and top speed while enhancing overall handling and maneuverability.
Q: How do I know when to replace my Yamaha EX impeller?
A: If you notice a significant drop in performance, excessive cavitation, or any visible damage to the impeller blades, it’s time to consider replacing your Yamaha EX impeller.
Q: What are the benefits of upgrading to a Dynafly impeller for my Yamaha Waverunner?
A: Upgrading to a Dynafly impeller can provide better acceleration, improved handling, and increased top speed compared to the stock impeller, making it a popular choice among PWC enthusiasts.
Q: Can I use a Solas Concord impeller on my FX Cruiser SVHO?
A: Yes, the Solas Concord impeller is compatible with the FX Cruiser SVHO and offers enhanced performance and efficiency over the stock impeller.
Q: What tools do I need to replace the Yamaha Jet Ski impeller?
A: Depending on the specific model and year of your Yamaha Waverunner, you will typically need a socket set, a torque wrench, pliers, and possibly a driveshaft tool.
Q: Is it necessary to replace the driveshaft when changing the SVHO impeller?
A: The driveshaft does not need to be replaced when changing the SVHO impeller unless it shows signs of wear or damage. Always inspect it during the replacement process.
Q: Where can I find a replacement impeller for my GP1800 SVHO?
A: Replacement impellers for the GP1800 SVHO can be found at authorized Yamaha dealers, marine supply stores, or online retailers specializing in PWC parts.
Q: What are the differences between the stock impeller and the variable pitch impeller?
A: The stock impeller generally provides a balanced performance for recreational use, while the variable pitch impeller allows for more precise tuning of performance characteristics, which can benefit racing or performance applications.
Q: How often should I service my Yamaha Jet Ski’s impeller?
A: Depending on your riding conditions and frequency of use, it is recommended that you inspect and service the impeller at least once a season or after every 50 hours of use.
Q: Are there any specific maintenance tips for the FX SHO impeller?
A: Regularly clean the impeller area to remove debris, inspect for any signs of wear or damage, and ensure the impeller is lubricated correctly to maintain optimal performance.