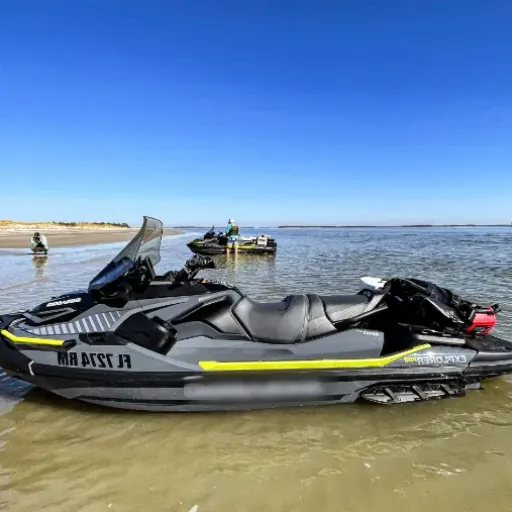
A jet ski is a fun device for water adventures; however, very little dampens your plan more than a jet ski that refuses to start. Mechanical or electrical issues cause immense frustration and puzzlement to both seasoned riders and novice watercraft users. Knowing what usually causes a jet ski not to start will help in diagnosis and make the repairs so that you waste less time and get back in the water quicker. This article examines some of the most common causes, ranging from battery issues to fuel system problems, and provides solutions to help you save time, prevent expensive repairs, and enjoy worry-free rides. Continue reading to discover how to become a professional at troubleshooting and resolving these issues.
Understanding the Common Issues with Jet Skis

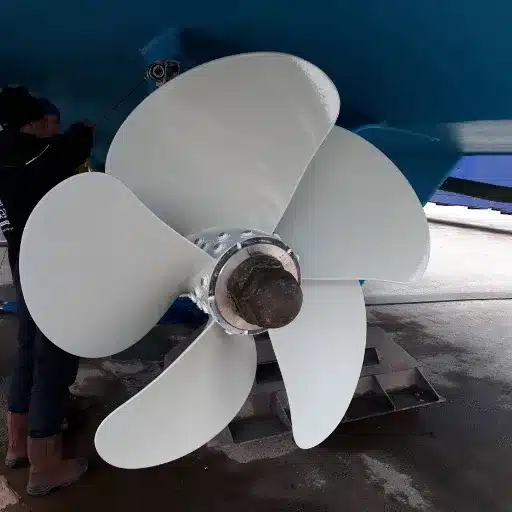
Identifying Starter Issues
Starter troubles are widespread among jet ski owners and may often be due to electrical or mechanical factors. Low or discharged batteries are among the more common faults, considering that jet skis require a strong battery charge to start the engine. Check the battery voltage using a multimeter; if it shows a low voltage, the battery is too weak to energize the starter motor. Corrosion or loose battery terminals can also be problematic, causing an interruption in the flow of electricity through the wiring. Maintaining the terminals clean and tightly connected is an easy way to keep on the right track.
The starter motor itself is also another component that could have worn out over time. Clicking from within while starting could indicate a faulty solenoid or a damaged starter motor. It is thus necessary to check these components before attempting to fix the issue through replacements. Other problems may lie within the ignition switch or wiring, with topics such as frayed cables or disconnected wiring preventing the proper engagement of the starter system. When maintained and inspected regularly, these problems can be identified early on, helping you avoid an untimely breakdown and the high cost of repairs.
Fuel System Failures: Fuel Pump and Fuel Line Problems
The fuel system is necessary to deliver the correct amount of fuel to the engine for combustion, and any obstructions can significantly impact a vehicle’s performance. One of the most common problems in the system is the failure of fuel pumps, resulting in trouble starting, pinging on idle, or outright stalling while in operation. These could be due to wear and tear or contamination within the pump, or supply voltage troubles.
On the other hand, damage to fuel lines, such as the interruption of fuel flow, can be caused by cracks, leaks, or clogs. Leaks cause inefficiency and are extremely dangerous since the fuel is flammable. Diagnosing these faults requires thorough inspection of the fuel lines for visible evidence of damage and pressure tests to find any blockages or weak points within the system.
Industry Insight: According to recent industry data, maintaining good health for the fuel system is of utmost importance in achieving the desired fuel efficiency and emissions levels. Better filters and higher-quality fuel should be accompanied by regular inspections and preventive measures to prevent premature failure of these systems. The more attention is paid to these components, the smoother the engine will run, and it will improve reliability while preventing costly repairs later on.
Electrical Failures: Fuses and Battery Checks
Car electrical failures often arise from a failure of fuses and batteries, two essential parts in the electrical system. Fuses are protective devices designed to safeguard sensitive equipment in the event of excessive electrical current. Fuses, however, tend to blow away over time due to wear and tear or a surge in power. It is essential to regularly inspect these fuses and replace those that have blown to avoid interruptions in essential systems, such as lighting, wipers, and climate controls. Experts suggest keeping an extra set of fuses in the vehicle and referring to the owner’s manual to locate the fuse and determine its specifications for immediate repairs.
Automobile batteries serve as the power source for the electrical system, supplying energy for ignition, lighting, and various accessories. Dim headlights, slow engine cranking, or dashboard warnings often indicate a dying battery. Car batteries have a lifespan of 3 to 5 years, but this period can be shortened under extreme weather conditions, frequent short trips, and poor maintenance. To maintain the battery, look for signs of corrosion on the terminals and cables, ensure it is securely mounted in place, and periodically perform a voltage test using a multimeter. In modern vehicles equipped with advanced electronics, a high-quality battery charger or maintainer can significantly extend the battery’s lifespan.
Pro Tip: Thanks to improved diagnostic and maintenance tools, vehicle electrical health can be monitored with greater precision. Battery analyzers, OBD-II scanners, and other tools help pinpoint failing components early, allowing unexpected breakdowns to be stopped in their tracks. Good fuse and battery hygiene means increased reliability, providing an ample safety margin for critical situations, such as nighttime driving or adverse weather conditions. Regular inspections and replacement will save an owner from expensive repairs and keep a vehicle’s electrical system performing at its peak.
Diagnosing Your Jet Ski’s Starting Problems
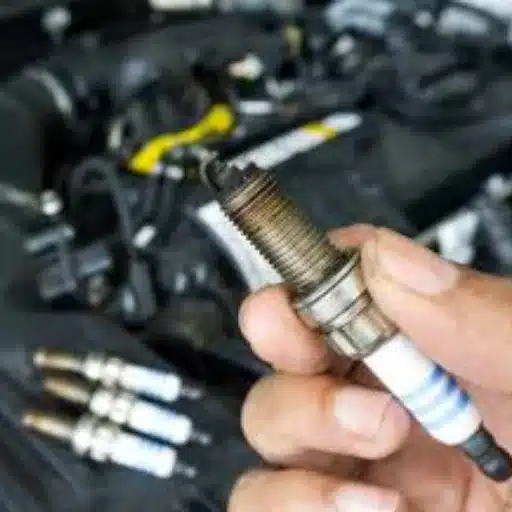
Checking the Spark Plugs
Step-by-Step Process:
- Remove the spark plugs from the engine with a socket wrench
- Inspect the plugs for symptoms of damage, such as snapped porcelain, burned electrodes, or carbon build-up
- Check the spark plug gap using a spark plug gap tool to verify it meets manufacturer specifications
- Examine plug color: light tan or grayish is normal, black soot means running too rich, white deposits indicate lean conditions
- Replace if there are any signs of wear or fouling
Spark plugs are essential for starting a jet ski, as they ignite the mixture of air and fuel inside the engine. In starting problems, frayed or fouled spark plugs are often the cause. Keep your spark plugs clean or changed for better starting, as well as optimal engine performance and fuel economy.
Checking the Crank Mechanism
One crucial aspect of the crank mechanism is that it converts the reciprocating motion of the pistons into rotational motion, which is, in turn, used to drive the jet ski’s propulsion. After that, the crank mechanism should be thoroughly examined for any signs of wear, damage, or corrosion. Careful observation of the crankshaft, connecting rods, and bearings is necessary since these parts are heavily stressed during use. Any unusual noises, such as knocking, grinding, or squealing, may be a sign of a severe problem that requires immediate attention. Keeping the mechanism well-lubricated and free of debris can reduce the wear, thereby enhancing the life of your jet ski engine.
Critical Check Points: For the other key criteria considered in evaluating the crank mechanism, checks for proper alignment and torque are essential. Any misalignments or loose parts can dissipate power, create vibrations, and potentially lead to engine failure. Check the torque of all bolts and fasteners using a torque wrench and ensure they are within the manufacturer’s specifications. Also, check the balance and straightness of the crankshaft as an imbalance may cause wild engine behavior and wear on other parts attached to it. Having these corrected will protect the performance of the jet ski and also make future repairs less costly.
Evaluation of the Work of New-Starters
Any set of starters essentially serves the function of allowing the engine to operate with jet skis. The starter must provide sufficient torque to initiate the engine’s combustion process, thereby ensuring smooth engine performance and reliable starting every time. If a starter is underperforming or failing, it can lead to poor engine operation, increased wear and tear on control parts, and a loss of operational time if the work is time-bound or recreational.
Maintaining the starter system in good working condition requires regular inspection. In this evaluation, look out for any signs of wear on the starter motor, such as worn coils, corroded terminal points, and unusual noise when the motor is running. Additionally, verify that the solenoid is appropriately engaging with the engine’s flywheel. Modern electric starters are well-designed and are supposed to last; however, they are susceptible to environmental conditions such as water intrusion and heat.
If you maintain prompt attention to matters related to these elements, you can ensure the starter system of the jet ski meets its performance criteria; thus, the lifespan of the system is extended, and on-water interruptions are avoided unnecessarily.
Preventive Maintenance for Jet Ski Owners

Regular Inspection of Fuel Systems
The maintenance of your jet ski’s fuel system is one of those essential tasks for consistent performance and the machine’s lifespan. Checking the fuel system lines for any cracks, signs of wear, or leaks should be the first action; damaged lines, whether due to cracks or wear, can reduce fuel efficiency and create potential hazards. Further check that any crimps, as well as connections, remain tight throughout operation. Always remember to inspect your fuel filter for any possible blockages or debris, as a clogged filter can restrict fuel flow and impair engine performance.
Secondly, it is essential to check the fuel status. Old or contaminated fuel can cause serious engine problems, including reduced power and increased wear on components. Using a fuel stabilizer helps preserve the quality of the fuel, especially when stored for an extended period. Occasional cleaning of the carburetors will prevent gum or varnish from building up, ensuring proper fuel delivery to jet skis. If such inspections are made routine, both fuel consumption can be improved and unexpected downtime can be avoided.
Battery Care and Maintenance Tips
Essential Battery Maintenance Checklist:
- Inspect battery terminals for corrosion regularly
- Clean terminals with baking soda and water mixture
- Apply terminal grease to prevent further corrosion
- Check battery voltage with multimeter (12.6-12.8 volts when fully charged)
- Detach battery during extended storage periods
- Store in cool, dry location
- Use battery maintainer or trickle charger during storage
With proper care, a battery will achieve longevity and predictable performance for your personal watercraft. Furthermore, your battery must be securely placed inside its compartment to prevent vibrations from damaging its internal components. By applying these maintenance procedures, you can prolong the battery’s life expectancy and reduce the likelihood of power-related issues while out on the water.
When and How to Replace Spark Plugs
| Spark Plug Type | Replacement Interval | Expected Lifespan |
|---|---|---|
| Standard Copper | Every 20,000-30,000 miles | Shorter lifespan, more frequent replacement |
| Platinum | Every 60,000 miles | Extended performance |
| Iridium | Up to 100,000 miles | Longest lasting, premium option |
Warning Signs for Replacement:
- Difficulty starting engine
- Rough engine idling
- Decrease in fuel economy
- Occasional misfiring
- Carbon deposits or oil fouling
- Electrode erosion
Installation Process:
- Ensure the engine is cool and check the owner’s manual for gap-size specifications and proper plug type
- Place the socket wrench on the spark plug socket and carefully proceed to remove each of the old plugs
- Clean any dirt away from the plug area before starting to prevent contamination
- After inspection and gapping of the new spark plugs, screw them in by hand to avoid cross-threading
- Tighten with the wrench to the torque spec given by the manufacturer
By replacing spark plugs on a regular schedule and ensuring they are correctly installed, smooth engine operation will be maintained, along with higher fuel efficiency and a longer lifespan for the car’s engine.
Special Considerations for Sea-Doo Models
Common Problems Associated with the Sea-Doo GTI
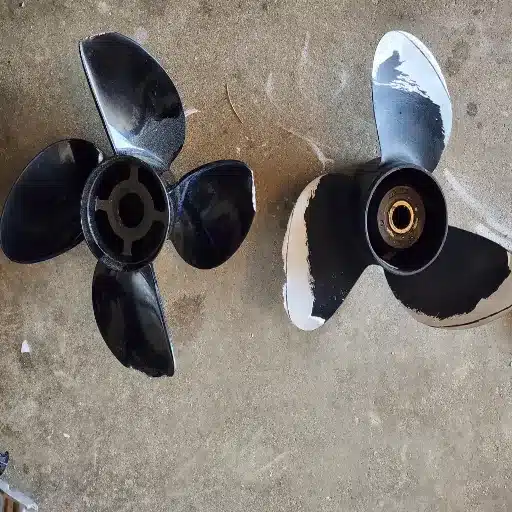
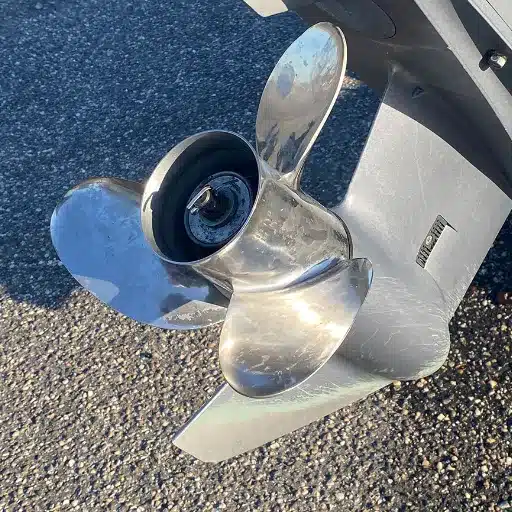
Jet Pump Issues
Wear and tear on jet pump components, specifically the impeller and wear ring. These parts are critical for propulsion, and deterioration will result in loss of performance, foul noises, or cavitation leading to loss of thrust.
Electrical Problems
Starting system-related problems and faulty battery connections. Loose battery terminals, corrosion, starter relay malfunctions can prevent the engine from starting at all.
Cooling System Issues
Overheating caused by clogging of the cooling system with debris or faulty thermostat. Salt or debris may accumulate, requiring regular monitoring and flushing after saltwater outings.
Fuel System Problems
Clogged fuel injectors and deteriorated fuel lines are threats to engine performance. Prevention includes using clean, high-quality fuel and periodic fuel system checks.
Although it is a dependable watercraft, Sea-Doo GTI owners face maintenance issues over time. Proper maintenance and addressing these issues promptly guarantees excellent long-term performance, making the Sea-Doo GTI fun to take out on the water.
Specific Maintenance Tips for Sea-Doo Owners
Jet Pump Maintenance
Always check the jet pump for any debris or damage and maintain it for high performance. Remove seaweed, plastic, or other debris stuck inside the pump. Inspect the impeller for signs of wear, as worn impellers reduce propulsion and fuel efficiency.
Cooling System Flush
After every use and especially after using in salt water, flush the cooling system to purify salt, sand, and other particles that may corrode internal components. Use fresh water and follow flushing hose instructions.
Spark Plug Inspection
Assess spark plugs for signs of wear, carbon buildup, or discoloration. Replace worn spark plugs to prevent misfiring, increase fuel efficiency, and permit smooth operation. Consider taking extras for long trips.
Battery Health Monitoring
Check for corrosion at battery terminals and ensure tight connections. Maintain battery life during inactivity with a trickle charger and avoid sudden discharges to prevent startup failures.
Hull Protection
Wash the hull with fresh water and mild soap after every use to remove dirt, salt, and grime. Apply wax periodically to protect against UV damage and maintain glossy appearance. Repair any hull damage promptly.
Wear Ring Replacement
The wear ring maintains proper seal between impeller and jet pump for efficient propulsion. Inspect regularly and replace if experiencing decreased acceleration or unusual vibration during operation.
Oil Changes & Filters
Perform regular oil changes using manufacturer-recommended oil type and grade. Change oil filter with each oil change to remove contaminants and improve engine performance for longer engine life.
Proper Storage
Use high-quality, weatherproof cover when not in use. Store in dry, calm environment as prolonged exposure to sunlight, rain, or humidity can cause damage. Proper storage maintains watercraft condition.
Result: By following these detailed maintenance procedures, Sea-Doo GTI owners can increase the lifespan of their watercraft, enjoy safer rides, and optimize performance on the water. Proactive measures will help preserve the reliability and value of your investment.
Understanding Sea-Doo’s Unique Electrical Systems
Sea-Doo watercrafts come with highly advanced electrical systems to improve performance, safety, and utility. The system’s centralization occurs within an “Intelligent Control Module” (or iControl for short), which is essentially the brain of the vehicle. Under this system, the throttle control, braking system, and onboard diagnostics work together seamlessly for a smooth and intuitive riding experience.
Intelligent Control Module (iControl)
Acts as the central brain coordinating throttle control, braking system, and onboard diagnostics for seamless, intuitive riding experience.
Engine Management System (EMS)
Communicates with Rotax engine to optimize fuel efficiency, ensure peak performance, and identify potential issues early for minimal downtime.
Intelligent Brake & Reverse
Electronic mechanism allowing precise stopping even in tight spaces, enhancing safety and maneuverability on the water.
Digital Display System
Provides real-time information including speed, fuel levels, and maintenance reminders, enabling users to monitor key watercraft parameters.
Sea-Doo electrical systems feature high-quality, water-resistant connectors and wiring to withstand the harsh marine environment. These components, therefore, must be inspected regularly to maintain optimal performance. By understanding and maintaining these special systems, owners will be able to maximize the reliability and high-performance features of their Sea-Doo watercraft, at least reducing unexpected incidents on the water.
Emerging Trends in Jet Ski Maintenance for 2025

Innovative Technologies in Jet Ski Repairs
AI-Powered Diagnostics
AI systems analyze onboard sensor data to diagnose engine problems, electrical faults, or performance inefficiencies rapidly. This saves time and provides precise problem identification rather than relying on trial and error methods.
Augmented Reality Repairs
AR-guided repair tools superimpose digital instructions or 3D renderings over jet ski components, providing step-by-step guidance. This simplifies complex repairs, ensures accuracy, and reduces human error.
3D Printing Solutions
3D printing reshapes part replacement by enabling quick, efficient production of specific components on-demand. This significantly reduces wait times and allows for modifications or upgrades based on specific needs.
Jet ski repair technologies are changing the way we approach maintenance and ensure optimal performance. With more knowledge-based technologies, owners can minimize repairs, improve the jet ski’s lifespan, and keep it water-ready for an extended period.
Data-Driven Approaches to Preventive Maintenance
Basing preventive maintenance on data has dramatically changed the way owners care for their machines. Analytics tools and digital monitoring enable real-time performance measurement, and whenever signs of possible trouble appear, issues can be averted. Parameters such as wear and tear, operating temperatures, or usage patterns provide helpful insights that help schedule work effectively. Instead of guessing or relying on time tables, owners can use data to forecast possible service or replacement of components to avoid sudden failure.
IoT Integration Benefits:
- Real-time Monitoring: IoT sensors gather detailed data from critical system parts
- Early Warning System: Quick alerts for abnormal conditions like vibration spikes or efficiency drops
- Proactive Maintenance: Immediate action capability for investigation and problem resolution
- Cost Reduction: Saves time, prolongs machine life, and reduces larger repair costs
- Planned Downtime: Schedule maintenance during convenient periods rather than emergency situations
Having such a data-driven approach provides peace of mind, as maintenance can be accurately planned during periods of downtime rather than facing disruptions during the most critical moments. These high-tech solutions have significantly contributed to smooth operation, improved performance, and increased confidence in reliability.
Case Studies: Restoring a Jet Ski Successfully
Case Study 1: 10-Year Abandoned Jet Ski
Challenge: Jet ski left exposed for over ten years with engine beyond repair, weathered hull, and completely corroded electrical system.
Approach: Systematic, data-driven restoration prioritizing engine work first. Replaced worn-out parts, optimized engine performance, and maintained factory specifications. Advanced materials were used for body restoration to repair scratches, chips, and faded coatings.
Result: Using innovative tools and techniques, a near-certain throwaway was transformed into a fully functional, high-performance jet ski that looked as good as new.
Case Study 2: Vintage Modernization Project
Challenge: Client wanted to modernize vintage jet ski without compromising classic appearance, balancing restoration of original charm with modern performance and safety needs.
Approach: Upgraded propulsion system for better performance, modernized electronics, and enhanced water stability while preserving timeless aesthetic appeal.
Result: Delivered a jet ski providing thrilling rides while turning heads on the water, successfully combining analytical precision with innovative problem-solving for exceptional results exceeding expectations.
Key Insight: These projects demonstrate that technical skills alone are insufficient for successful restoration; one must also have vision for the equipment. Each project allows experimentation with innovative approaches and skill development, pushing limits to achieve both functional and spectacular results.
Reference Sources
-
10 Most Common Jet Ski Problems and How to Fix Them – Bert’s Mega Mall
Discusses common issues like weak batteries and fuel system problems, along with practical fixes. -
Help! Jetski not starting – Reddit Jetski Community
Offers community-driven troubleshooting tips, including fuel selector and line issues. -
Common Jet Ski Issues and How to Fix Them – WaveTech Powersports
Covers problems like loose battery cables and engine misfires, with actionable solutions. - Find more info now.
Frequently Asked Questions (FAQs)
What should I check if my jet ski won’t start?
The first thing to test when the jet ski won’t start is the battery. The battery connections must be clean and secure. If they are loose or corroded, then the engine will not crank. If the battery is new and there still isn’t a start, one may want to check the battery’s voltage to ensure it actually has enough power. Also, check the kill switch to make sure it is in the ‘on’ position. Verify that the starter feels right and that the start button is functioning properly. If all are in good shape, then perhaps look at the fuel pump.
How do I know if the spark plug has to be changed?
Starting difficulties can be due to several reasons, but most commonly, it is the spark plug. Remove them for inspection, checking for wear or some deposits. They require replacement if found dirty and worn. A new spark plug can ensure better ignition, resulting in a smooth engine start. Additionally, excessive carbon deposits can sometimes indicate a serious problem within the engine itself. This is where regular maintenance comes in, and one such maintenance is changing the spark plugs to prevent such issues.
What causes my Sea-Doo GTI engine not to turn over?
This is a rarely explored question, and the first idea is: “Why would my jet ski engine not turn over?” It may be as simple as a battery issue-a weak battery or, worse, a dead battery. Check the battery voltage to ensure it is fully charged. If it’s new, however, it might be a defective battery or bad connections. Additionally, inspect the starter and the electrical connections leading to it. If all appears to be in order and yet the engine still won’t crank, you may have more extensive electrical problems that require diagnosis and repair by a qualified Sea-Doo professional.
What could prevent my jet ski from starting after winter storage?
From preventing kicking after winter storage, various things are at play in the fuel line. First, blockages may be present in the fuel line, or the fuel might be stale; the stale fuel itself can prevent the jet ski from starting. Check the battery terminals and test the battery; it may have become discharged during the winter months. Additionally, when the engine has been exposed to immense volumes of water, this can hinder performance. Ensure the spark plugs are clean and not fouled. If the kill switch is on, it will also prevent the vehicle from starting.
What are the signs of a bad battery in my jet ski?
Signs of a bad battery in your jetski include dimming lights, an inability to crank the engine, or a battery that won’t hold a charge. If you press the start button and hear a clicking sound but the engine doesn’t turn over, it could indicate a weak battery. Check the battery terminals for corrosion, which can also affect performance. If the battery voltage is low, consider charging the battery or replacing it altogether. A working battery is crucial for ensuring your jet ski starts smoothly.
Can electrical issues affect my Sea-Doo’s starting ability?
Electrical problems can significantly impact the starting capabilities of your Sea-Doo. Corroded battery terminal connections or a bad starter solenoid could prevent the engine from cranking. An improperly engaged or defective kill switch will also prevent the engine from starting. Thus, troubleshooting becomes crucial when an electrical system issue accompanies starting problems. Verify all the connections while testing the battery, and perhaps check the fuses for any that may have gone bad. Fixing these electrical issues is crucial if one wants to take the Sea-Doo out on the water.