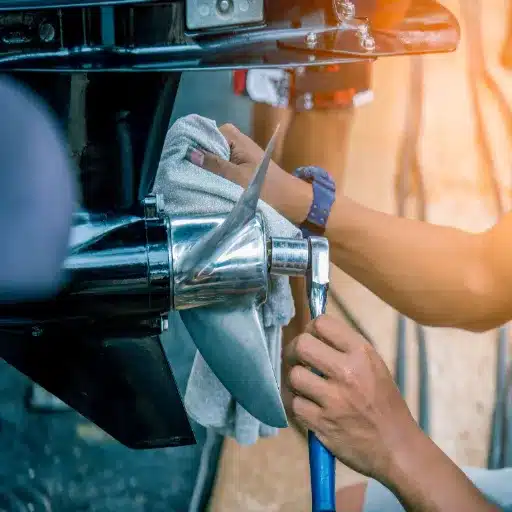
The foundation of proper propeller maintenance is a simple routine: inspect visually before every outing, rinse with freshwater after saltwater use, remove and grease the shaft monthly, deep clean seasonally, and assess professionally once a year. Follow this schedule, and you will prevent most propeller problems before they cost you fuel, speed, or engine life.
Here is the problem. Most boaters treat their propeller like a set-it-and-forget-it part. They check the oil, flush the engine, and inspect the hull — then ignore the one component that directly converts horsepower into motion. A neglected propeller does not just perform poorly. It vibrates, corrodes, and quietly destroys bearings and seals while you are wondering why your fuel bill jumped 15%.
At Captain Marine, we have seen every propeller failure pattern there is. The good news is that most are preventable. This guide gives you a complete maintenance system — inspection, cleaning, corrosion prevention, shaft care, minor repairs, and a clear repair-vs-replace framework — so your prop performs like new season after season. For help choosing the right prop in the first place, see our Boat Propeller Selection Guide.
Key Takeaways
- Inspect your propeller before and after every outing; a 30-second visual check catches most problems early.
- Rinse with freshwater after saltwater use; salt residue starts corrosion within hours.
- Remove the prop monthly to inspect the shaft for fishing line, grease the splines, and check for hub slippage.
- Deep clean and file minor burrs seasonally; aggressive grinding does more harm than good.
- Sacrificial anodes should be replaced when roughly 50% eroded; painting them destroys their protective function.
- A dirty or damaged propeller can cost you 5-15% in fuel efficiency and accelerate engine wear through vibration.
- Stainless steel props are usually worth repairing; aluminum props are often cheaper to replace when heavily damaged.
How Often Should You Maintain Your Propeller?
Propeller maintenance is not one task. It is a schedule of tasks at different frequencies. Match the frequency to your use case, and you will never be caught off guard.
Before and After Every Outing
A 30-second visual inspection before you launch and after you retrieve is the single highest-ROI maintenance habit you can form. Look for new nicks, bent blades, fishing line wrapped around the shaft, and anything that looks different from last time. If something changed, investigate before you run the engine.
After saltwater use, rinse the propeller and lower unit with freshwater. Salt residue does not just look bad — it starts electrolytic corrosion within hours, especially on aluminum props and steel shafts.
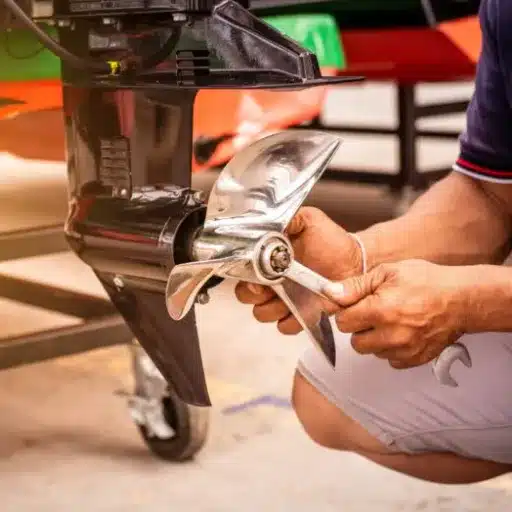
Monthly (or Every 20-30 Hours)
Remove the propeller. Inspect the shaft splines for fishing line, corrosion, or scoring. Apply fresh marine grease. Spin the prop by hand to feel for binding or roughness. Check the hub for slippage using the mark test described in the inspection section below.
This takes 10 minutes. It prevents the two most common causes of propeller-related engine damage: fishing line cutting shaft seals, and a spun hub dumping metal fragments into your gearcase.
Seasonally (Spring and Fall)
Deep clean the propeller blades and hub. Remove marine growth with a plastic scraper or stiff brush — never a wire brush on aluminum. File minor burrs with a fine metal file. Inspect and replace sacrificial anodes. Touch up paint on the lower unit. Polish stainless props with a marine-safe compound.
Annually
Have a professional propeller shop inspect the prop for balance, pitch accuracy, and structural integrity. If you run in saltwater or log high hours, consider this a hard requirement, not a suggestion.
| Frequency | Task | Time Required |
|---|---|---|
| Before/after every outing | Visual inspection, freshwater rinse | 1-2 minutes |
| Monthly | Remove prop, inspect shaft, grease, hub check | 10 minutes |
| Seasonally | Deep clean, file burrs, replace anodes, touch-up paint | 45-60 minutes |
| Annually | Professional inspection, balance, and pitch verification | 1-2 hours (shop time) |
The Complete Propeller Inspection Checklist
A thorough inspection uses four methods: look, feel, spin, and mark. Each catches different problems.
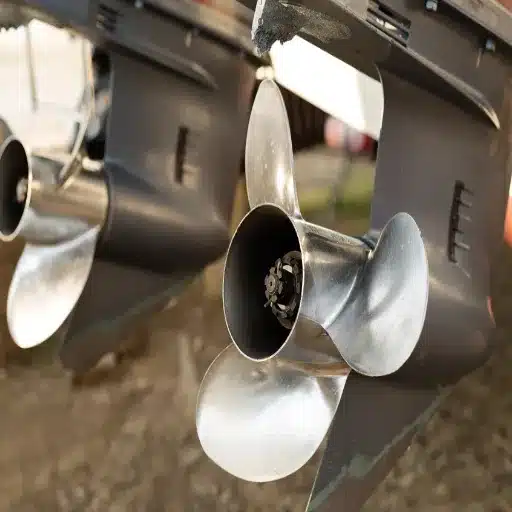
Visual Inspection
Look at the blades from multiple angles. Check for:
- Nicks and chips on the leading edges and blade tips — these cause vibration and cavitation
- Bent blades — even a slight bend throws the prop out of balance
- Cracks — any crack is a replace-now situation; cracked blades can fail catastrophically
- Pitting or corrosion — small pits grow into larger ones; aluminum props are especially vulnerable
- Cavitation burns — rough, eroded patches on the blade face where bubbles collapsed
When Marcus pulled his center console for the season, he noticed a hairline crack running from the blade tip toward the hub on his stainless prop. He almost ignored it — the prop still “worked fine.” But a cracked blade can fracture under load, sending a chunk of metal through the lower unit. He replaced it, and the old prop went to a repair shop for welding assessment. The 400 replacement was expensive. A destroyed gear case would have required 400 expensive replacement parts. A destroyed gear case would have been 3,000.
The Feel Test
Run your fingers gently along the blade edges and face. You are feeling for:
- Burrs — rough, raised metal from impacts with sand, gravel, or debris
- Rough patches — corrosion or cavitation damage that you might not see
- Edge sharpness — a properly maintained prop has clean, consistent edges
Wear gloves. Props are sharp, and corrosion can hide beneath what looks like discoloration.
The Spin Test
With the engine in neutral and ignition off, spin the propeller by hand. It should turn smoothly without wobbles, binding, or clicking. A wobble suggests a bent blade or bent shaft. Binding or clicking can indicate bearing wear in the lower unit or a damaged hub.
The Hub Mark Test
Use a permanent marker to draw a straight line across the inner hub and outer hub. Run the boat under normal load. Check the line afterward. If the marks no longer align, your hub is slipping. A spun hub means the prop is not transferring full power to the water — and it is only a matter of time before it fails.
Shaft and Seal Inspection
When you remove the prop, inspect the shaft itself. Look for:
- Fishing line wrapped around the shaft — this is the silent killer of lower units; the line cuts the seal and lets water into the gearcase
- Scoring or galling on the splines — damaged splines mean the prop is not seated correctly
- Seal condition — if the seal behind the prop looks dry, cracked, or contaminated, have it inspected professionally
Cleaning Your Propeller: Step by Step
A clean propeller performs better, lasts longer, and resists corrosion. But cleaning it the wrong way can do more harm than good.
The Freshwater Rinse
After every saltwater outing, attach a hose or use a bucket to rinse the propeller, shaft, and lower unit with freshwater. Pay attention to the area between the prop hub and the gearcase — salt loves to hide there. This 60-second step prevents 80% of saltwater corrosion issues.
Removing Marine Growth
Barnacles, algae, and slime add drag and throw off blade balance. Remove them with:
- A plastic scraper or wooden paint stirrer for most growth
- A stiff nylon brush for stubborn patches
- Marine-safe cleaning solution for heavy buildup
Never use a wire brush or power sander on an aluminum prop. You will remove metal and change the blade geometry. Stainless props can handle slightly more aggressive cleaning, but “little and often” still beats “aggressive and rare.”
Deep Cleaning and Polishing
For seasonal deep cleaning:
- Remove the propeller completely
- Soak in a bucket of freshwater and mild marine detergent for 15 minutes
- Scrub with a non-abrasive pad
- Rinse thoroughly
- For stainless props: apply marine polish and buff to a smooth finish
- For aluminum props, apply a light coat of marine wax for protection
Waxing and Protective Coating
A thin coat of marine wax on the blades creates a barrier against salt, oxidation, and marine growth. Reapply every month in saltwater environments, every season in freshwater. For props that sit in the water for extended periods, consider a propeller-specific anti-fouling coating applied by a professional.
Corrosion Prevention: Protecting Your Investment
Corrosion is the leading cause of premature propeller failure in saltwater environments. Understanding how to prevent it saves you hundreds of dollars and countless hours of frustration.
Sacrificial Anodes
Sacrificial anodes (zincs for saltwater, magnesium for freshwater) are your propeller’s bodyguards. They corrode intentionally so your propeller, shaft, and lower unit do not.
Replace anodes when they are approximately 50% eroded. Waiting until they are completely gone means your propeller is absorbing the corrosion instead. Never paint anodes — they must be in direct electrical contact with the water to work.
If your anodes show no wear at all, that is actually a warning sign. It may mean they are not making proper contact, or worse, that stray electrical current is bypassing them and attacking other metal components.
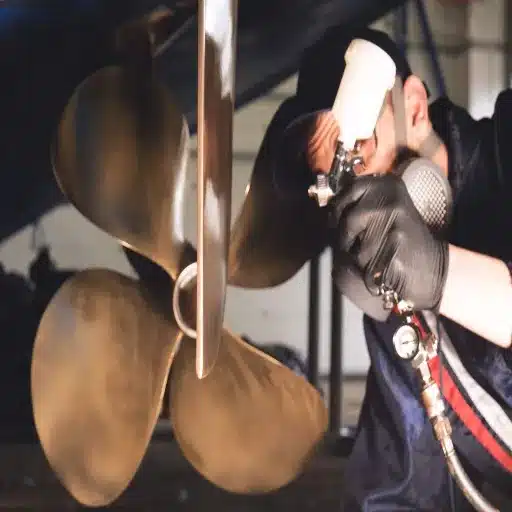
Protective Coatings and Sprays
Apply a marine corrosion guard spray (such as Yamashield or Mercury Corrosion Guard) to the lower unit, shaft, and propeller after cleaning. Avoid spraying anodes, air intakes, or electrical connections. For aluminum lower units, touch up paint chips immediately with manufacturer-matched touch-up paint. Bare aluminum corrodes fast in saltwater.
Freshwater vs. Saltwater Considerations
Saltwater boaters need the full protocol: rinse after every outing, monthly prop removal and inspection, aggressive anode replacement, and seasonal deep cleaning.
Freshwater boaters can relax slightly but not completely. Sand, silt, and debris cause their own damage. Rinse after running in muddy water. Inspect monthly during heavy use. Replace anodes annually even if they look fine — freshwater anodes degrade differently than saltwater ones.
Material-Specific Corrosion Risks
Not all props corrode the same way. For a complete breakdown of how aluminum, stainless steel, and composite materials handle marine environments.
Aluminum pits easily in saltwater but is sacrificial by design — it protects the lower unit.
Stainless steel resists general corrosion but is vulnerable to crevice corrosion in tight spaces (like between the prop hub and thrust washer).
Bronze can suffer dezincification, where the zinc in the alloy leaches out, leaving a weak, porous blade. Look for a reddish-pink mottled appearance.
Shaft, Seal, and Hub Maintenance
The propeller is only one part of the system. The shaft, seal, and hub need attention, too.
Greasing the Propeller Shaft
Every time you remove the prop, clean the shaft splines with a rag and apply a thin coat of waterproof marine grease. This prevents corrosion, makes future removal easier, and ensures the prop seats are correctly installed. Use a high-quality marine grease such as Yamalube Marine Grease or Mercury 2-4-C.
Do not over-grease. Excess grease traps debris and can interfere with the hub’s friction fit.
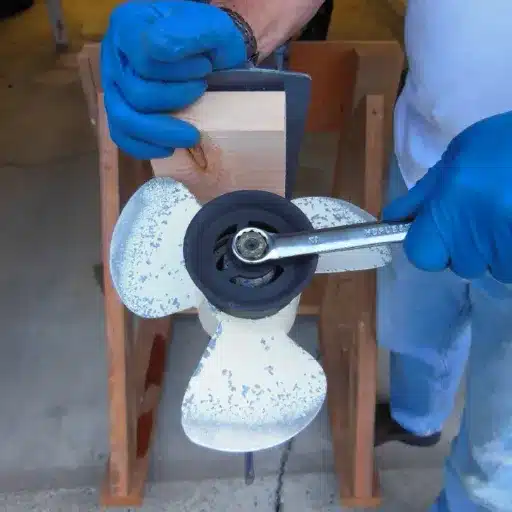
Torque Specs and Cotter Pins
When reinstalling the prop, torque the prop nut to the manufacturer’s specifications. Common ranges are 45-55 ft-lbs for many outboards, but always check your engine manual. Under-torqued props can loosen and damage splines. Over-torqued props are nearly impossible to remove later.
Always use a new cotter pin or lock washer. Reusing a cotter pin is like reusing a lock — it defeats the purpose. A $0.10 cotter pin prevents a $500 prop from spinning off at 5,000 RPM.
The Fishing Line Problem
Fishing line wrapped around the prop shaft is one of the most common and most destructive maintenance oversights. The line cuts into the rubber shaft seal behind the prop, allowing water to enter the gearcase. Water in the gearcase destroys bearings, gears, and seals.
The fix is simple: remove the prop monthly and check for line. If you find any, cut it away carefully and inspect the seal. If the seal is damaged, have the lower unit serviced before your next outing.
Hub Systems Explained
Different propellers use different hub systems:
- Rubber hub (pressed-in): Common on aluminum props. The rubber sleeve absorbs impact. If it spins, the prop is done.
- Flo-Torq hub (Mercury system): Uses a sacrificial Delrin sleeve that fails before the prop or gearcase. Carry a spare hub kit.
- Solid hub: Found on some performance props. No rubber to fail, but impacts transfer directly to the gearcase.
Know which system your prop uses and inspect accordingly. For step-by-step installation guidance for each hub type, see our propeller installation guide.
Minor Repairs You Can Do Yourself
Not every ding requires a trip to the prop shop. Some fixes are well within the ability of a careful boat owner.
Filing Burrs and Small Nicks
Use a fine metal file or mill bastard file to remove burrs and smooth small nicks on the blade edges. Work slowly and evenly. Your goal is to restore a smooth edge, not reshape the blade. A few rules:
- File in the direction of the blade’s natural contour
- Do not remove more metal than necessary
- Stop if you reach the point where the blade geometry is changing
- Balance your work — if you file one blade, check the others
Edge Touch-Ups
Very small chips (under 1/4 inch) on aluminum props can sometimes be smoothed with marine-grade epoxy. This is cosmetic and temporary — the prop still needs professional attention if the chip is on a leading edge or near the tip.
Propeller Polishing “Little and Often”
Stainless steel props benefit from regular light polishing. A smooth blade surface reduces drag and resists marine growth. The key is “little and often” — a quick polish with marine compound every month beats an aggressive grinding session once a year. Aggressive grinding removes metal, changes blade geometry, and can void manufacturer warranties.
What NOT to Attempt at Home
Do not try to straighten bent blades, weld cracks, or re-pitch a propeller yourself. These require specialized equipment and expertise. A DIY straightening attempt often makes the blade weaker and more likely to fail.
When to Repair vs. Replace: A Decision Framework
At some point, every propeller owner faces the repair-or-replace question. Here is how to decide.
The Repair Threshold
Damage that is usually repairable:
- Small nicks and burrs on blade edges
- Minor edge chips (under 1/2 inch) on stainless props
- Surface corrosion that has not penetrated deeply
- Slight imbalance (correctable by a prop shop)
The Replacement Threshold
Damage that usually requires replacement:
- Cracks anywhere on the blade or hub
- Bent blades (especially if bent more than a few degrees)
- Deep pitting or dezincification that has weakened the blade
- Severely spun hub on pressed-hub props
- Damage that would cost more than 60% of a new prop to repair
Cost Comparison
| Prop Type | New Cost | Typical Repair Cost | Replace If Repair Exceeds |
|---|---|---|---|
| Aluminum | $75-$250 | $30−$80 | $150 |
| Stainless Steel | $300−$700+ | $80−$250 | $420 |
| Composite | $150−$350 | Limited repair options | Usually replace |
When Sarah bought her runabout three seasons ago, she went with an aluminum prop to save money. After a season of gravel-bar encounters, the edges looked like saw blades. A shop quoted $65 to file and balance. A new prop was $120. She repaired it. Two seasons later, the same prop had developed deeper pitting. The second repair quote was $90. She replaced it. The math was simple: $155 in repairs on a $120 prop made no sense.
For stainless steel, the math usually favors repair. A $400 stainless prop with $100 in edge damage is absolutely worth fixing. A good prop shop can restore the blade shape, rebalance the prop, and return it to near-new performance.
Performance Impact Assessment
A damaged propeller does not just look bad. It costs you performance:
- Fuel efficiency: A fouled or damaged prop can increase fuel consumption by 5-15%
- Speed: Nicks and bends reduce thrust; you might lose 2-4 mph at WOT
- Acceleration: Blade damage increases slip, meaning slower hole shots
- Engine wear: Vibration from imbalance accelerates bearing and seal wear
If your prop is costing you 10% more in fuel every trip, a $400 replacement pays for itself in fuel savings within a season of regular use.
Seasonal Maintenance: Spring and Fall Protocols
Tying propeller maintenance to the boating season makes it easier to remember and ensures your prop is ready when you are.
Spring Commissioning Checklist
Before your first outing of the season:
- Remove the prop and inspect the shaft for corrosion or fishing line
- Grease the shaft splines
- Deep clean the propeller blades
- File any burrs that developed over winter
- Replace sacrificial anodes if more than 50% eroded
- Check the hub for slippage using the mark test
- Reinstall with a new cotter pin, torqued to spec
- Touch up the lower unit paint where needed
- Run a test outing and verify WOT RPM is within range
Fall/Winterization Checklist
Before storage:
- Remove the prop for a final deep clean
- Inspect thoroughly and address any damage before storage
- Apply a protective coat of wax or corrosion guard
- Grease the shaft and reinstall loosely (do not torque fully if storing for months)
- Store the prop in a dry place, ideally hanging or on a rack — not flat on concrete
Cold Climate Considerations
In freezing climates, water trapped in the prop hub or between the prop and gearcase can freeze and expand, cracking the hub or damaging seals. Remove the prop for winter storage in regions where temperatures drop below freezing.
How Maintenance Affects Performance
Understanding the performance impact of propeller maintenance helps justify the time investment.
Fuel Efficiency Impact
A propeller with damaged blades, marine growth, or improper pitch forces the engine to work harder for the same speed. The result is higher fuel consumption. Industry estimates suggest a fouled or damaged prop can increase fuel burn by 5-15%, depending on the severity. For a boater who burns 20 gallons per weekend, that is an extra 1-3 gallons every trip — or 20-60 gallons over a 20-trip season.
Speed and Acceleration Impact
Blade damage increases slip — the percentage of power that is lost instead of converted to thrust. A well-maintained prop typically operates at 10-15% slip. A damaged or fouled prop can see slip rise to 20-30%. That means less speed at WOT and slower acceleration onto the plane.
Engine Longevity Impact
Vibration is the enemy of engine components. A bent or unbalanced prop creates vibration that accelerates wear on bearings, seals, and gearcase components. The repair costs cascade: first the prop, then the bearings, then the gearcase. Preventing vibration through proper maintenance is far cheaper than rebuilding a lower unit.
Captain Marine’s CFD-optimized propellers are designed to maintain their performance profile over time — but only if they are maintained. Our corrosion-resistant coatings and precision-engineered blade geometry give you a head start. Proper maintenance keeps that advantage intact.
Frequently Asked Questions
How often should a propeller be maintained?
Inspect visually before and after every outing. Rinse after saltwater use. Remove and inspect the shaft monthly. Deep clean seasonally. Have a professional assessment annually.
What are the signs of propeller damage?
Vibration, reduced top speed, poor acceleration, unusual noise, visible nicks or cracks, and over-revving or lugging at WOT.
Can a damaged propeller be repaired?
Yes, if the damage is limited to small nicks, burrs, or edge chips. Cracks, bent blades, and serious structural damage usually require replacement. Stainless steel props are more often repairable than aluminum props.
How do I prevent propeller corrosion?
Rinse with freshwater after saltwater use. Maintain sacrificial anodes. Apply protective coatings. Store properly in the off-season. Choose corrosion-resistant materials for your boating environment.
Why is my propeller vibrating?
The most common causes are bent blades, blade imbalance, a spun hub, or debris caught between the prop and gearcase. Start with a visual inspection and the spin test described in this guide.
Is propeller polishing necessary?
For stainless steel props, yes. Regular light polishing reduces drag and resists marine growth. For aluminum props, waxing is usually sufficient. Aggressive polishing of aluminum removes protective coatings and speeds corrosion.
What tools do I need for propeller maintenance?
A propeller wrench or socket, a block of wood to prevent rotation, marine grease, a fine metal file, a stiff brush, marine detergent, and replacement cotter pins. A torque wrench is recommended for proper installation.
Should I carry a spare propeller?
Yes. A spare aluminum prop is cheap insurance. If you damage your primary prop on the water, you can swap it and keep your weekend intact. Include a prop wrench, spare nut, thrust washer, and cotter pins in your spare kit. If you use a Mercury Flo-Torq hub system, carry a replacement hub kit too.
At Captain Marine, our team offers free consultations to help you maintain your propeller and know when it is time for a replacement. Contact us, and we will walk through your maintenance routine together.
Conclusion
Boat propeller maintenance is not complicated, but it is specific. Inspect before every outing. Rinse after saltwater. Remove and grease monthly. Deep clean seasonally. Assess professionally once a year. Follow this rhythm and your propeller will deliver consistent performance, better fuel efficiency, and longer engine life.
The alternative is what we see in the shop every spring: props with cracked blades, spun hubs, and shafts corroded beyond salvage. Most of those failures started as small problems that could have been caught early.
Start with the schedule in this guide. Add the inspection checklist to your pre-launch routine. Track what you find. Over time, you will know your propeller’s condition as well as you know your engine’s oil level.
If you need a replacement propeller, repair advice, or expert help choosing the right prop for your setup, browse Captain Marine’s propeller catalog or reach out for a custom recommendation. We will make sure you spend more time on the water and less time in the shop.